Are you using MAXQDA TeamCloud? This function is already integrated into the TeamCloud workflow and is therefore not available while working with team projects.
Quite often, teamwork starts as follows: researchers work on the same data parallel to one another - each on their own project file on their own computer. One person only assigns selected codes to the data, for example, the other only processes selected documents. Both use already-existing codes and add new codes, create variables, and write new memos or summaries. In these cases, MAXQDA allows you to transfer the codes, coded segments, memos, paraphrases, summaries, and variables from one project file to another.
Of course, this teamwork presupposes that everyone is working with the same data. To make sure this is the case, it is best to import the existing data (e.g. documents, variables, interview notes as memos etc.) into a MAXQDA project file on one computer and then distribute the project file to all team members. Of course, it often makes sense to define already fixed categories as codes in the “Code System”.
Please note 2: It is not intended to transfer data from a MAXQDA 2022 project to a MAXQDA 2020 project using the procedures described on this page. If you work in a team, all team members should work with the same program version and first convert all projects from 2020 to 2022 on one computer. For more information on the compatibility of MAXQDA 2022 and 2020, please click here.
In principle, we are dealing with the following situation, where for the sake of simplicity in the example we are assuming that we are working with only two MAXQDA projects. The procedure is basically the same with three, four, or more files.
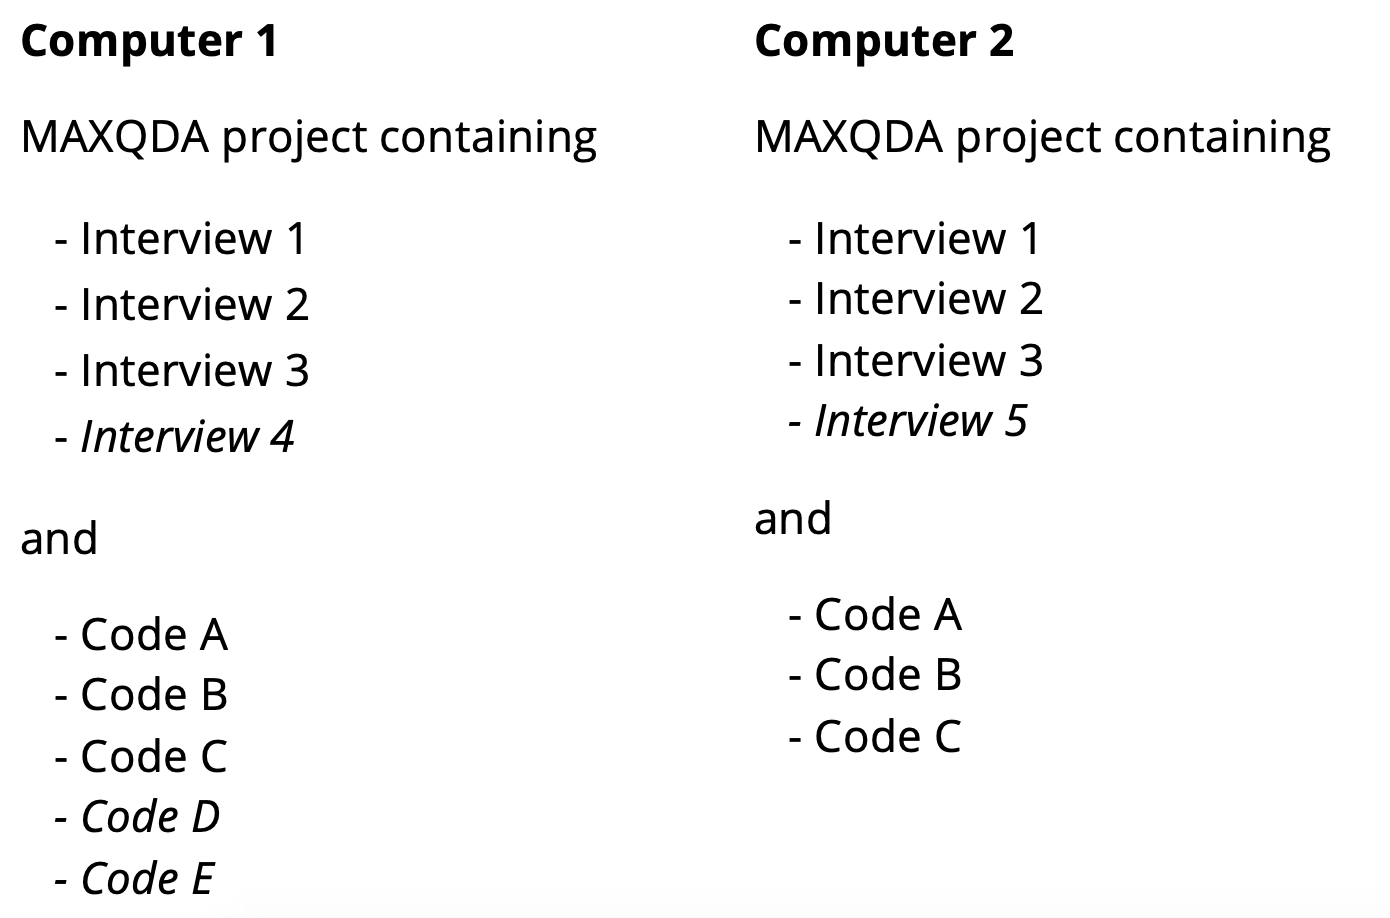
In the example, interview 4 is only available on computer 1, interview 5 only on computer 2. The set of documents does not have to be completely identical in the sense that all documents of one project must also be available in the other.
Neither does the code system have to be identical. Though, of course, in a research group you should make sure that the same category, i.e. the same code, always has the identical name and hasn't been given a different name by different team members.
How does the transfer process work?
Suppose colleague 1 works on computer 1 and has coded “Interview 1” and also added some memos. How can you now make the results of this work accessible to colleague 2 on computer 2, especially if colleague 1 on computer 1 redefined some codes during their work and colleague 2 also continued working on the project file separately?
This it how it works in MAXQDA: colleague 1 exports all the relevant information to be transferred from their project file into a MAXQDA exchange file with the extension “MEX22” and sends this file to colleague 2. Colleague 2 then imports that information into their own project file. The abbreviation MEX stands for MAXQDA EXchange format.

Teamwork export: saving data to an exchange file
To start the export process, select Teamwork > Teamwork Export: Export Data to Exchange File in the Home tab.

A dialog box will then appear in which you can select the following options a step at a time.
Select your codes and documents
First select the documents whose data you want to export. In the dialog box, you can select individual documents or all documents in a document group or document set at once. It is also possible to select the documents you activated before starting the export procedure.
After clicking on Next >> a dialog box for the code selection will appear. At the bottom, you will see how many codes are currently selected and how many coded segments occur in the previously selected documents.
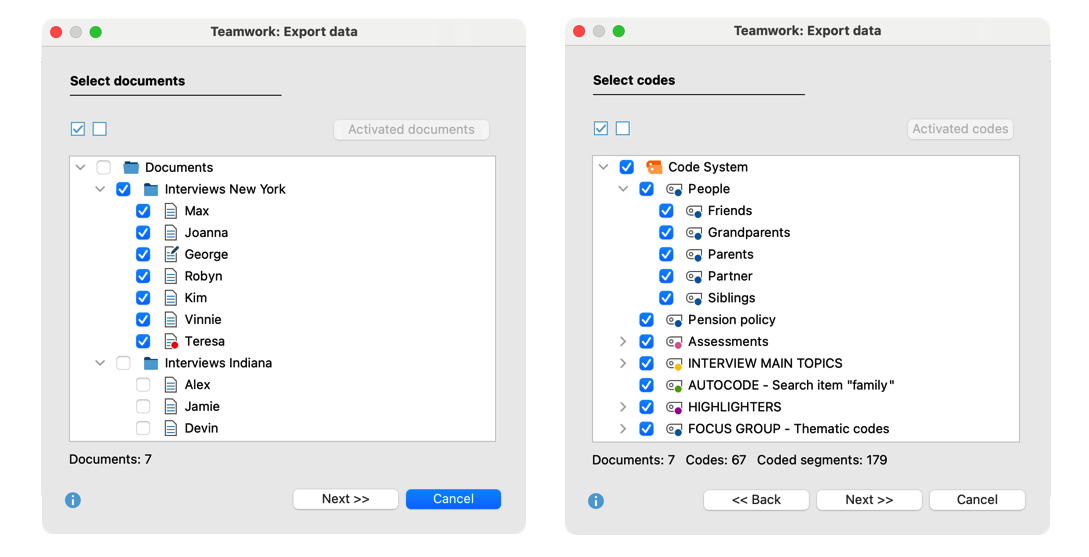
Assign a file name and select a storage location.
Clicking Next >> will assign a file name and select a storage location. MAXQDA will then export all the data (codes, code assignments, memos, variables, summaries, paraphrases etc.) of the selected documents into the export file.
Importing the exchange file into the target project
You can import the exchange file data into any MAXQDA project that contains the same document (in this example “Interview 1”).
Select Teamwork > Teamwork Import: Import Data from Exchange File in the Home tab. A dialog box will appear that guides you through the import process a step at a time:
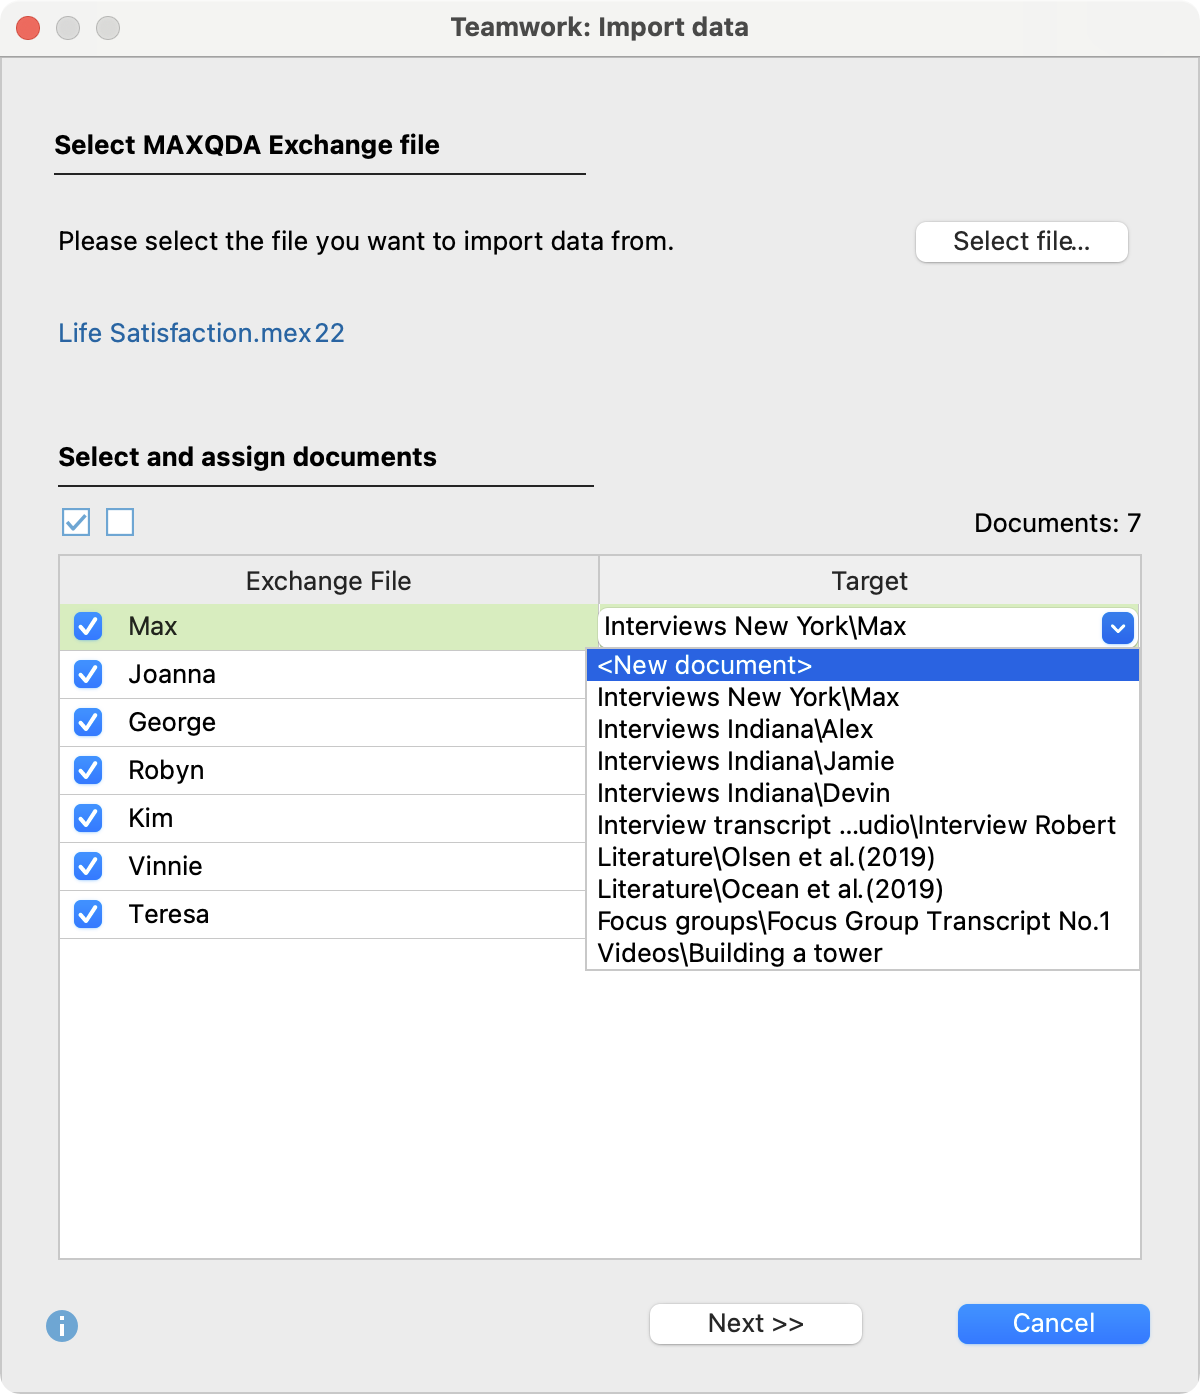
- First select a MEX file. MAXQDA will analyze the file and then display the following:

In this dialog box, you have to check the correspondence between the source and target documents. If the documents in the MAXQDA projects have the same name, all you have to do is double check the automatic allocations made by MAXQDA. Otherwise, you have to allocate each text to the appropriate matching text yourself. If the document does not yet exist in the project, you can select theoption to import the document from the exchange file. You can deselect a document in the first column if necessary – it will then be ignored during the import process.
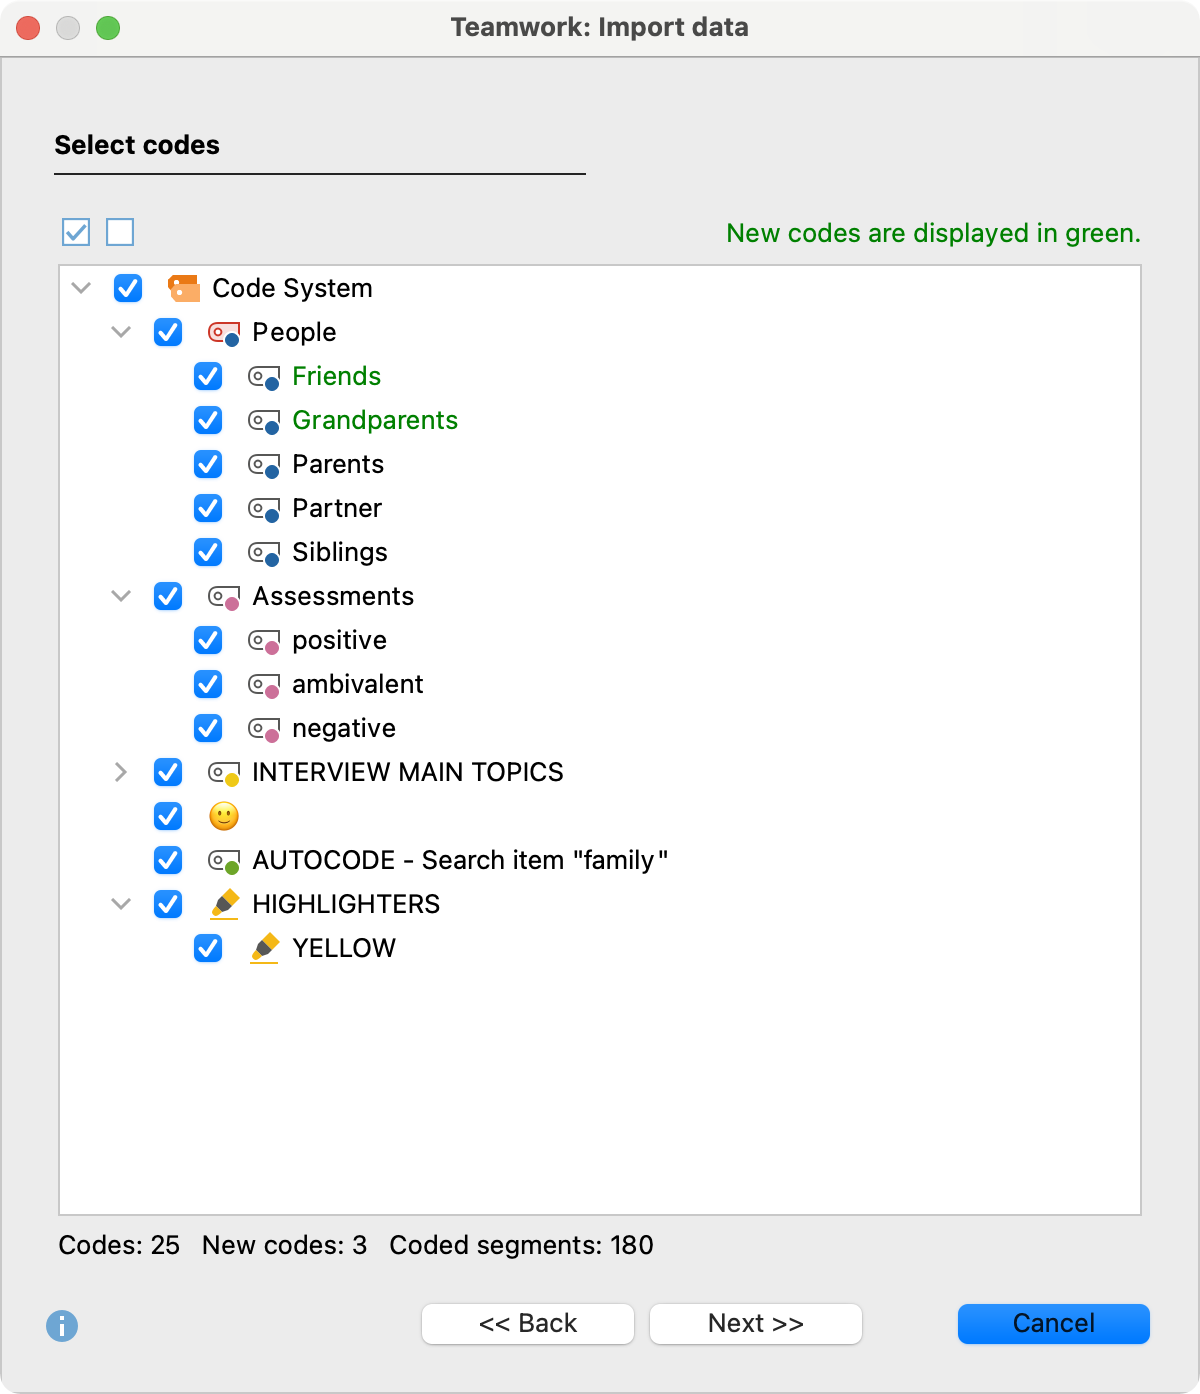
If the document does not yet exist in the project, you can select the <New Document> option to import the document from the exchange file. You can deselect a document in the first column if necessary - it will then be ignored during the import process. - When you click Next >> the following dialog box will appear for the code selection. New codes, i.e. those that do not yet exist in the opened project, will be immediately recognizable by the green font in the displayed list of codes.
In the dialog box, select all the codes that you want to import.
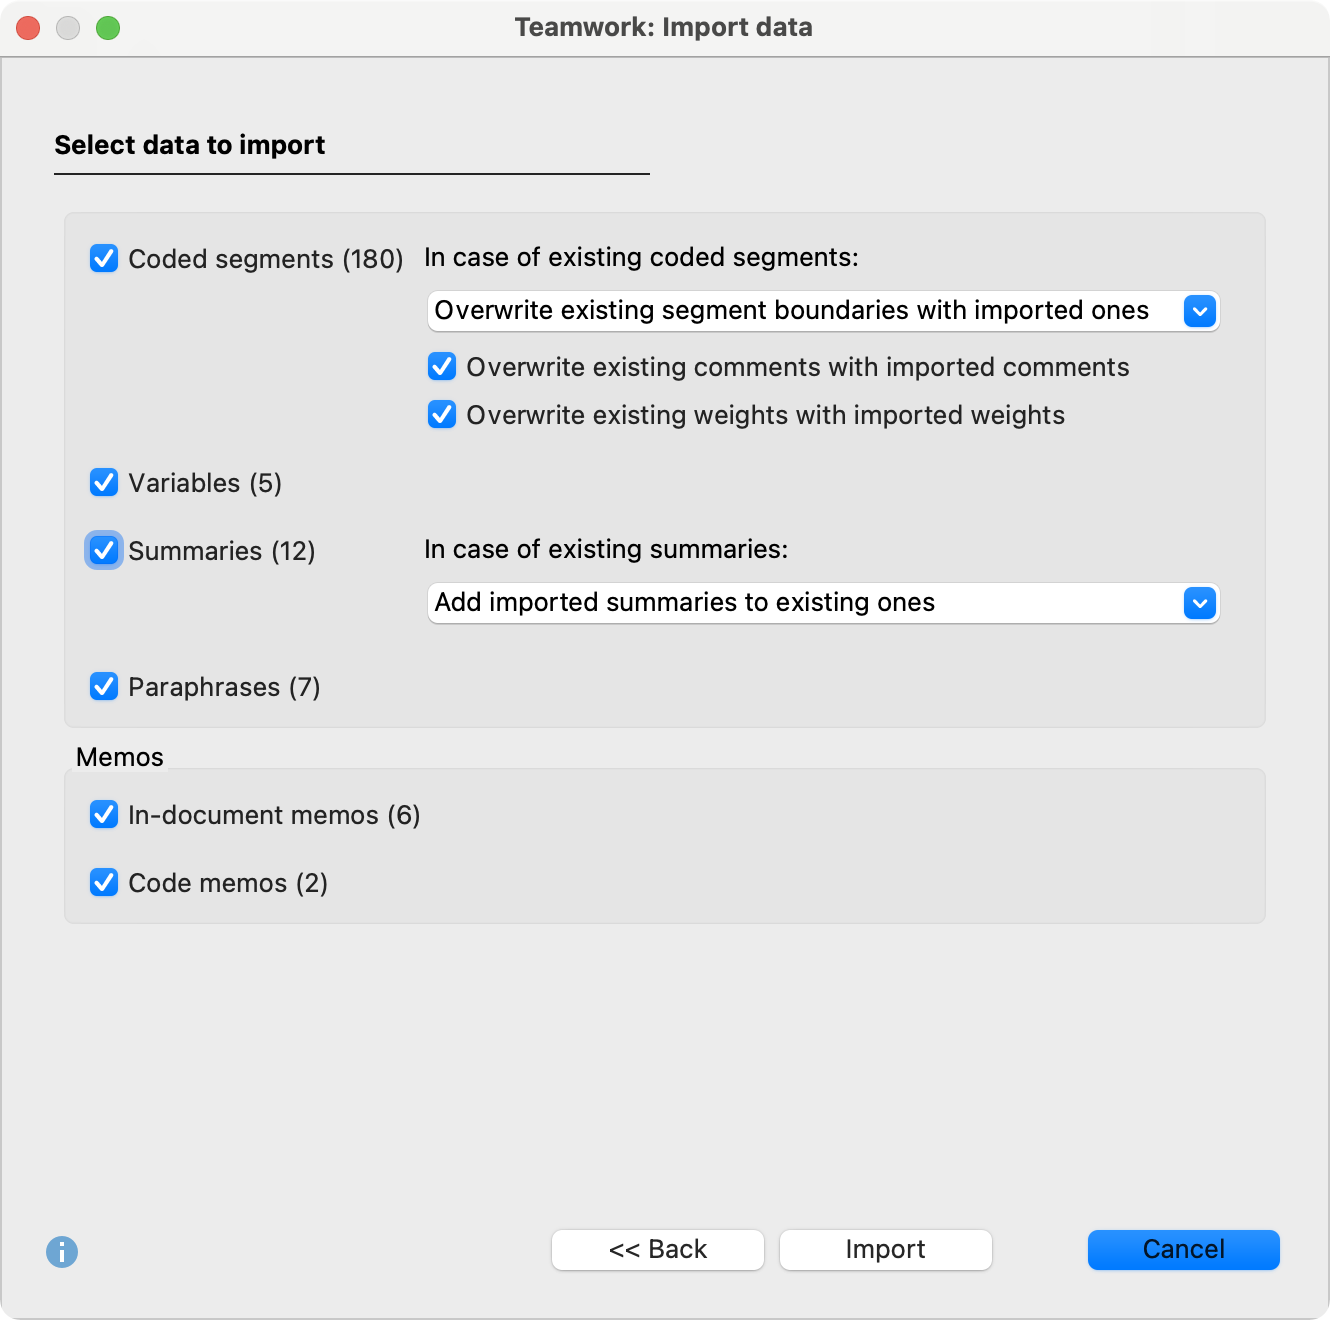
- In the third step, select the data you want to import. MAXQDA only displays the data types in the dialog box that are contained in the MEX file. You can deselect individual elements, such as variables or paraphrases, to ignore them during the import process. The other options determine how conflicting code assignments are to be dealt with - these are described in more detail below.

- Click Import to start the import process.
Handling of conflicting code assignments
When importing the coded segments, it may happen that the same code has already been assigned to the corresponding segment in the target project. This segment may also have other segment boundaries than the coded segment you want to import. Since the rule in MAXQDA is that a segment in a document can only be coded once with the same code, you can use the drop-down menu to specify which segment boundaries should “win” during import process:
- Overwrite existing segment boundaries with imported ones – This is the default selection: in the case of a conflicting code assignment, the segment boundaries of the imported coded assignment override those in the opened project file.
- Preserve existing segment boundaries – In the event of a conflict, the existing coded assignment "wins", i.e. no changes are made to the segment boundaries.
- Use outer segment boundaries of the code assignments – In cases of conflict, the outermost segment boundaries of the two code assignments are used.
- Use inner overlapping area of code assignments – In cases of conflict, only the overlapping area of the two code assignments is taken as the coded segment.
Each code assignment in MAXQDA also includes a comment and a weight. In the event of a conflict, you can instruct MAXQDA whether the existing comments and weights should be retained or overwritten by the imported ones:
- Overwrite existing comments with imported comments – When this option is activated, the comment of the imported coded segment always "wins", that is, it overrides the comment in the opened project file. If the imported coded segment has no comment, this is ignored, i.e. an existing comment is never overwritten by an empty comment.
- Overwrite existing weights with imported weights – If this option is enabled, the weight of the imported coded segment always "wins".
When importing summaries, you can also control how MAXQDA should proceed if a summary already exists for a document in a code:
- Do not change existing summaries – With this setting, only those summaries are imported that were empty in the project file. In case of a conflict, the imported summaries are ignored and not imported.
- Overwrite existing summaries with imported summaries – With this setting, in the event of a conflict, the summaries already existing in the project are deleted and overwritten by the imported ones.
- Add imported summaries to existing ones – In case of a conflict, the imported summaries are added to the existing summaries.
What exactly happens during the import process?
Code assignments:
- All code assignments already present in the document are retained or adapted depending on the option selected.
- Previously non-existing code assignments are inserted into the opened project.
- If a coded segment with a code not yet contained in the “Code System” is found in the exchange file, this code is inserted into the “Code System” at the corresponding position. Codes with the same name at the same hierarchy position are considered identical, but their color is irrelevant.
Memos:
- All in-document memos are imported (exception: memos at the same location with the same title).
- Document memos in the "Document System" are only imported if there is no memo in the document yet. Existing document memos remain unaffected.
- Code memos are dealt with in the same way.
Paraphrases:
- A paraphrase to be imported is ignored if a paraphrase already exists at the same location in the current project.
Variables:
- Variables that do not yet exist in the list of variables are added and their values are imported.
- Existing variables are overwritten with the value from the import file.
Start your teamwork in the "Document System"
You can also start the export for a document, document group or document set directly in the "Document System". To do this, right-click an entry and select Teamwork > Teamwork Export: Export Data to MAXQDA Exchange File from the context menu.
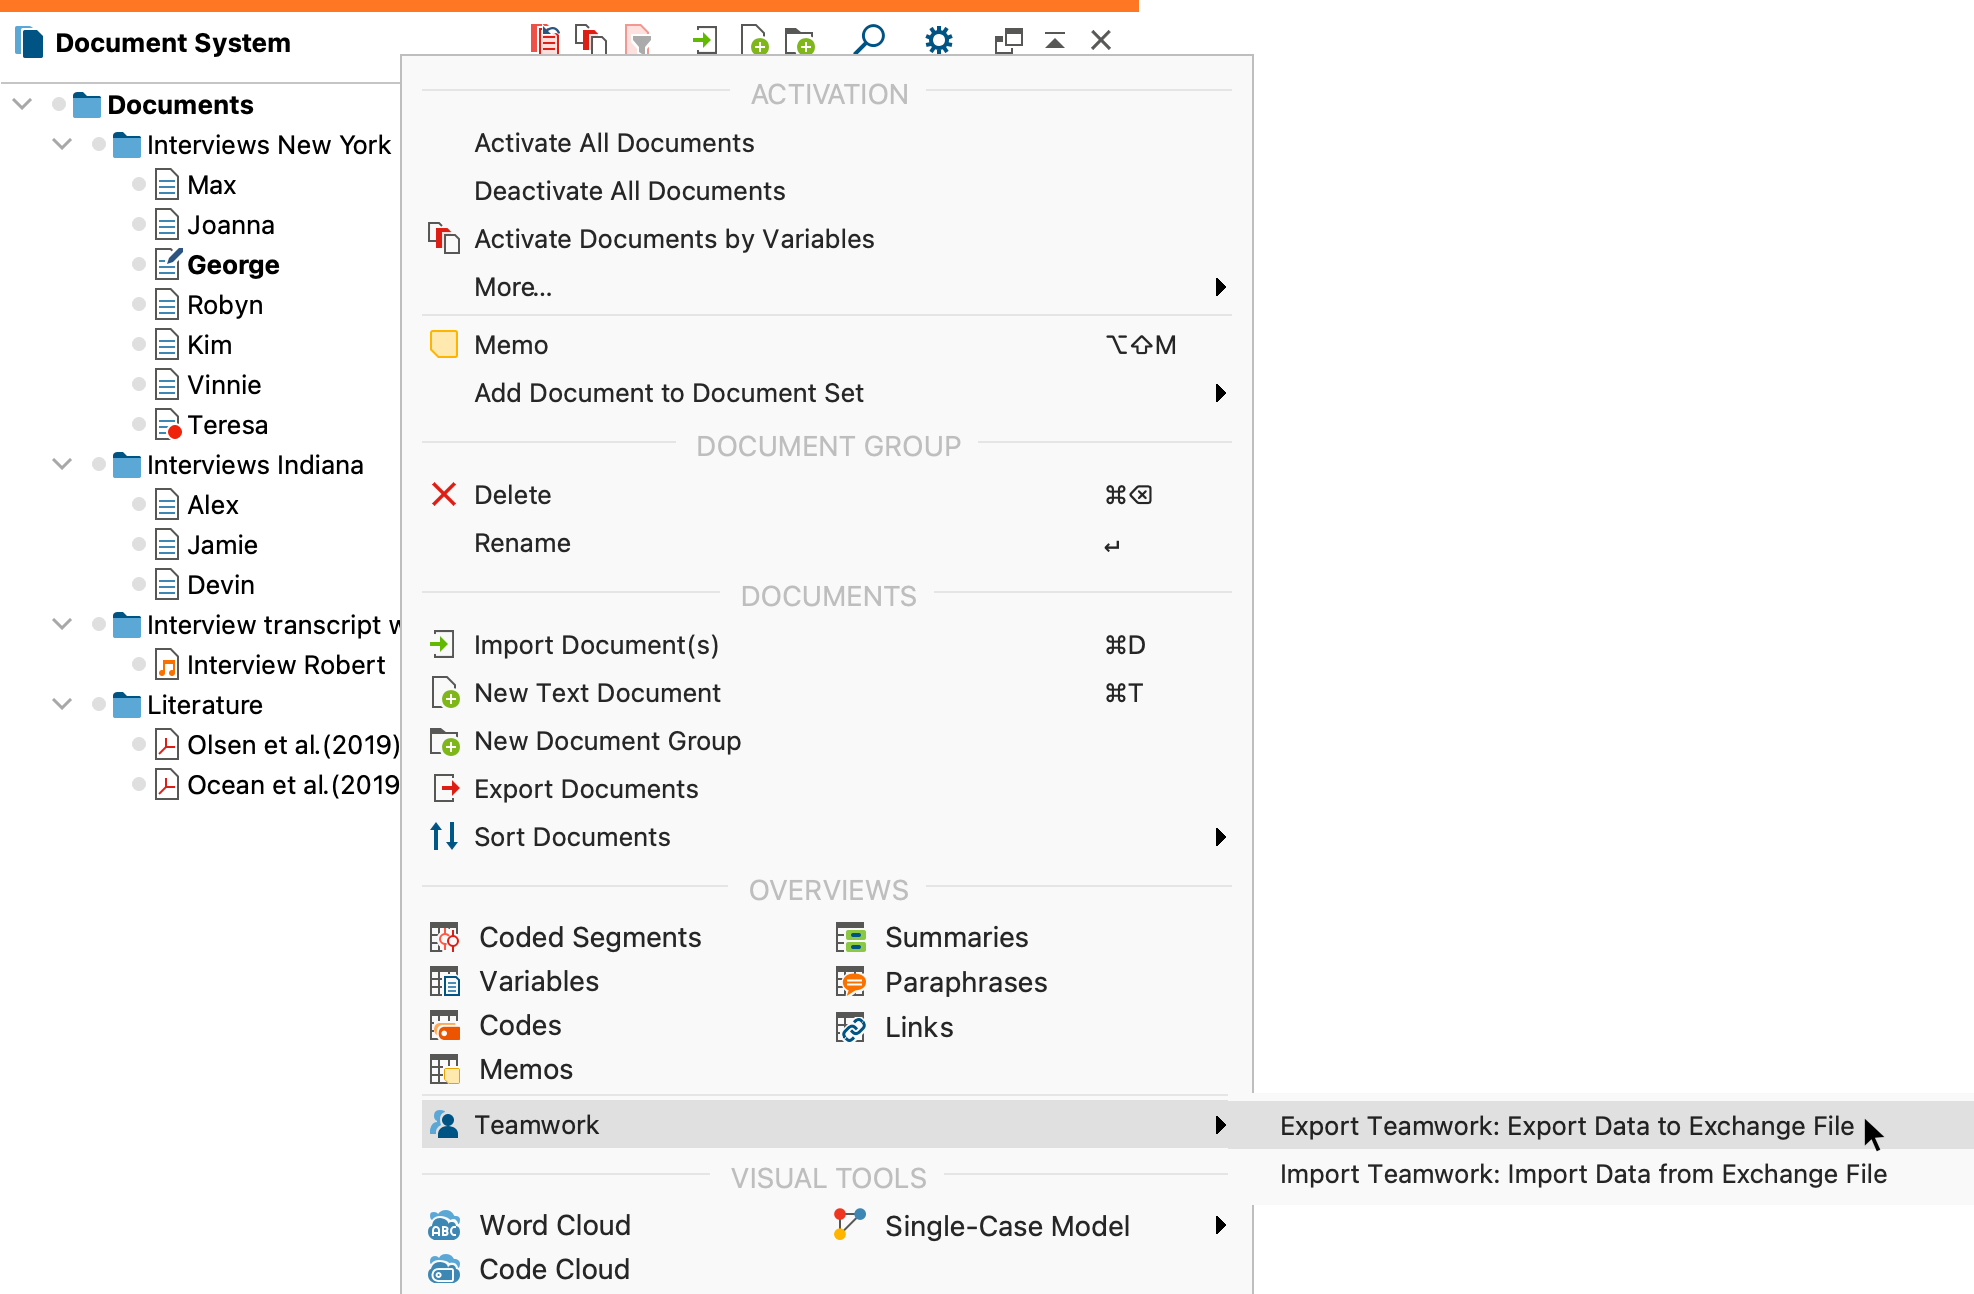
In the picture, you can see that you can open the complementary function Teamwork Import for a document, a document group, or a document set directly in the "Document System" context menu.

