Creating a map
To create a new map, click the New Map icon on the Start tab. A new map is immediately inserted into the "List of Maps" with the default name "New Map" and an empty workspace is provided. The default name can be changed at any time by right-clicking and selecting the Rename option in the context menu.
Any number of maps can be created. They are saved in MAXQDA but can also be exported in the form of JPG or SVG files and then inserted into text files. The storage of maps in the MAXQDA project file is done automatically every minute, as well as when the MAXMaps window is closed. No separate command is required to save.
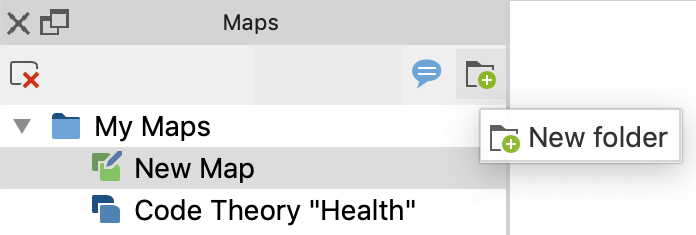
You can create folders in the "List of Maps" where you can arrange your maps for a better overview. To create a new folder, click the icon at the top of the page window.
Types of objects in MAXMaps
The following distinction is made between elements on a map:
- Standard objects
- Free objects
- Connecting objects
Standard objects originate from MAXQDA, e.g. a code, a text, or a memo. They can only be inserted into a drawing pad once. So a document can be contained within a map once only. Modifications on standard objects have no effects on the MAXQDA project. For instance, if you modify the name of a text imported from MAXQDA, the name in MAXQDA’s “Document System” nevertheless remains the same. Objects removed from the drawing pad are not simultaneously removed from the MAXQDA project. No matter how you arrange an object, connections to the MAXQDA database will always be preserved. This also means that a text that is represented only as a picture will open via double-click in MAXQDA’s “Document Browser.”
Free objects are not connected with items of the current MAXQDA project. In this sense, they are independent of the analyzed data.
Connecting objects are lines, which interconnect two objects.
Both standard and free objects consist of an object label and an object picture. Standard objects receive the appropriate icon from MAXQDA as a picture and the appropriate name from MAXQDA as a label. For example, as with a MAXQDA document, the document name will be taken from the “Document System”.
Connecting objects can also be labeled and the type and characteristics of the connecting line can be customized.
Inserting objects into your map
Each object that is imported into the workspace – be it a code, a memo, a text, a coded segment, or a so-called free object – consists of two elements:
- A symbol, and
- a label.
When importing a MAXQDA object, the MAXQDA default icon (or "symbol") is carried over as the picture and the MAXQDA name as the label. For example, when importing a code, the code icon from the list of codes and the code name are carried over.

Both the label and the icon can be changed, or an image, a diagram, symbol, or photo can be imported. The label can also be changed along with the font type, font size, and other properties.
How to import standard objects from MAXQDA
There are three ways to import an element from MAXQDA:
- hold down the Alt key (Windows) or the ⌥ key (macOS) and double-click on the selected object while in MAXQDA,
- click on the element with the right mouse button and select the Insert into Map option from the context menu, or
- drag and drop the element into the map with the left mouse button.
The selected element is inserted into the drawing area at the next free point as viewed from the top left.

The following MAXQDA elements can be inserted. The brackets state where the elements are located in MAXQDA:
- Documents (“Document System”).
- Document groups (“Document System”).
- Document sets (“Document System”).
- Codes and subcodes (“Code System”).
- Code memos and Memos on code sets(“Code System”).
- Memos attached to parts of documents (“Document Browser”).
- Memos attached to documents, document groups or document sets (“Document System”).
- Free Memos (Memo Manager, “Overview of Memos”).
- Coded segments (“Retrieved Segments”, “Overview of Coded Segments”, “Document Browser”, “Multimedia Browser”).
All these functions are only available with the MAXMaps window open. The object is always imported into the currently open map.
For documents, codes, subcodes and coded segments, the assigned color is always adopted. The assigned memo icon is always used for memos.
Importing multiple documents or codes at once
You can import all documents or codes currently activated in the MAXQDA project into an open map at once:
- Select the desired codes or documents in the MAXQDA window. For example, you can use the Mixed Methods > Activate Documents by Variables function to select all documents with a specific property.
- Then right-click on the white space in MAXMaps and select Insert Activated Documents or Insert Activated Codes.
Inserting a new code
From the Insert tab in the MAXMaps window, you can create a code and paste it into a map by clicking on the New Code icon. The dialog for creating new codes appears, where you can specify the name, color, and description of the new code. The code is inserted into the MAXQDA project at the top of the "Code System" and then its symbol with the codename as a label is inserted in the opened map.

Alternatively, this can be done by right-clicking on the white area of MAXMaps and selecting the Insert New Code option.
Inserting a background image
You can insert a background image for each map, which is displayed behind all objects. Right-click on the white workspace and select Insert Background Image. Background images are always inserted in their original resolution and can be changed as desired in their displayed size.
To change the image later, either right-click it and select Change Image... or insert a different background image, this will replace the existing one.
Inserting free objects
The term "free objects" refers to objects that are not part of MAXQDA. Go to the MAXMaps Insert tab to add one of the following free objects to your map:
- New texts (a label without a visible icon is added)
- New images from a file, e.g. a photo, a map or chart
- Standard shapes such as squares, circles, and arrows
By clicking on New Code, New Text or New Image in the Insert tab, the new object is inserted into the map at the next free position seen from the top left. For images you have to select a graphic file. This file will then be saved in the MAXQDA project. In the MAXMaps options, which can be accessed via the gear symbol at the top right of the window, you can determine the quality with which images are saved in the map.
This is how you can insert one of the standard shapes (rectangles, circles, and arrows):
- Click on the desired shape. The mouse pointer changes to a large cross.
- Drag the shape to the desired position on the map by holding down the mouse button and dragging the cross.

Similarly, "free objects" also consist of an image and a label, except that no image is displayed when a new text is inserted, and no label is displayed when images or standard shapes are inserted. Image and label can be shown or hidden at any time.
Importing related MAXQDA objects
In MAXMaps, it is possible to import analytically related objects to an already imported object, for example the coded segments of a code or the text of a memo.
To import related objects, right-click a MAXQDA element on a map. Depending on the object selected, the context menu contains different options for importing.

The following list provides an overview of the import options for different objects:
Document icon
Import Memos - All memos that are contained in the selected document are inserted into the workspace and linked to the document icon. The document memo from the "Document System" is also inserted (if available).
Import Codes - Depending on the selection, all or the activated codes assigned in the clicked document are inserted into the workspace and linked to the document icon.
Import Summaries - Depending on the choice of all or of activated codes, the summaries that were written in the clicked document are inserted into the workspace alongside the corresponding codes. The document is connected to the codes by lines, which are also connected to the summaries by a line.

Document group or document set icon
Import Summaries - Depending on the choice of all or activated codes, the summaries that were written in the clicked document group or document set are inserted into the workspace alongside the corresponding codes. The document is connected to the codes by lines, which are also connected to the summaries by a line.
Import Paraphrases - All paraphrases that were written in a document of the clicked document group or document set are inserted into the workspace and connected to the icon by lines.
Code icon
Import...> Code Memo - If a code memo exists, it is inserted into the workspace and connected with the clicked code symbol by a line.
Import...> Linked Memos - All memos that are linked with the clicked code are inserted into the workspace and connected with the clicked code symbol by lines.
Import...> Co-occurring Codes - All codes associated with the selectedcode on the same segment are inserted into the map. The inserted codes are connected with dashed lines to the selected code icon. Optionally, the line strength can represent the frequency: the thicker the line is represented, the more overlaps with the associated code exist.
Import...> Subcodes - All subcodes up to the selected level are inserted into the workspace and connected with the clicked code symbol. Subcodes on lower levels are ignored. Optionally the line thickness can represent the frequency: The thicker the line, the more encodings were made with the subcode.
Import..> Coded Segments - Symbols (coding strips) for the coded segments of the clicked code are inserted and connected to the code. The following dialog appears before the import, in which you can select which segments and how they are to be imported:

At the top, select how many segments you want to import. If less than existing segments are imported, it is also possible to prioritize according to highest weight or largest segment. Change label to coded text or comment causes the text of the coded segment or the comment on the coded segment to be automatically adopted as label instead of the mere indication of origin.

Coded segment icon
Insert the text of the coded segment as a label - If the coded segment consists of a text, a PDF or a table, the entire coded text is accepted as a label.
Insert the text of the associated summary as a label - If a summary exists for the code and source document in the summary grid, the entire text of the summary is accepted as a label.
Inserting a coded image segment as an "icon" - If the image segment is coded in a PDF or an image, the coded section is taken to symbolize for the segment.
Memo icon
Insert memo text as a label - The text of the memo is adopted as a label for the activated memo icon.
Deleting objects
Each object can be deleted from the map:
- The object is first selected with the mouse. You can also select multiple objects by highlighting them with the mouse.
- Press the Delete key or click the Remove from Map icon on the Start tab. Alternatively, you can also right-click on the object and choose Remove from Map from the context menu.
The object and its connections to other objects are then removed from the map.