What is the Word Tree function?
The word tree allows you to visually explore and analyze words and word combinations in their respective contexts. The more frequently a word or phrase occurs, the more prominent it appears in the tree. The word tree is interactive in two ways: First, it can be navigated through its individual "branches" to visualize words in their contexts. Second, the data is interactively linked to the original texts, so that you can view words and phrases in MAXQDA's Document Browser. These features make the Word Tree a visually supported form of keyword-in-context (KWIC) analysis.
Word trees were originally developed by Wattenberg and Viégas (2008) ("The Word Tree, an Interactive Visual Concordance") and have since become part of the standard repertoire of text exploration tools.
Opening the function and select texts
To create a Word Tree, go to MAXDictio in the ribbon menu, and select Word Tree . The following window will appear, in which you can use the mouse to import text or PDF documents from the “Document System” window.
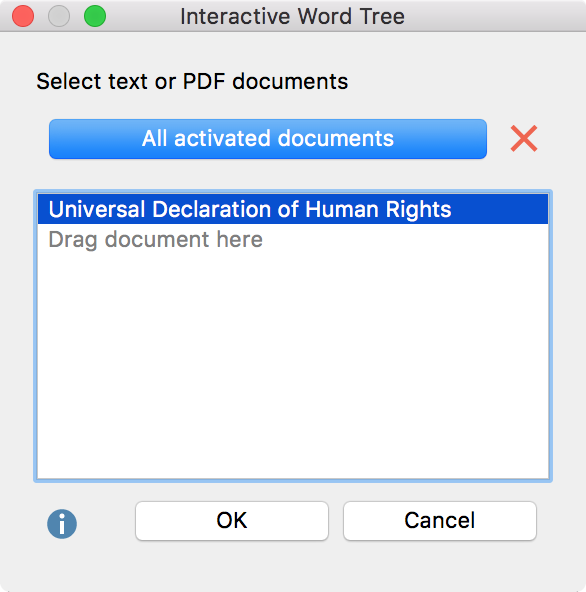
Alternatively, click the All activated documents button to add the currently activated text and PDF documents to the existing selection.
Click OK to begin creating your Word Tree. Progress of this operation is indicated in the display.
The Interactive Word Tree function
The following figure shows a Word Tree for the UN Declaration of Human Rights created in MAXDictio.
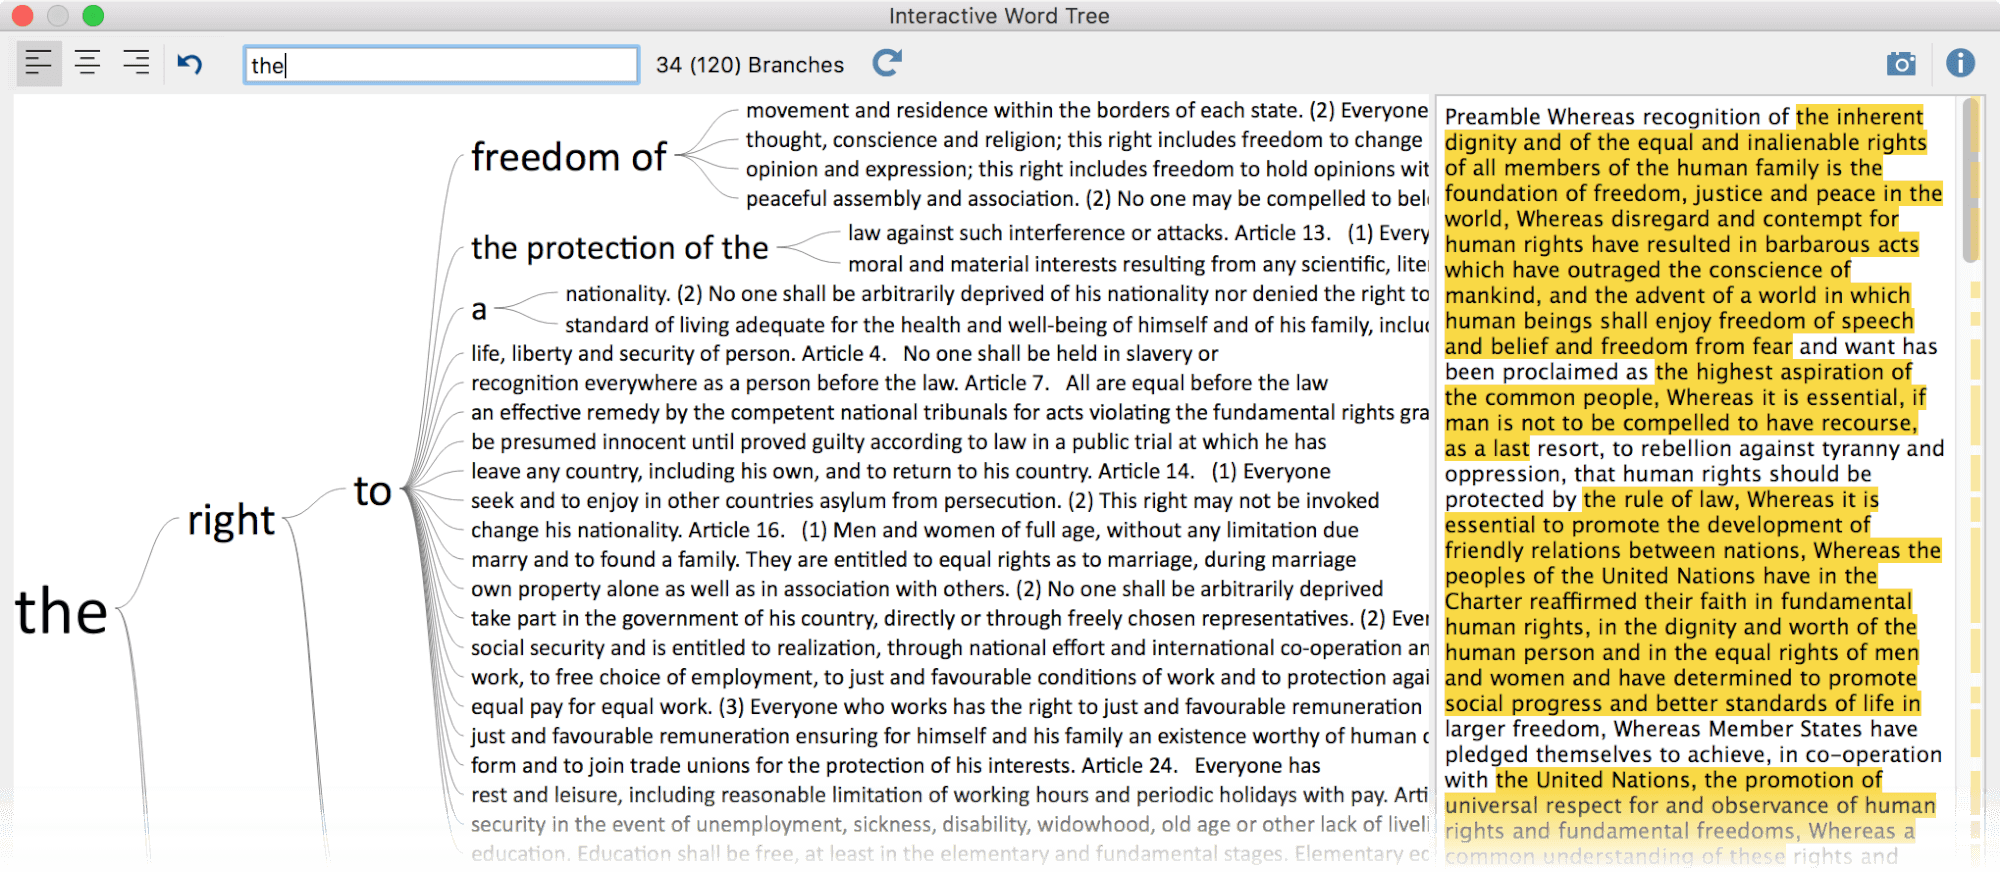
The Word Tree window is structured as follows:
- The actual Word Tree is displayed in the left pane.
- The right pane contains the original text without formatting. If several texts have been selected, they are displayed one after the other.
- In the upper window area, a toolbar allows you to adjust the view and to export the tree.
- The Word Tree is created according to the following logic:
- The most frequent word is shown on the far left, in the example "the". This word forms the root of the Word Tree. The next most frequent word following the root word is displayed on the top branch, in the example, "right". The word "United" is the next most frequent word and is positioned at the second branch from the top. According to this logic, each branch of the tree grows longer, until only one phrase remains in the form of one branch per line.
- Stop words are not applied to avoid breaking the reading flow.
- Punctuation marks such as periods are considered single words.
- The visible portion of the word tree is displayed in the display pane. The number of currently displayed branches with different text lines is displayed in the upper toolbar. If there are more branches than space, the number of currently visible branches is displayed, followed by the total number of branches in parentheses. In the example above, 34 of a total of 120 branches are visible.
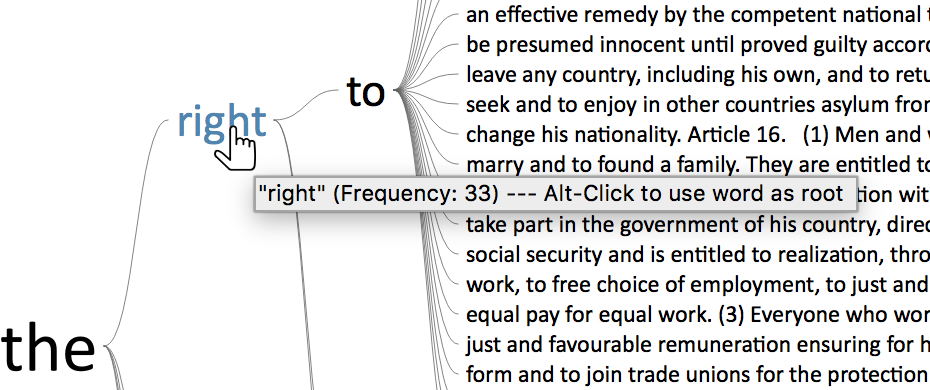
- The tooltip that appears when you hover over a word with the mouse shows how often this word appears in the analyzed texts. The following figure shows that the word "right" appears 33 times in the Declaration.
Selecting sentences and extending the root
Click on a word in the tree with the mouse to define all words from the previous root to the selected word as the new root of the tree. One can imagine observing a braThe nch with binoculars and ignoring the other parts of the tree. The following screenshot displays the view of the tree after clicking the word "to" in the upper part of the tree:
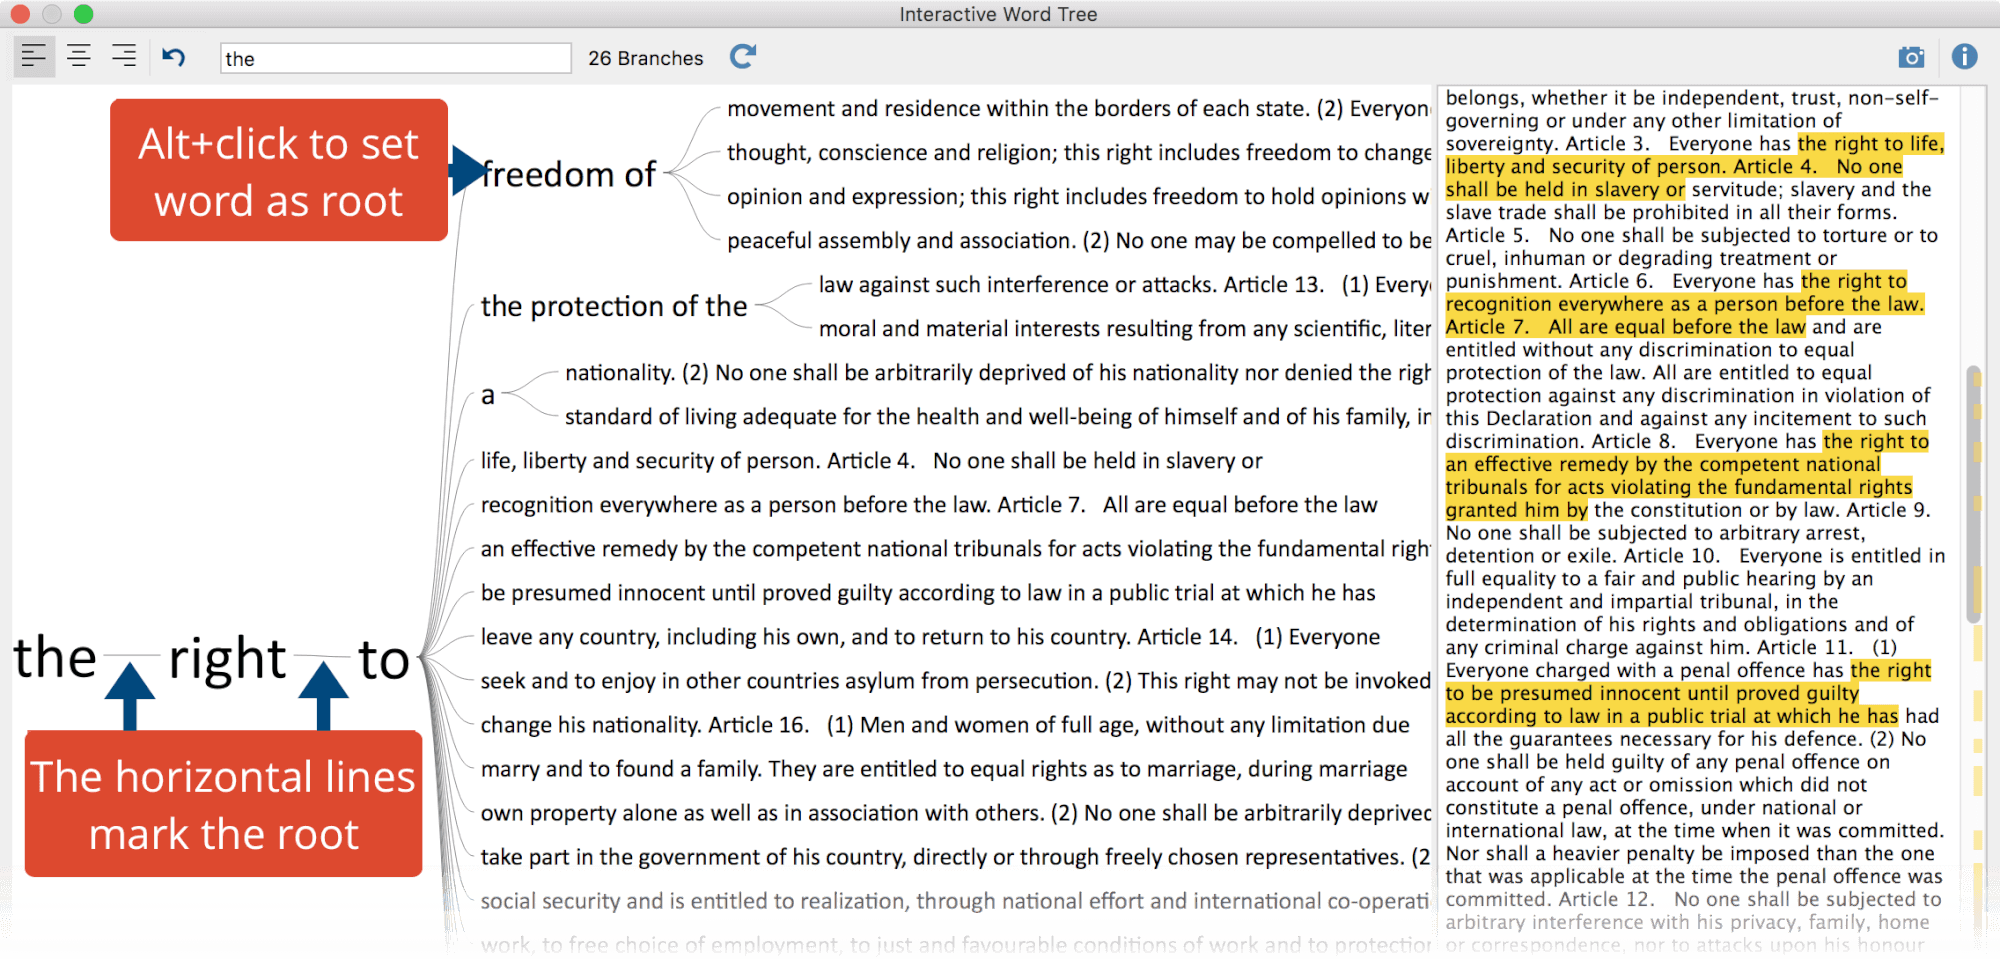
Between the three words “the right to”, horizontal lines are displayed to show that “the” and “right” are followed by other words and phrases, but this word combination has been selected as the current root. As shown in the upper toolbar, the word combination "the right to" appears a total of 26 times in the text.
To shorten the root, click on one of the preceding words in the root. In the example above, clicking the word “the” shortens the root to this word.
Using words or word combinations as the root
You can make any word or phrase in the tree the new root by holding down the Alt key and clicking the word. The clicked word immediately becomes the new root.
The words in the right pane containing the analyzed text are also interactive: click a word to make it the new root.
Search for words and phrases
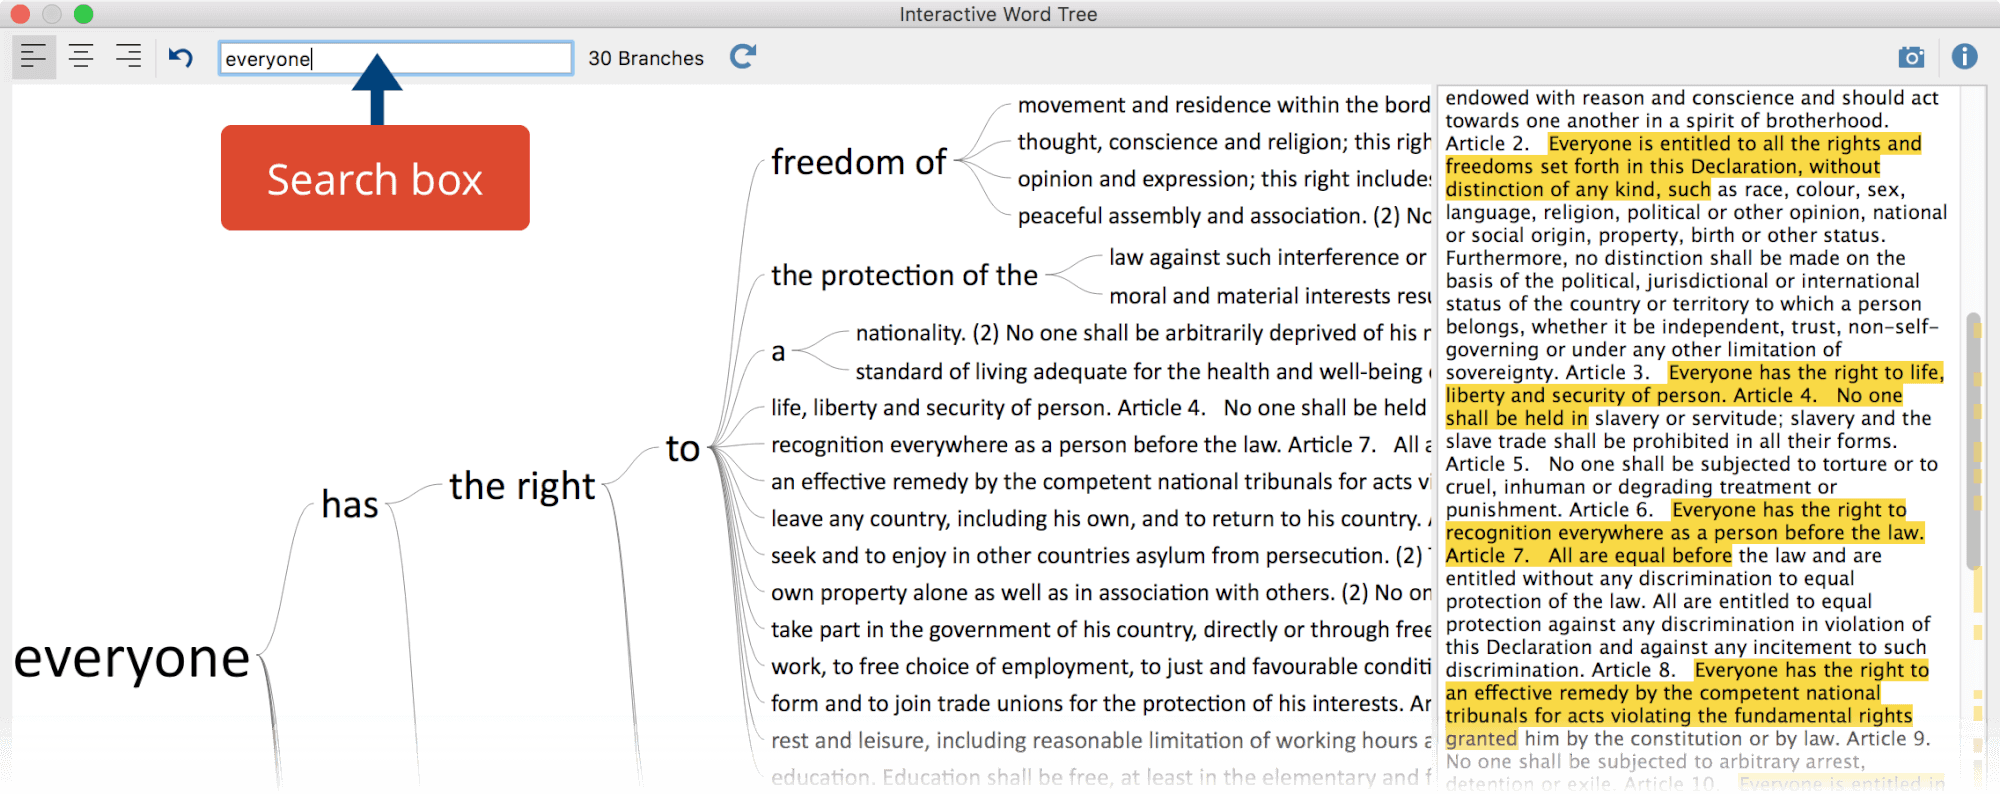
One of the main functions of the Word Tree is to search for interesting words within a text and to explore them in their respective contexts. To this end, a search field is located at the top of the window. Hit Enter key to begin the search process; if there is a hit, it will go directly to the new root of the tree:
Jumping to the original text
The right pane contains the complete analyzed text; if several text documents are selected, these are displayed one behind the other. The yellow-highlighted text corresponds to the phrases shown in the tree. The yellow highlighting on the scroll bar shows the positions of the phrases in the text to provide better orientation.
Right-click a yellow highlight in the text and select View in Document Browser to display the associated document in the “Document Browser” and highlight the corresponding text for further exploration.
Placement of the root: start, center, end
By default, the word of interest is displayed on the left, so you can examine which words follow. If, however, you want to analyze which words appear in the text before the word of interest, you can adjust the placement of the root using the three icons on the upper left of the screen:
![]() Root: start – The root, that is the selected phrase, is left-justified in the window so you can examine which words follow.
Root: start – The root, that is the selected phrase, is left-justified in the window so you can examine which words follow.
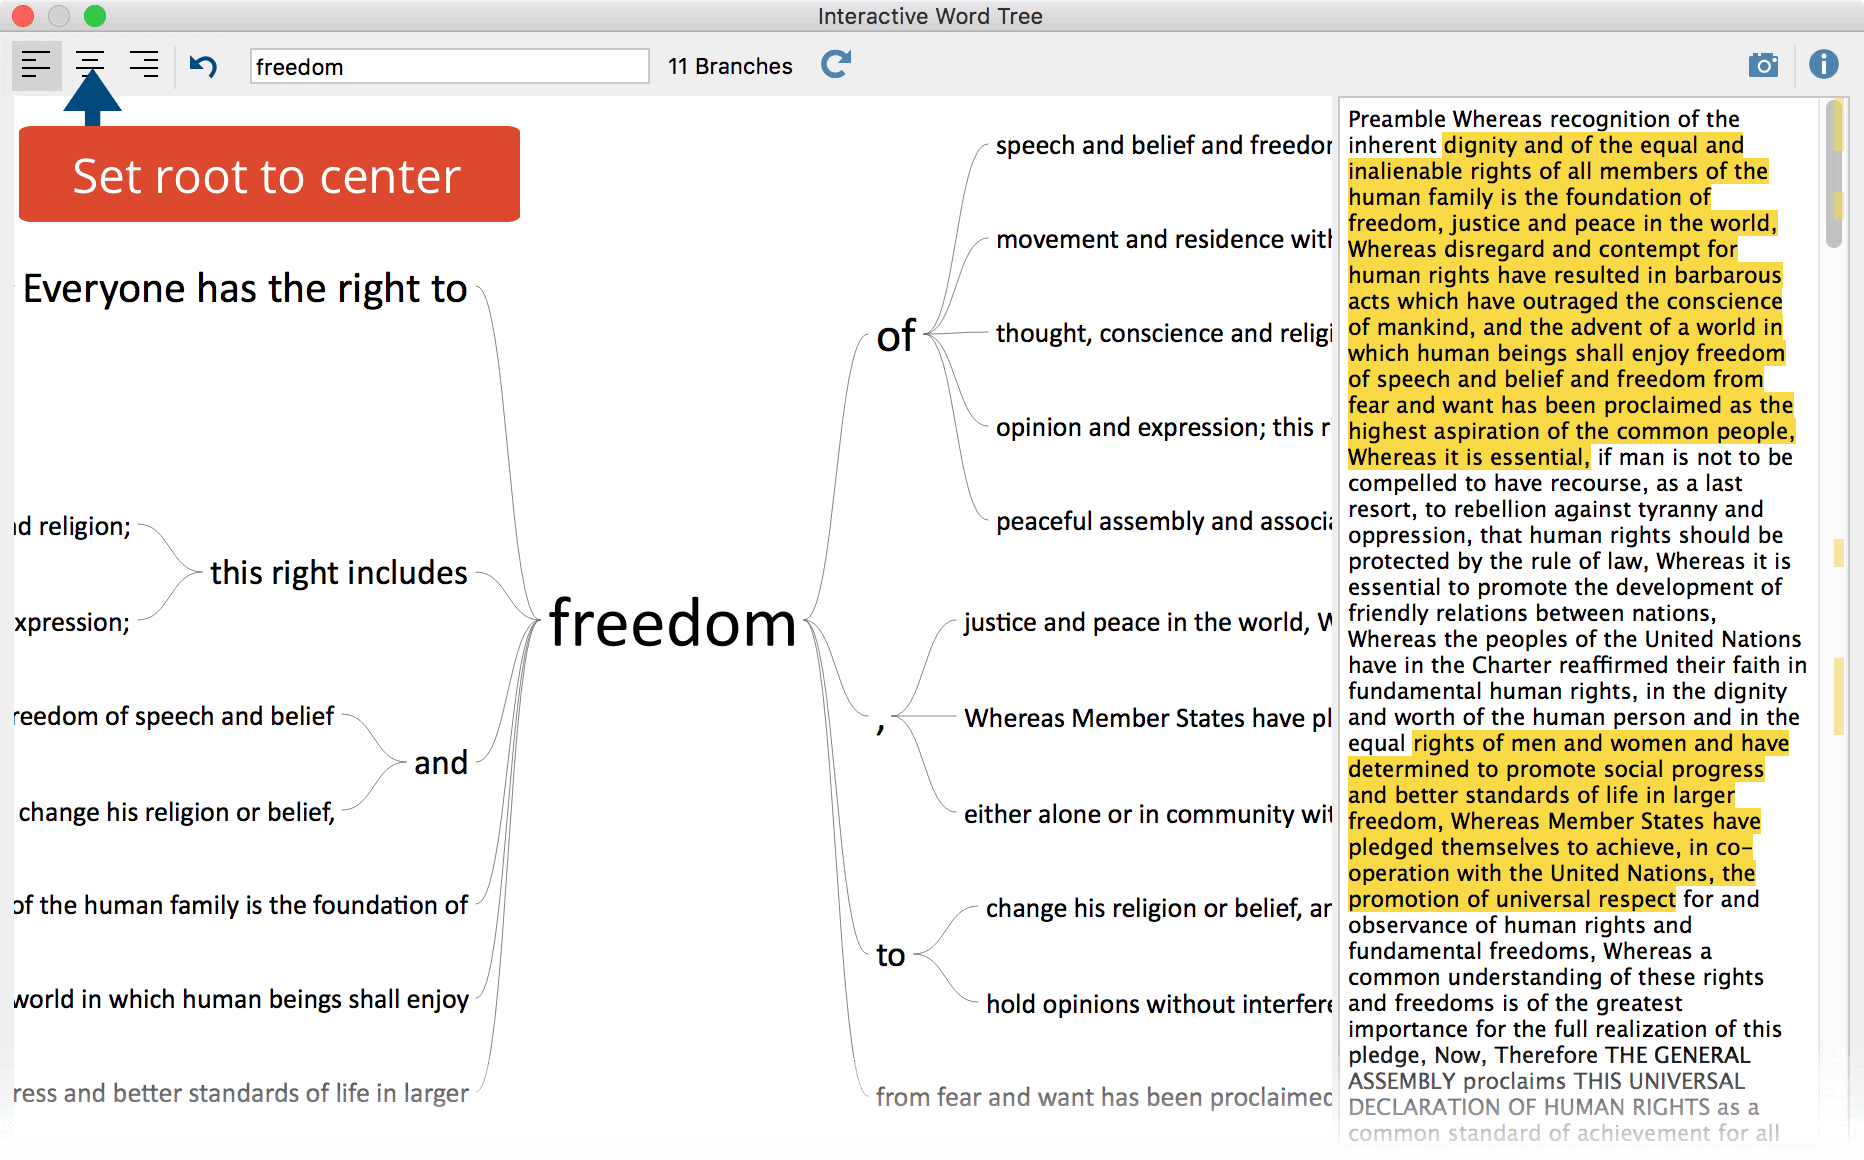
![]() Root: center – The selected phrase is displayed in the center of the window, so you can examine which words appear before and after. Clicking a word on the right half of the tree extends the root to the right; clicking a word on the left extends the root to the left.
Root: center – The selected phrase is displayed in the center of the window, so you can examine which words appear before and after. Clicking a word on the right half of the tree extends the root to the right; clicking a word on the left extends the root to the left.
![]() Root: end – The selected phrase is right-justified in the window so you can examine which words appear before it.
Root: end – The selected phrase is right-justified in the window so you can examine which words appear before it.
Store Results Table in a QTT Worksheet
In the Questions – Themes – Theories (QTT) workspace of MAXQDA, you can collect and comment on all the important results of your project. To save the the Word Tree in an existing or new worksheet in the QTT workspace, you can use the ![]() Send to QTT Worksheet icon in the upper right corner in the toolbar.
Send to QTT Worksheet icon in the upper right corner in the toolbar.
Exporting your Word Tree
For documentation and presentation, you can copy the currently displayed Word Tree to the clipboard by clicking the Copy current display as an image to clipboard icon ![]() to insert a graphic of the tree into a word processor such as Word or a presentation software such as PowerPoint. For better quality, the number of pixels is doubled relative to the view.
to insert a graphic of the tree into a word processor such as Word or a presentation software such as PowerPoint. For better quality, the number of pixels is doubled relative to the view.
