If you do not want to automatically transcribe your audio or video file using MAXQDA Transcription, you can transcribe it manually with MAXQDA.
To get started with your transcription in MAXQDA, you must first import the audio or video file into your project. To do this, simply drag the file into MAXQDA’s “Document System” window with your mouse. Alternatively, go to the Import menu tab and click on the Audio or Videos icon (for more details on import, see here).
When importing a recording, an empty text document is created in the "Document System", to which the audio or video file is assigned and in which you can write the transcript. In the "Document System", you can recognize text documents with an associated media file by a play icon that is displayed next to their name:

Activating Transcription Mode
To start transcription, right-click on a document name and select the option Transcribe Audio File > Transcribe Manually or Transcribe Video File > Transcribe Manually.
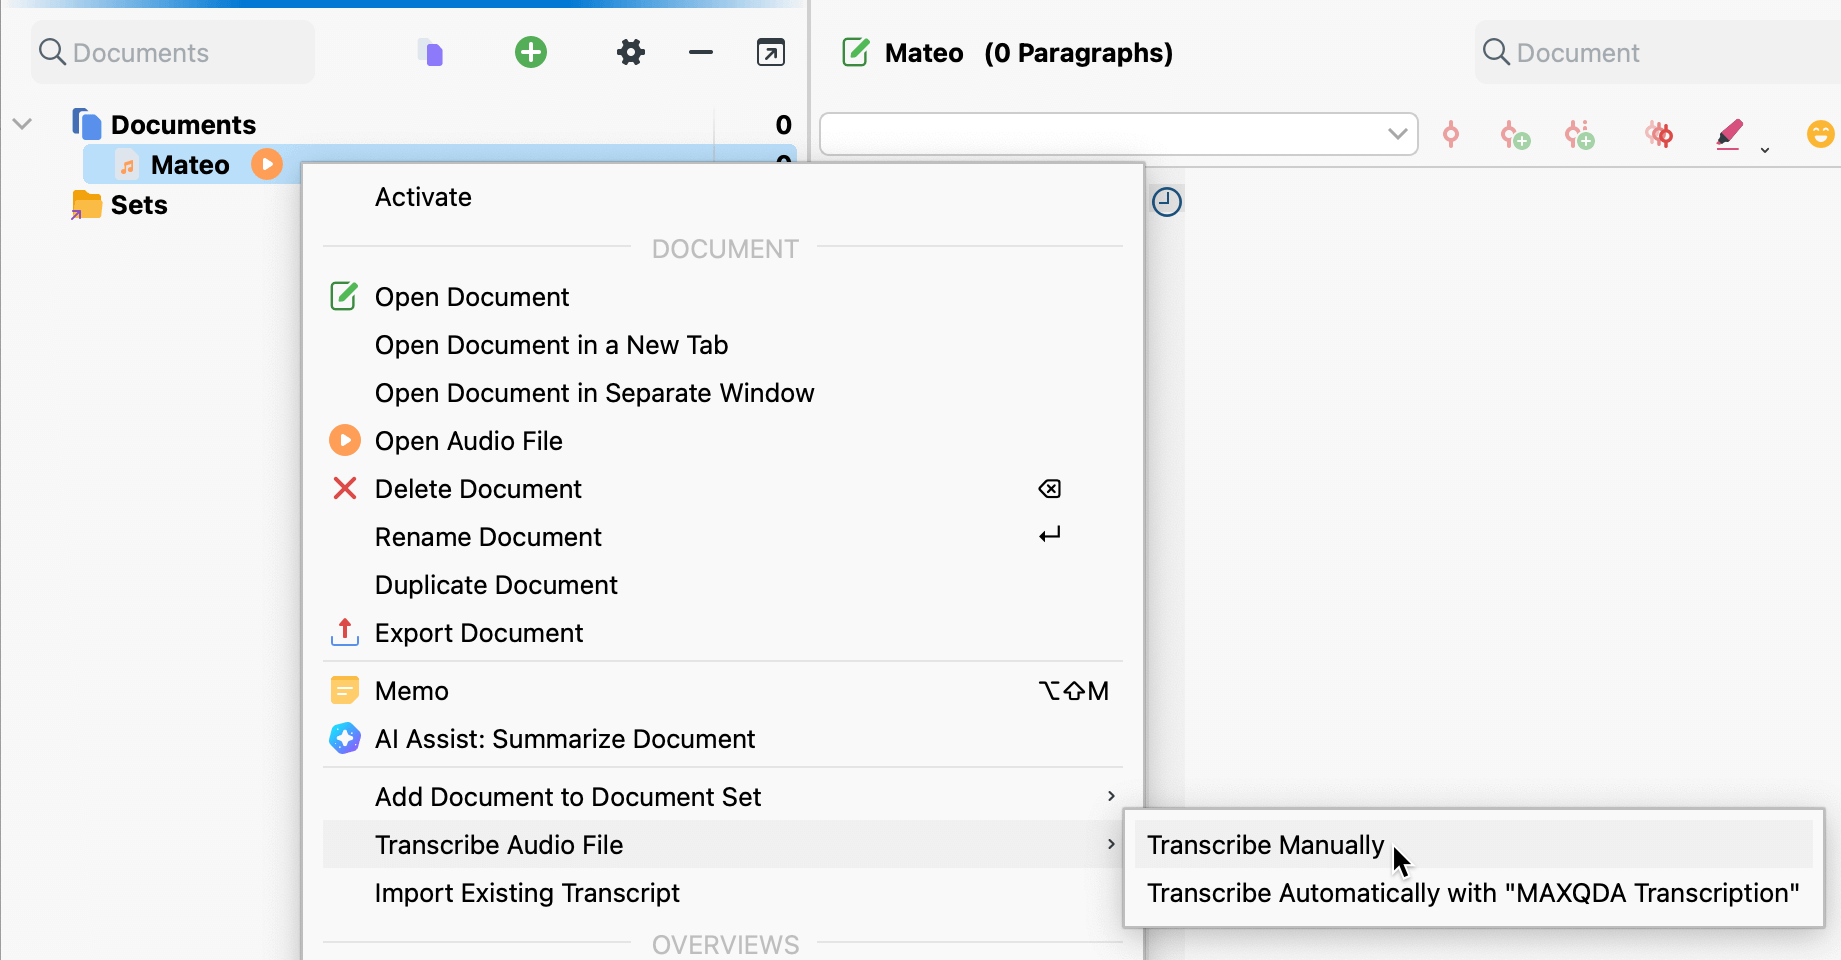
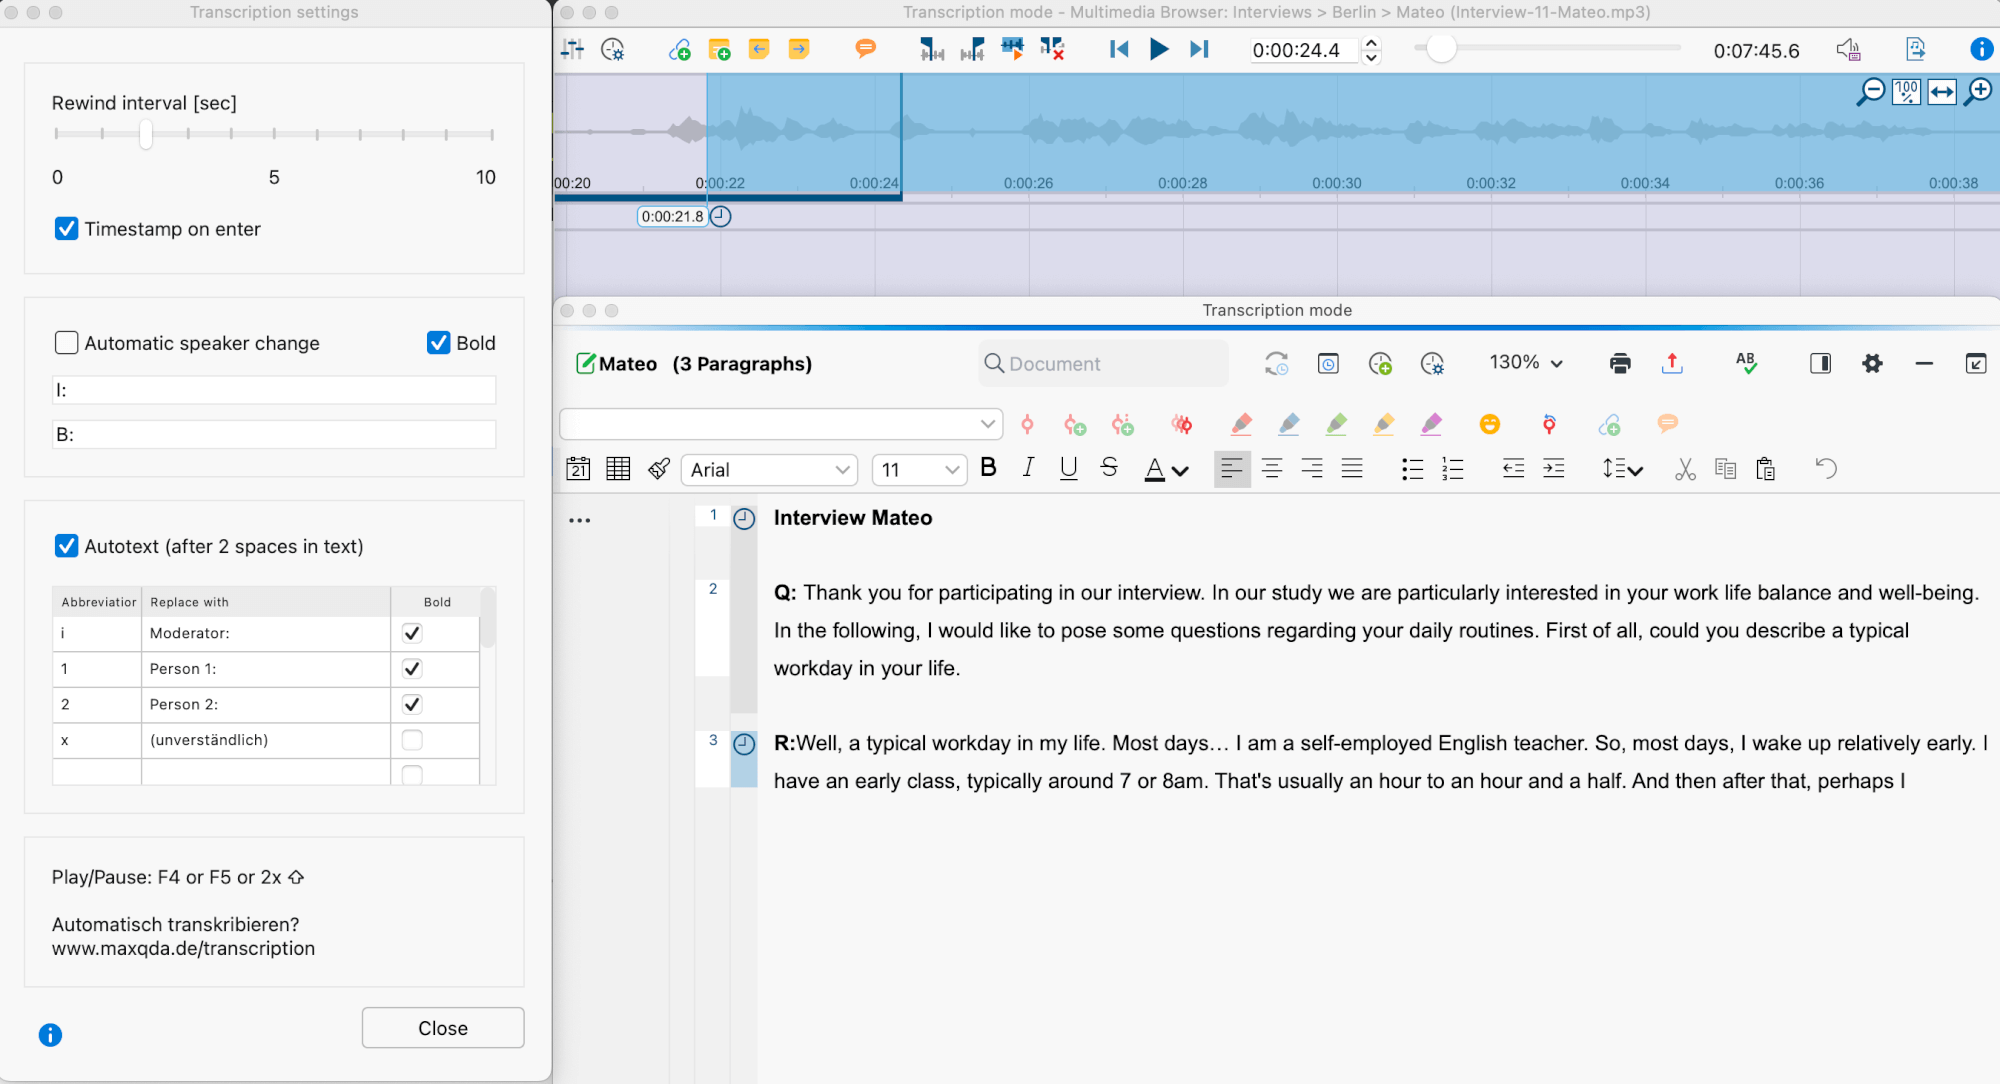
This activates MAXQDA’s Transcription Mode, in which the windows you need for transcription are optimally arranged:
- The "Multimedia Browser" is displayed and placed at the top of the screen.
- The "Document Browser" is displayed directly below—here you can write your transcript.
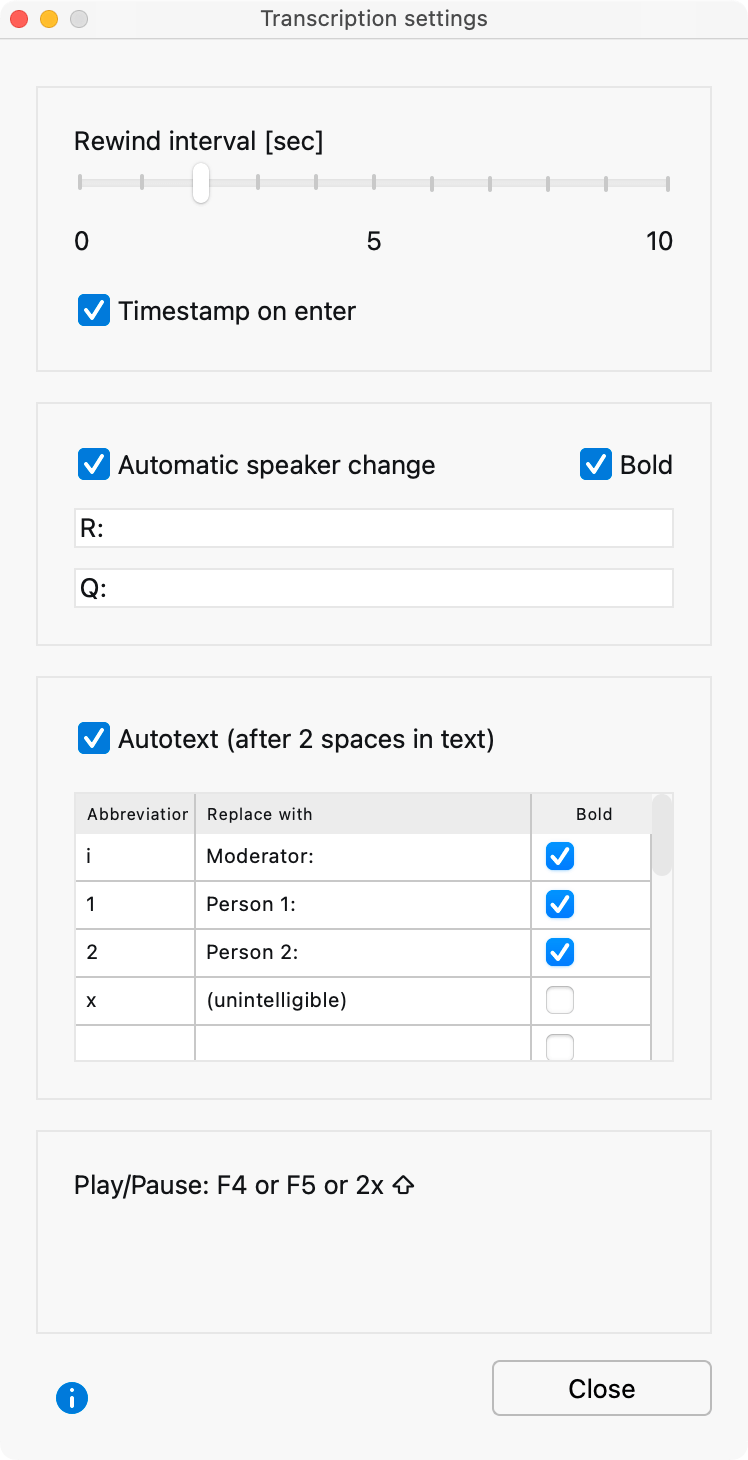
- A dialog window is displayed to the left of the "Multimedia Browser" where you can adjust all your settings for the transcription.
Starting the transcription process
Now you can play the recording and start writing. To play and pause,
- press F4 or F5,
- or press Ctrl (Windows) or Shift ⇧ (macOS) twice in succession (this way you don't have to move your fingers very far).
To quickly navigate to a certain spot in your media file, use the slide control in the “Multimedia Browser” window or use the keyboard combination F12 and ⇧+F12 to forward or rewind 5 seconds.
The transcript and the recording are linked to each other using time stamps. For detailed information on using time stamps, see this section.
The transcription text is stored automatically in the project file every 5 minutes. You can change this time interval in the global settings of MAXQDA. To access the settings, click the settings icon at the bottom left corner of the MAXQDA main window.
Adjusting the rewind interval, volume, and playback speed
A rewind interval of 2 seconds is set by default, so you can continue your flow when you resume playback. You can adjust this interval at any time, to a time between 0 and 10 seconds, in the Transcription Settings.
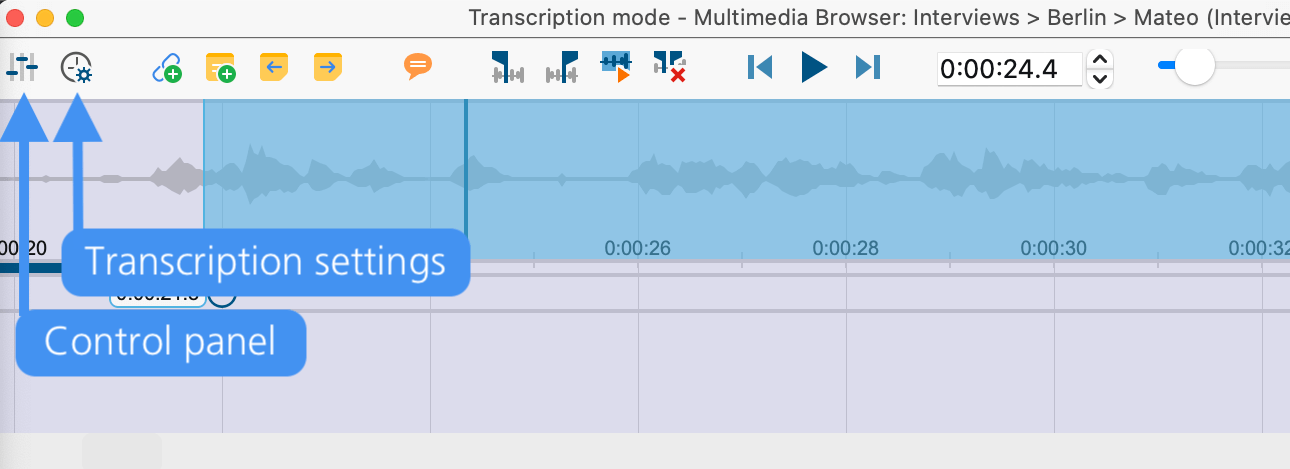
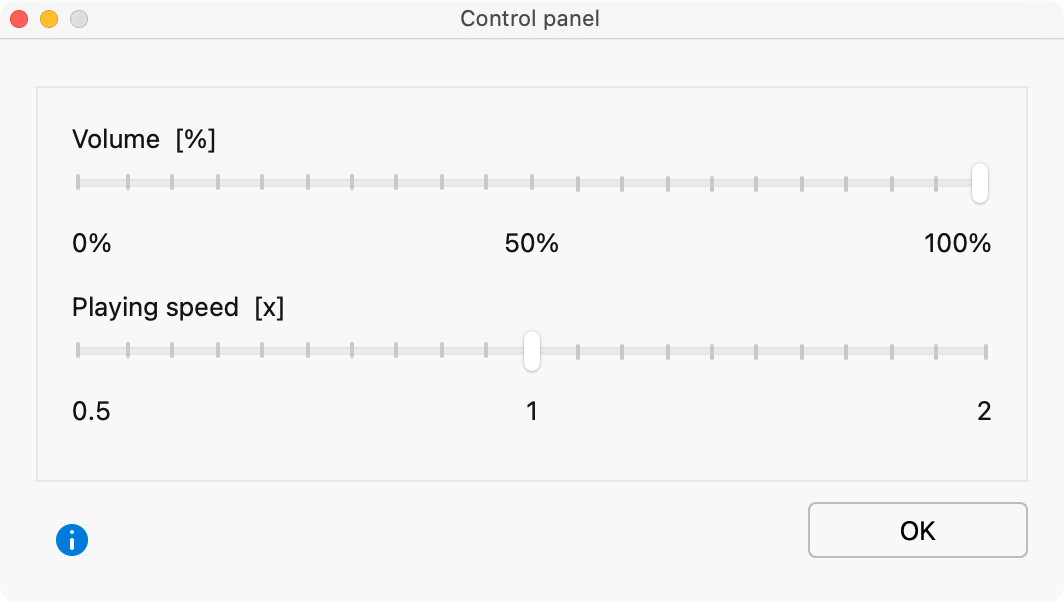
To adjust the volume and playback speed, click the Control Panel icon in the “Multimedia Browser”. The following dialog window will appear, which allows you to adjust the volume and speed of playback.
Automatic speaker change
When transcribing a recording with two speakers, you can switch on the automatic speaker change in the Transcription Settings. As a result, each new paragraph begins automatically with a freely definable name, pseudonym, or abbreviation.
Follow these steps:
- Select the option Automatic speaker change in the Transcription Settings dialog window.
- Enter names for each speaker. It's a good idea to add a space at the end too.
- Select the Bold option if you want the speaker names to be emphasized.
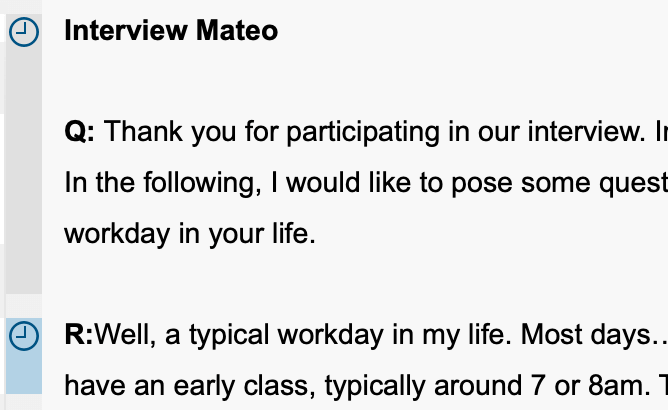
If "Q:" and "R:" are entered for the names of the two speakers, as shown in the figure above, the next name will be entered automatically for each paragraph change in the transcript, saving you a lot of typing.
Autotext
In the Transcription Settings, you can also define abbreviations that are automatically replaced with text when two spaces are entered after the abbreviation. This is particularly useful if you are transcribing a group discussion with several speakers, as the the names of the participants can be replaced with shortcuts, saving you a lot of typing. Likewise, you can also use frequently recurring and difficult to type transcription elements with brackets, for example, "(unintelligible)" or "(2)" for 2 seconds pause as autotexts.
The autotexts shown in the following image are defined by default for all new MAXQDA projects. The abbreviations can be up to three letters long.
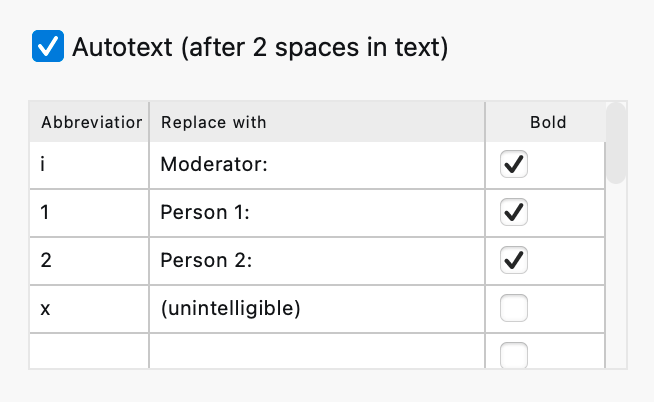
You can use the Bold setting in the last column to control whether the text is inserted in boldface.
The autotexts are stored in your project, so that you can also use different computers with MAXQDA installed for transcription without having to re-enter your required autotexts.
A total of 15 autotexts can be stored. The entire autotext function can be switched off by deactivating this option in the Transcription Settings.
Coding while transcribing
You can code the typed text with new or existing codes as you transcribe. To do this, select a text segment, for example, and drag it to a code in the "Code System".
All the usual features of the “Multimedia Browser” are also available. This allows you to highlight and code sections, set memos and internal links directly in the audio or video file. For detailed explanations on how to use the “Multimedia Browser”, please see the section for coding videos.
Stopping and resuming the transcription
You can start and stop Transcription Mode at any time – just close the “Multimedia Browser”.
To resume working on a transcript, right click on the document and select Transcribe Audio File or Transcribe Video File.
Transcribing with a foot pedal
For faster and easier transcription, MAXQDA supports the following foot pedals from Audiotranskription:
- The yellow “Science” switch has the same functionality as the F4 or F5 key (depending on the software setting inside the foot pedal): press once to play, and a second time to stop.
- The black “Science II” switch must be held down to play media data and will stop playing when released.
- The "Office" footswitch has three buttons: Press the left button to rewind 5 seconds, the right button to fast forward 5 seconds. Press and hold the middle button to playback the media file and release to pause playback
