You can export your documents in various ways. There are three places in MAXQDA where you can start the export process:
- Every opened document can be exported directly from the "Document Browser" by clicking on the
 export icon.
 - If you right-click on a document name in the "Document System," you will find the option to Export Document in the context menu. The same applies to a document group, where you can use Export Documents to initiate the export process for all documents in that group.
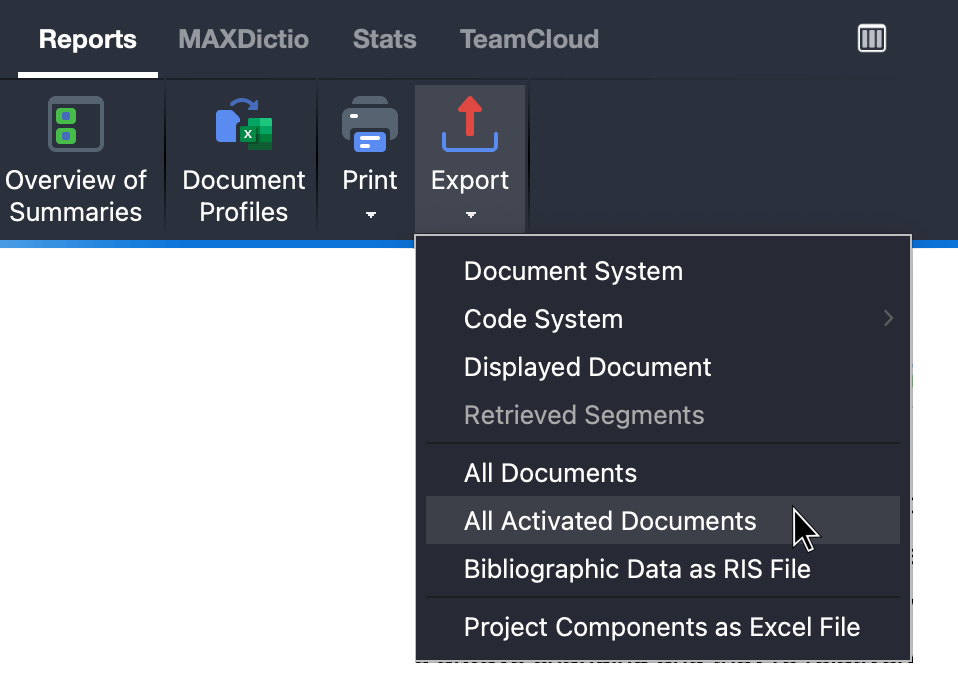
- In the Reports menu you can find an
 Export option, which contains an extensive menu for exporting individual data from MAXQDA, including the options to export the currently dispayed, all, or only activated documents:

If you select All Documents or All Activated Documents, you have to select a folder on your computer where you want MAXQDA to save the documents. Document groups are saved as subfolders.
Export interview transcripts with paragraph numbers, coding stripes, and memos
For the documentation of an interview study, it is often necessary to include selected or all interview transcripts in the report. For this purpose, MAXQDA offers you the option not only of exporting the pure transcripts as text files, but also of exporting the paragraph numbering, the code assignments made, and any attached memos with the transcripts and saving these as PDF files:
- To export individual transcripts, right-click them in the "Document System" and select Export Document from the context menu.
- To export several transcripts simultaneously, select Export Documents from the context menu of a document group.
Exporting text documents
When exporting text documents, you can customize the output based on your needs (this does not apply to image, or table document exports). The available display options depend on the file format you choose for your transcripts and are outlined below:
Export as DOCX
- As table with paragraph/line numbers - Displays your document as a table with paragraph or line numbering. This option can be selected when exporting as a DOCX document.
- Include memo content - Inserts the content of your in-document memos at the appropriate places in the exported document. This option is available when exporting as a DOCX document.
Export as PDF
- Display coded segments - Coded segments are shown as coding stripes to the left of the text. Only the selected codes from the "Document Browser" will be included, along with their colored backgrounds. This option is available when exporting as a PDF document.
- Display memos - Displays memo symbols to the left of the text. The memo content itself is not exported. This option is only available when exporting as a PDF document.
- Width of coded segments' column - Adjust the width (in %) for the display of coding stripes and memos. This option is available when exporting as a PDF document.
Export as HTML
- As table with paragraph/line numbers - Displays the document as a table with paragraph or line numbering. This option is available when exporting as an HTML document.
- Include memo content - Inserts the content of your in-document memos at the appropriate places in the exported document. This option is available when exporting as an HTML document.
Export as XLS/X
No additional export options are available when exporting as XLS/X.
Exporting PDF Documents
When exporting a PDF document (which can only be exported as PDFs), the following options are available:
- Display coded segments - Coded segments are shown as coding stripes to the left of the text.
- Display memos - Displays memo symbols to the left of the text. The memo content itself is not exported.
- Width of coded segments' column - Adjust the width (in %) for the display of coding stripes and memos.
Printing Documents
To print an individual document (except table documents), click the ![]() export icon in the upper right corner of the “Document Browser” and select the
export icon in the upper right corner of the “Document Browser” and select the ![]() Print option from the menu. Alternatively, use the keyboard shortcut Ctrl + P for Windows or ⌘ (cmd) + P for macOS.
Print option from the menu. Alternatively, use the keyboard shortcut Ctrl + P for Windows or ⌘ (cmd) + P for macOS.
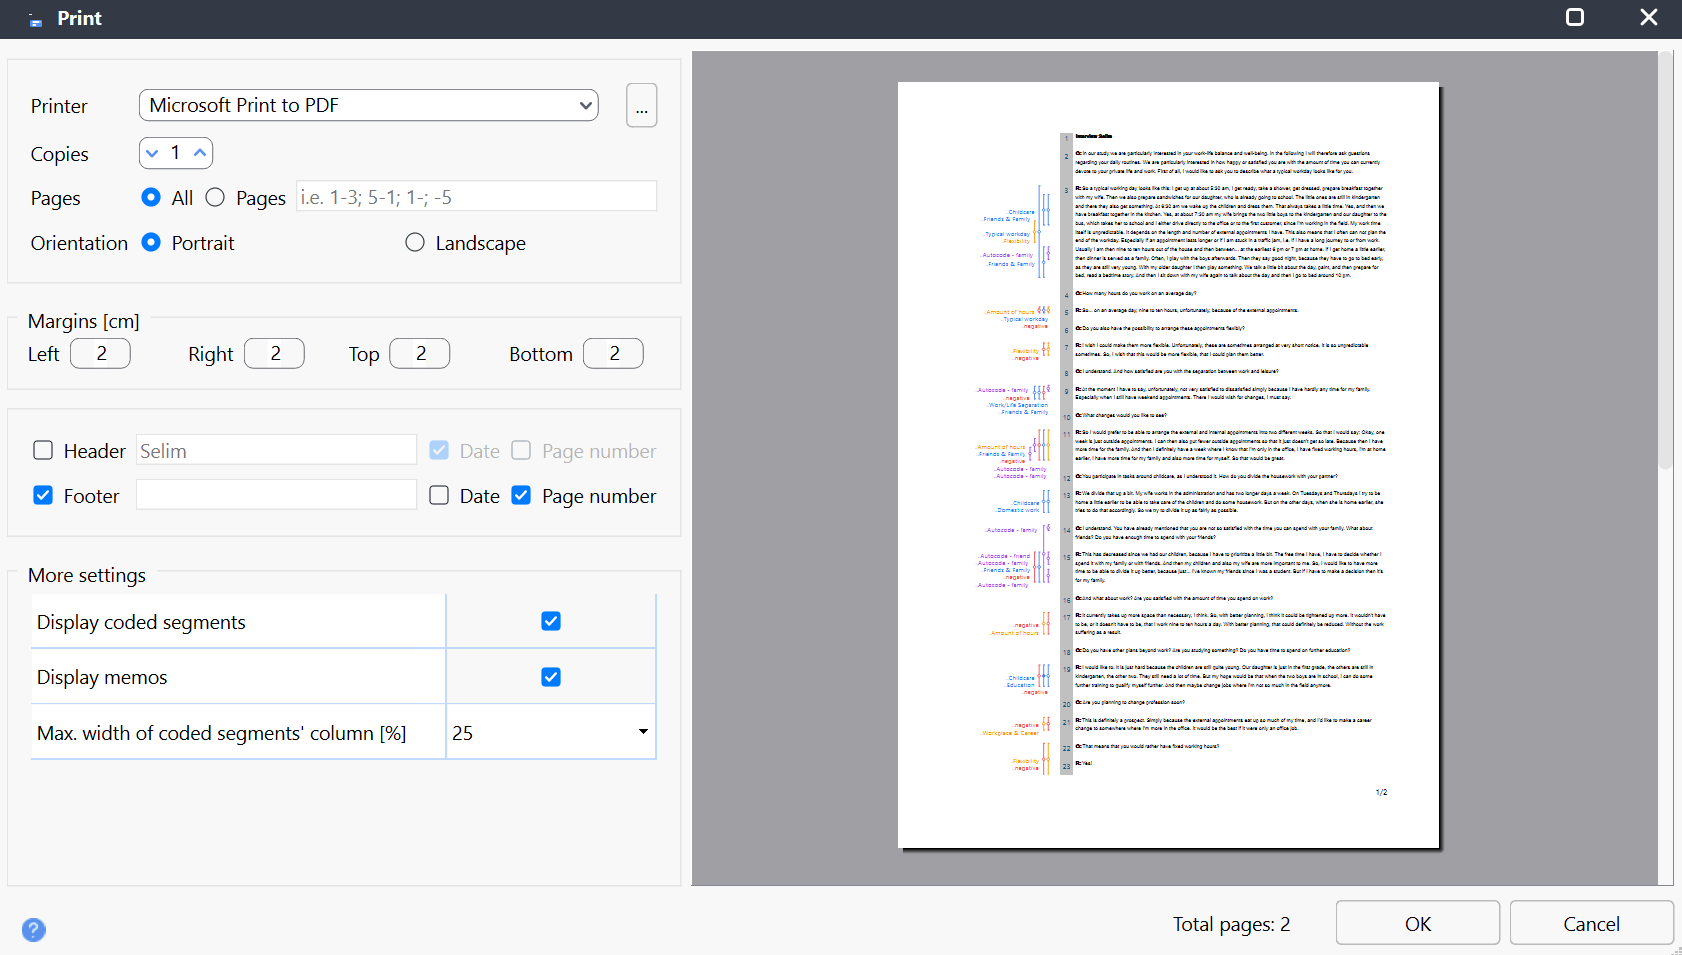
If you have a PDF printer installed, you can also export a transcript with codes in the page margin. In the print preview, you can adjust the page margins and enter header and footer text. The "More settings" section allows you to visualize coding stripes and memo icons to the left of the document:

