Starting MAXQDA
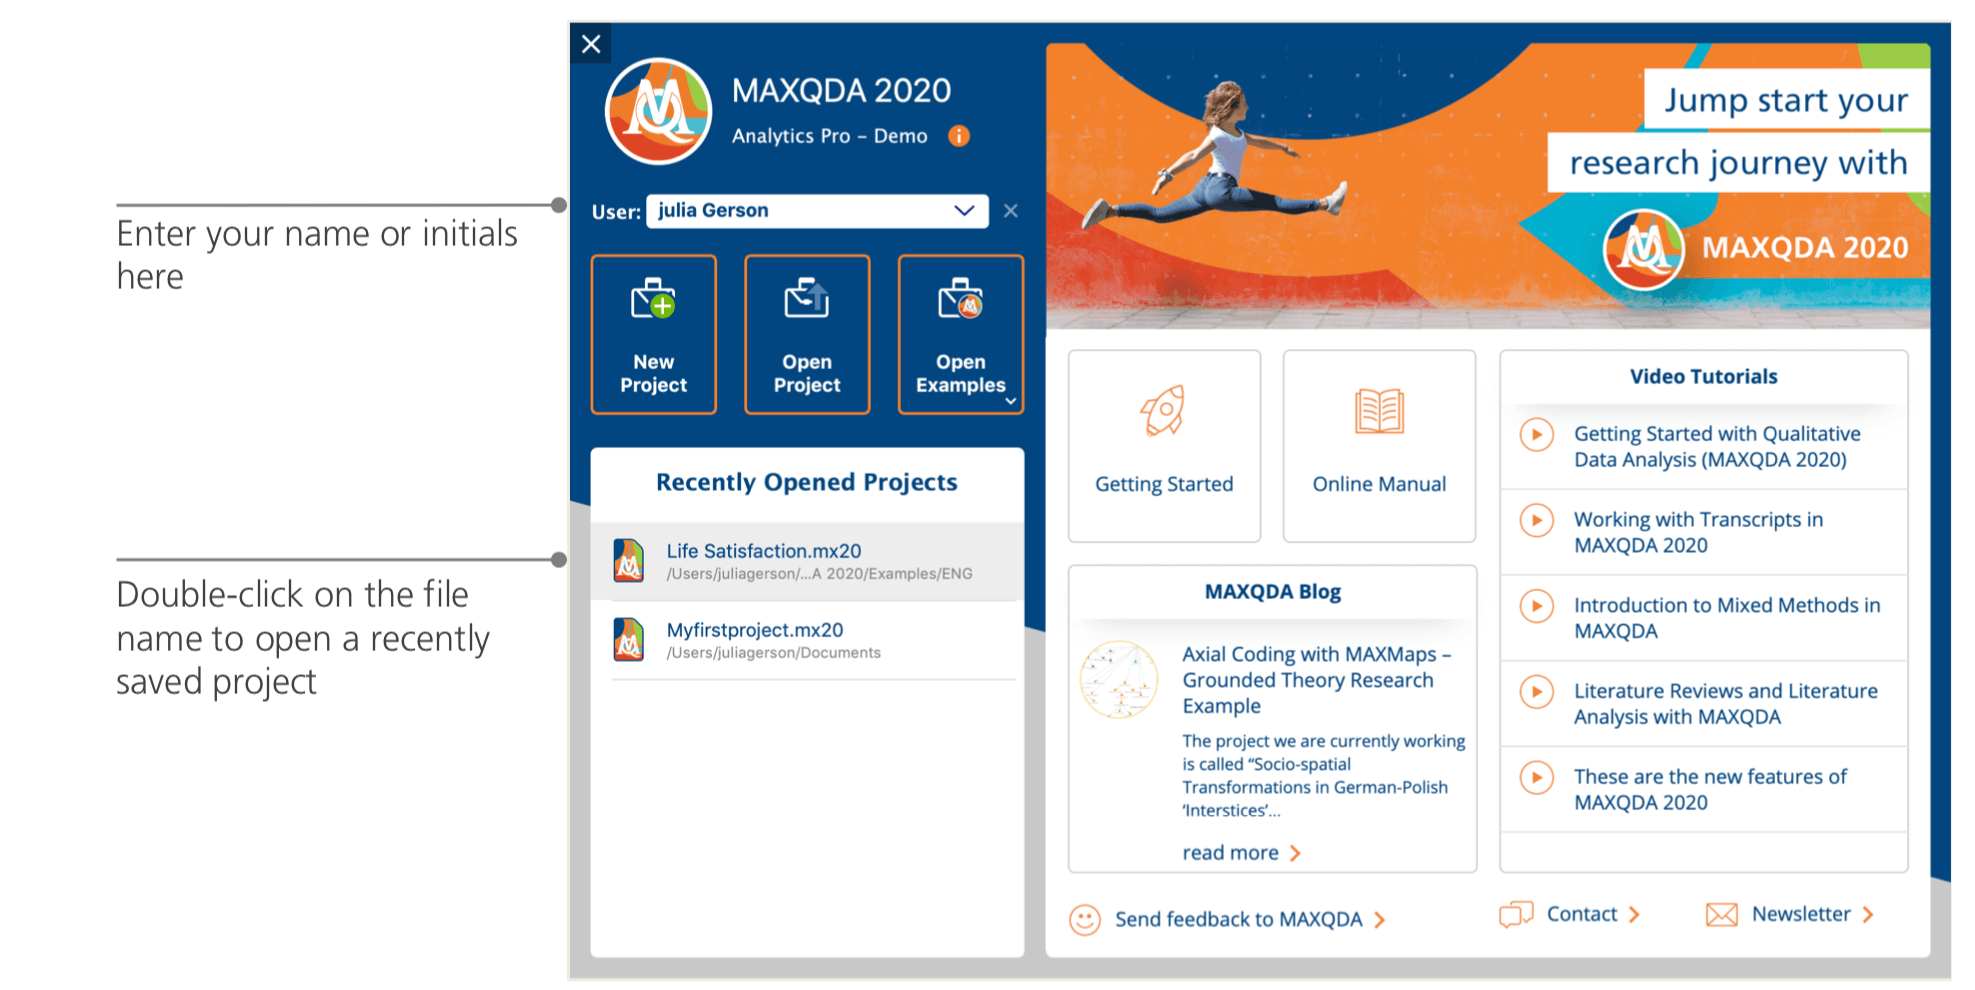
When opening MAXQDA, you will see a window on the top left that lets you type in a user name or a user abbreviation (which can be more practical in your later work).
To create your first MAXQDA project, click New Project, name your project and save it to a place of your choice. The best location for a MAXQDA project is inside a local folder on your computer, not on a network drive or on a USB flash drive. You should also avoid folders that are synchronized by a cloud service like iCloud, Dropbox or Google Drive. These services may compete for access to the project database while it is open in MAXQDA.
MAXQDA 2020 project files have the file ending MX20. You can also recognize these files in Windows Explorer or Mac Finder by the description “MAXQDA 2020 Project”.
MAXQDA uses Projects, like Excel uses workbooks (.xlsx), and Word uses text documents (.docx). Nearly everything you import to or create with MAXQDA (like your Codes and Memos) will be saved in Projects.
The right side of the start screen provides you with several links, for example the option to open up the MAXQDA online manual, watch MAXQDA video tutorials or send feedback to the MAXQDA team.
The user interface
Once you successfully created and saved your first MAXQDA project, the following screen will appear – with all of the main windows still mostly empty.
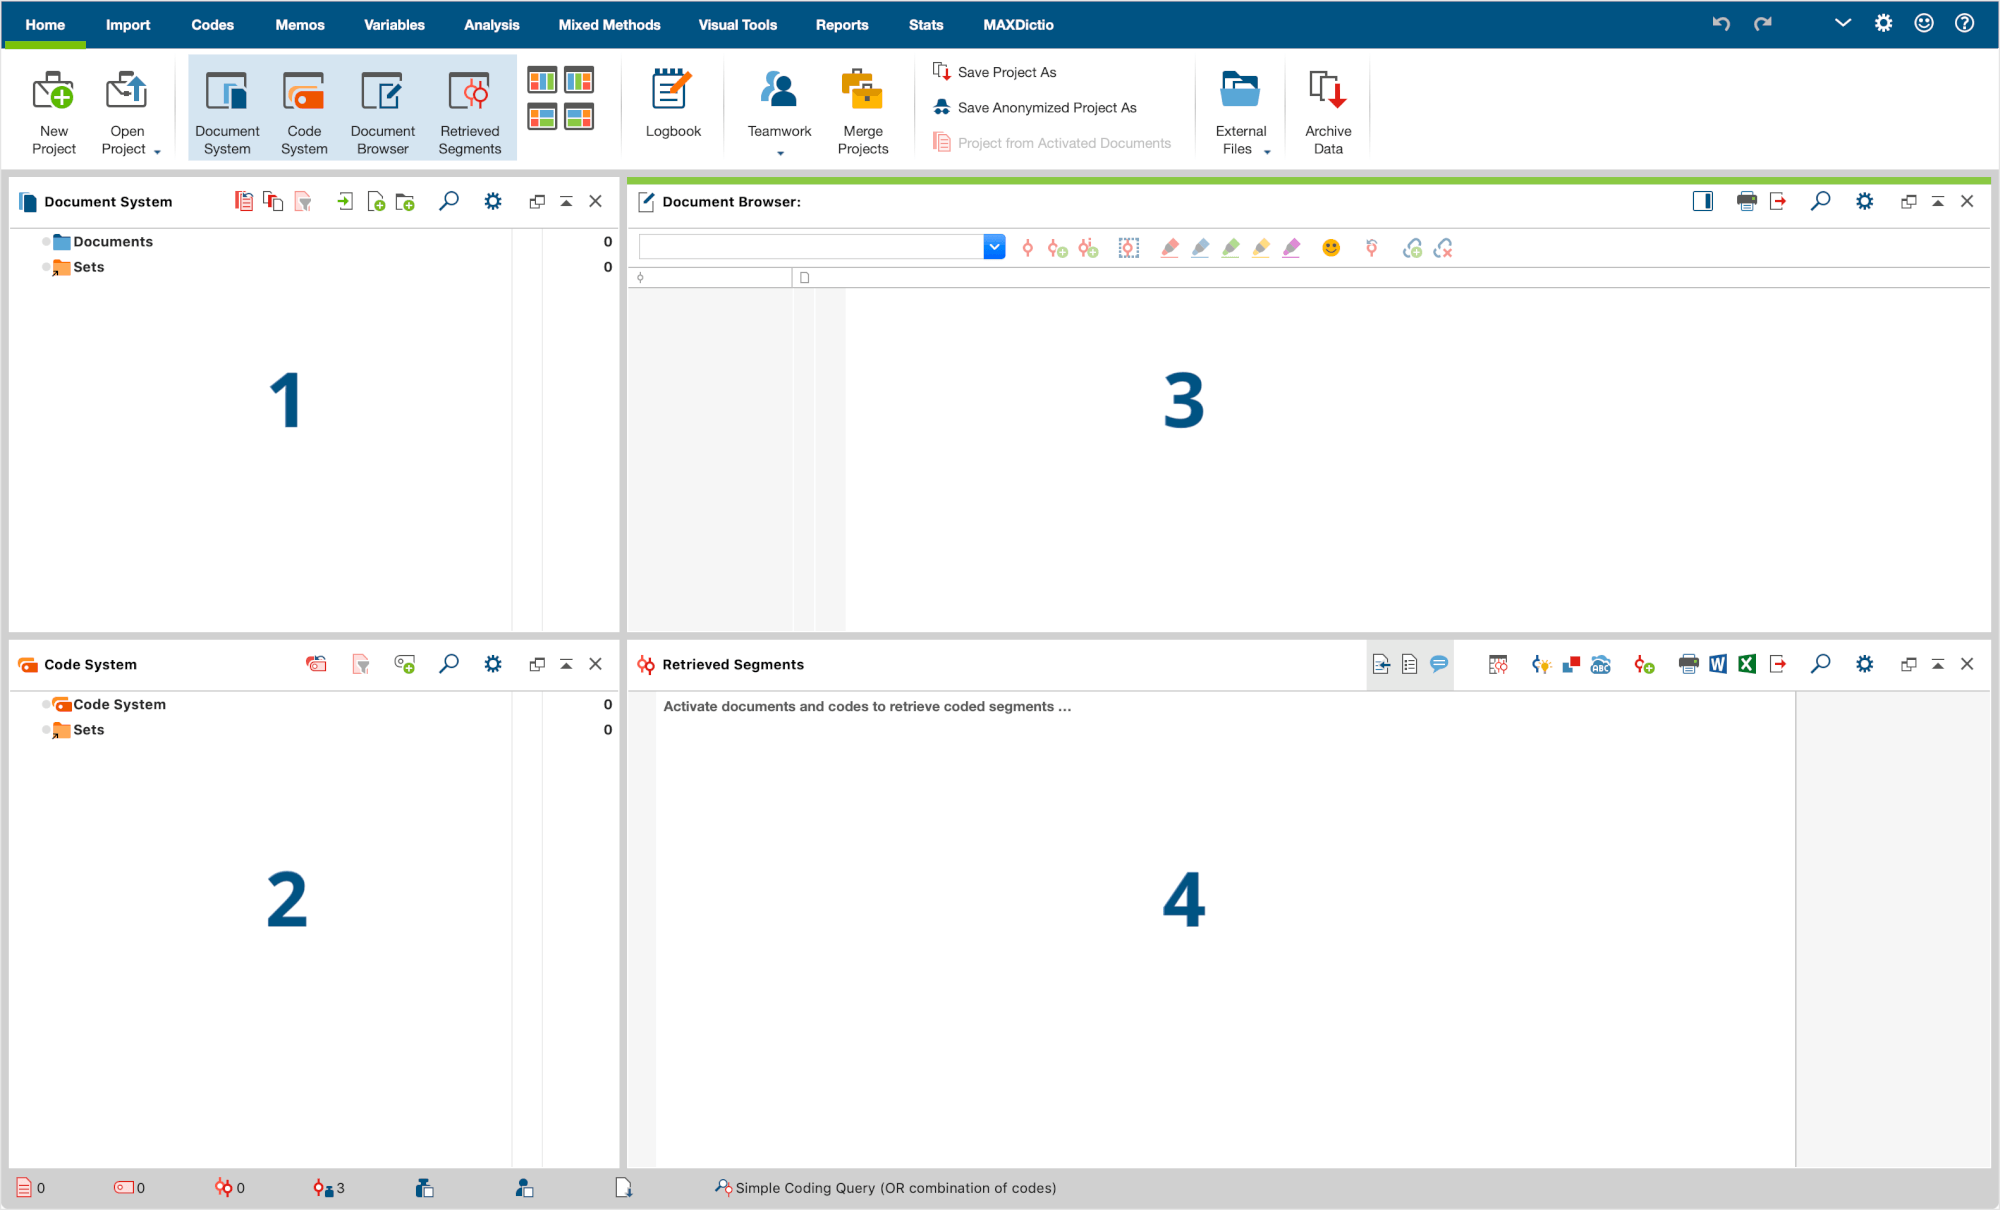
The division into four windows makes working with MAXQDA very easy: as you can see, the first window (1) in the upper left corner contains the Document System, the window below (2) contains the Code System, the window in the upper right corner (3) is the Document Browser, and the fourth window (4) is called Retrieved Segments. (Don’t worry, if you only see three windows. The fourth window is hidden when you start MAXQDA for the first time, because you don't need it at the beginning of your analysis.)
These four windows make up MAXQDA’s basic structure. You can rearrange them by swapping the windows’ sides, or by displaying the windows in three instead of two columns. You can change those settings in the main menu with the four symbols on the “Home” tab.
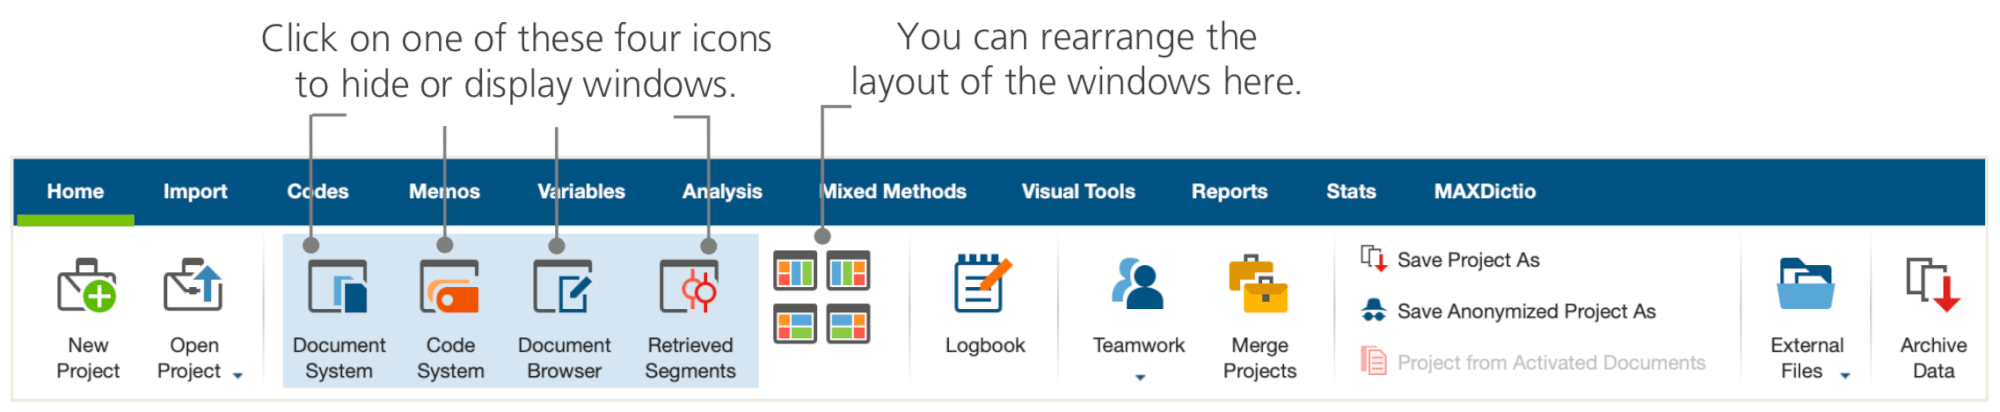
These tabs (some programs may call them “ribbons”) are located at the top of the MAXQDA window and offer access to many of MAXQDA’s features. On the “Home” tab you can open or close individual windows and arrange the screen according to the work you intend to do. On top of that, you can “undock” individual windows from the four-window structure and drag them to a different position or even a second computer screen. To open and close the windows, you can click on the button for the respective window(s), or simply close a window by clicking the “x” symbol in its upper right corner.
Now, let’s return to the four main windows! All the files you wish to work with will be imported into the Document System window. In case you use codes and subcodes, you can manage them in the Code System window. You can view and edit your data in the Document Browser. The Retrieved Segments window is where the results of your retrievals will be displayed later on.
A few notes on data storage and saving
MAXQDA administers everything you import, comment, or define in one single file, the Project file. So, once you create it: one project = one file. As we learned earlier, those files end in MX20 (older versions’ projects end in MX18 or MX12). MAXQDA Exchange files are special types of files used to make data exchanges between different program versions.
In order to ensure that your project is always safe, please read the following box:
To sum up, the Project file contains all the data material you need to work on your research project, bachelor thesis or master thesis. But there’s an exception to every rule: if you use a lot of audio or video files, the Project file may become too large, even after importing only a few video files. The standard setting therefore automatically embeds pictures and PDF documents only up to a certain file size (5 MB), whilst audio and video files are saved separately. Of course, you can change these settings. But when your Project file becomes too large, it may be difficult to exchange it with others.
Important keywords
Here are some of the most important keywords you should know for your work with MAXQDA:
Projects are the system files, or “work units” in MAXQDA. They contain all imported data, like texts, PDFs, pictures, tables as well as the codes, memos, comments you created.
Documents are those units that you want to analyze. They can be interviews, focus group protocols, video or audio recordings, articles from scientific journals and many more.
Codes are your most important analysis tool. They can be assigned to anything you consider worth marking, be it text segments, sections in a photo or parts of a video.
The Code system or Code tree describes the entirety of all codes and subcodes which can be ordered hierarchically.
Coding is the act of assigning a code to a marked segment of your material.
Coded segments are those material segments that have been assigned a code.
Memos basically serve as your records. You can note your ideas, assumptions, and questions for your next analysis steps, or formulate first hypotheses regarding possible connections in the data.
Comments are shorter than memos. You can use them to assign comments like “contradictory”, or “important part!” to coded segments.
Overviews are tabular presentations omnipresent in MAXQDA. There are overviews of coded segments, memos, variables, links and so on. All MAXQDA overviews follow the same principle and allow easy access to individual elements so that you don’t lose track of your data.