With the creation of programs like Google Earth and Google Maps, it has become possible to view any point on the globe with the appropriate coordinates. Geolinks or Georeferences are links between elements in MAXQDA and a selected place on the globe. You could, for example, choose to link each interview transcript in MAXQDA with the place the interviewee lives.
With the help of these geolinks you can also show geographic aspects of sociological research data. The use of georeferencing tools, especially Google Earth™, in combination with software for qualitative data analysis is fairly new. Cesar Cisneros, professor of sociology at Universitaria Autonoma Metropolitan Iztapalapa in Mexico, was one of the first to use this technique. In 2006, he used geolinks in MAXQDA for a research project in South America. MAXQDA includes a column in the “Document Browser” specifically for these geolinks. To create one, follow these steps:
- Go to the location in Google Earth™ that you would like to link to. You can then save the location by right-clicking on it and selecting Save Place As …
- Highlight the text or image segment to be linked in MAXQDA, right-click on it, and select Insert Geolink. Simply select the saved KML file in the window that appears, and the geolink has been created.
The KML file contains the coordinates to the saved place and everything else that Google Earth™ needs to take you directly to that location. When you click on the geolink in MAXQDA, Google Maps will open in your Internet browser and the location will be marked with a red dot.
By hovering your mouse over the geolink visualization, you will see the coordinates that are saved for that location. The screenshot below shows you this below. It is a geolink in the interview transcript “Teresa,” linking to the place that she lives in “New York, NY, USA” at the exact coordinates.
Geolinks are visualized similar to other links (blue and underlined), but they also have their own visualization column next to the opened document. If the column is not shown, right-click somewhere in the document in the “Document Browser” and select Display Geolink Bar. This bar makes it easy to differentiate between regular internal links and the geolinks.

Segments that contain geolinks can be coded just as any other segment can.
Geolinks can be easily viewed in the “Overview of links” table, available in the “Document System” at multiple levels (project, document group or document). In the first column of the chart, geolinks are marked with an blue locator symbol. If you click on the column header of this column, the entire column will be sorted by the symbols, so it is possible to obtain a successive list of all geolinks.

Inserting geolinks as objects in MAXMaps
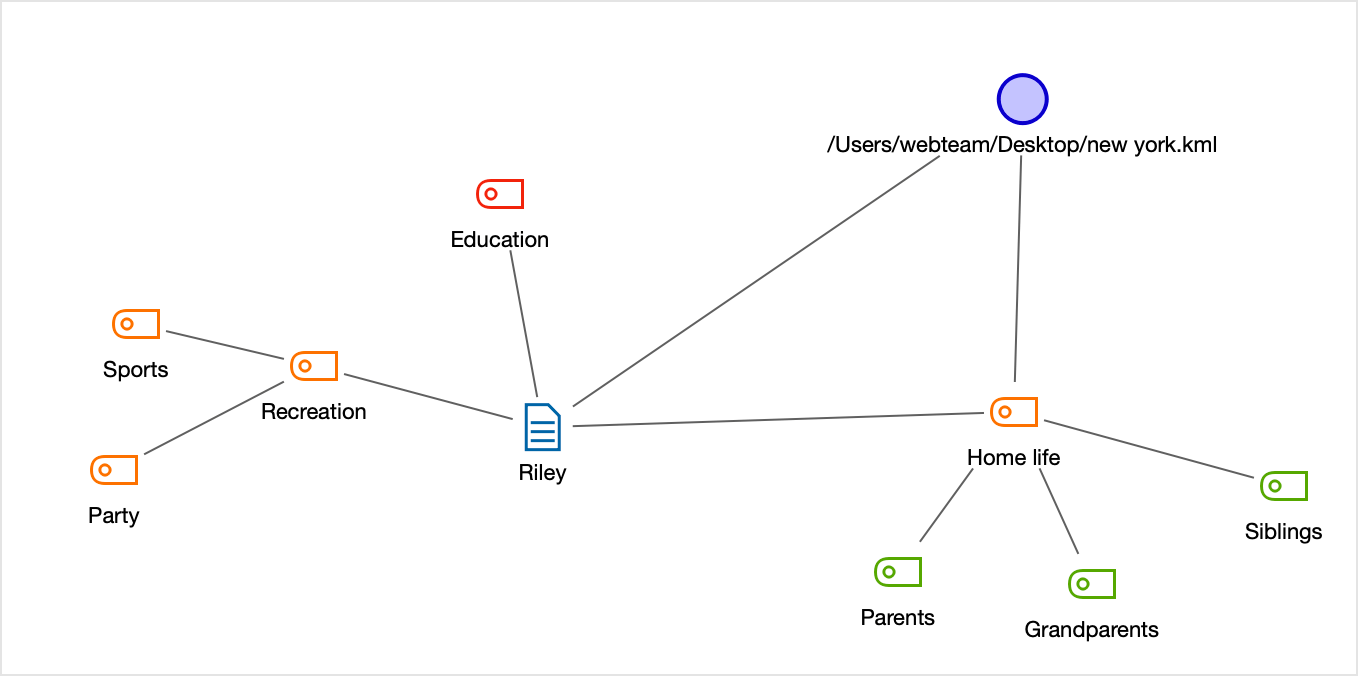
Geolinks can also be inserted in MAXMaps by right-clicking in a map and selecting Insert Geolink. You will then be able to select the appropriate KML file from the window that appears.
The MAXMaps screen then looks as follows:

The name of the location in Google Earth is automatically inserted as the label for the geolink in the map. This label is usually long and can be easily changed.
The inserted geolink can then be set up, visualized, linked to other objects, and moved around just like any other object in MAXMaps. You can, for example, insert a picture to replace the blue circle, change its size, etc.

Geolinking for codes, documents, memos and coded segments in MAXMaps
All MAXQDA objects inserted in MAXMaps can be connected to a geolink. As with the free objects mentioned above, a blue ball appears in the top right of object’s frame when it is clicked on. Double-clicking on the ball opens Google Earth™ and takes you to the assigned location.
Using a background image with geolinks in MAXMaps
Google Earth™ allows you to save any view as a JPG file, which can be inserted in MAXMaps as the background.
Invisible hotspots as well as all aspects of your MAXQDA project can then be inserted and placed on the newly-imported background.
