Moving codes
Changing the structure of the category system is not difficult. All codes can be moved with the mouse and the drag-and-drop function.
In the following example, the “Code System” contains four codes (A, B, C and D).

To move Code D to the top of the list, you would need to do the following: Click on Code D and drag it in front of Code A while holding down the left mouse button, then, when a line appears, drop the code.
It is also easy to make a code a subcode of another code. If you want Code B to become a subcode of Code A, for example, you would carry out the following actions: Click on Code B, drag it to Code A, and release as soon as Code A has a green background. Code B is then added as a subcode of Code A.
Move multiple codes
You can select multiple separate codes while holding down the Alt (Windows) or option ⌥ (Mac) key and then move your selection while holding down the mouse button. To select a range of codes, first click on a code and then click on a second code while holding down the Shift key ⇧. This will then also select all codes between the clicked codes.
Sorting subcodes
Subcode can be sorted in ascending and descending order by name and by frequency, by right-clicking the parent code and selecting Subcodes... > Sort from the context menu.
Adding a new top-level code
A common procedure when working with codes is to group previously defined codes under a new, more abstract category, as shown in the next diagram:
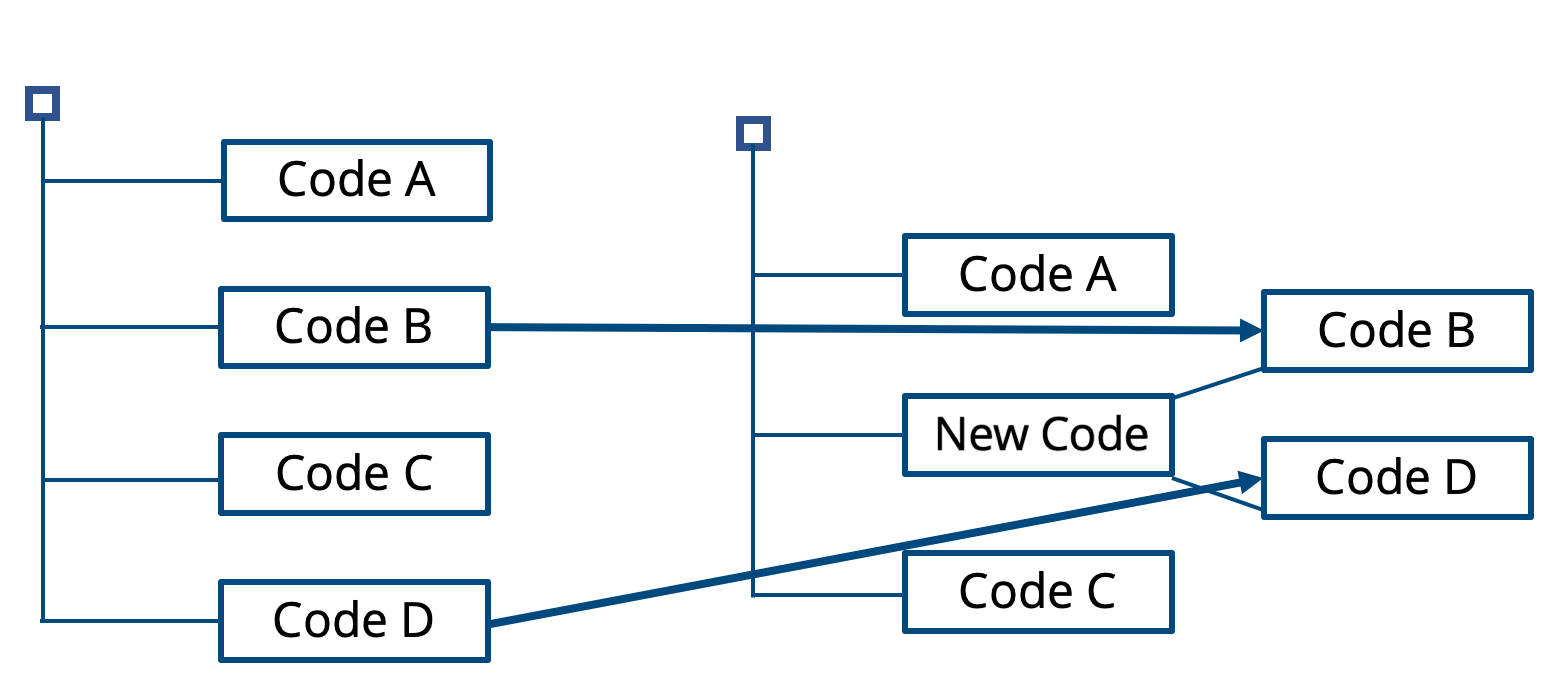
MAXQDA’s hierarchical “Code System” makes it easy to group existing codes under new top-level codes. Reorganizing the “Code System” can be done at any time during the analysis process:
- Create a new code at the top level of the hierarchy ("new" in the example above).
- Drag Code B to "new" and release it; it will be inserted as a subcode.
- Do the same with Code D.

Dividing a code into subcodes
Often when working with a code system, it is desirable to differentiate between elements grouped under one code. In MAXQDA this corresponds to dividing a code into two or more subcodes. For example, imagine you have created a code named “Family” and have assigned document segments, in which an interviewee talks about his family, to this code. Then imagine that it becomes necessary to differentiate between “Mother”, “Father”, and “Siblings”.
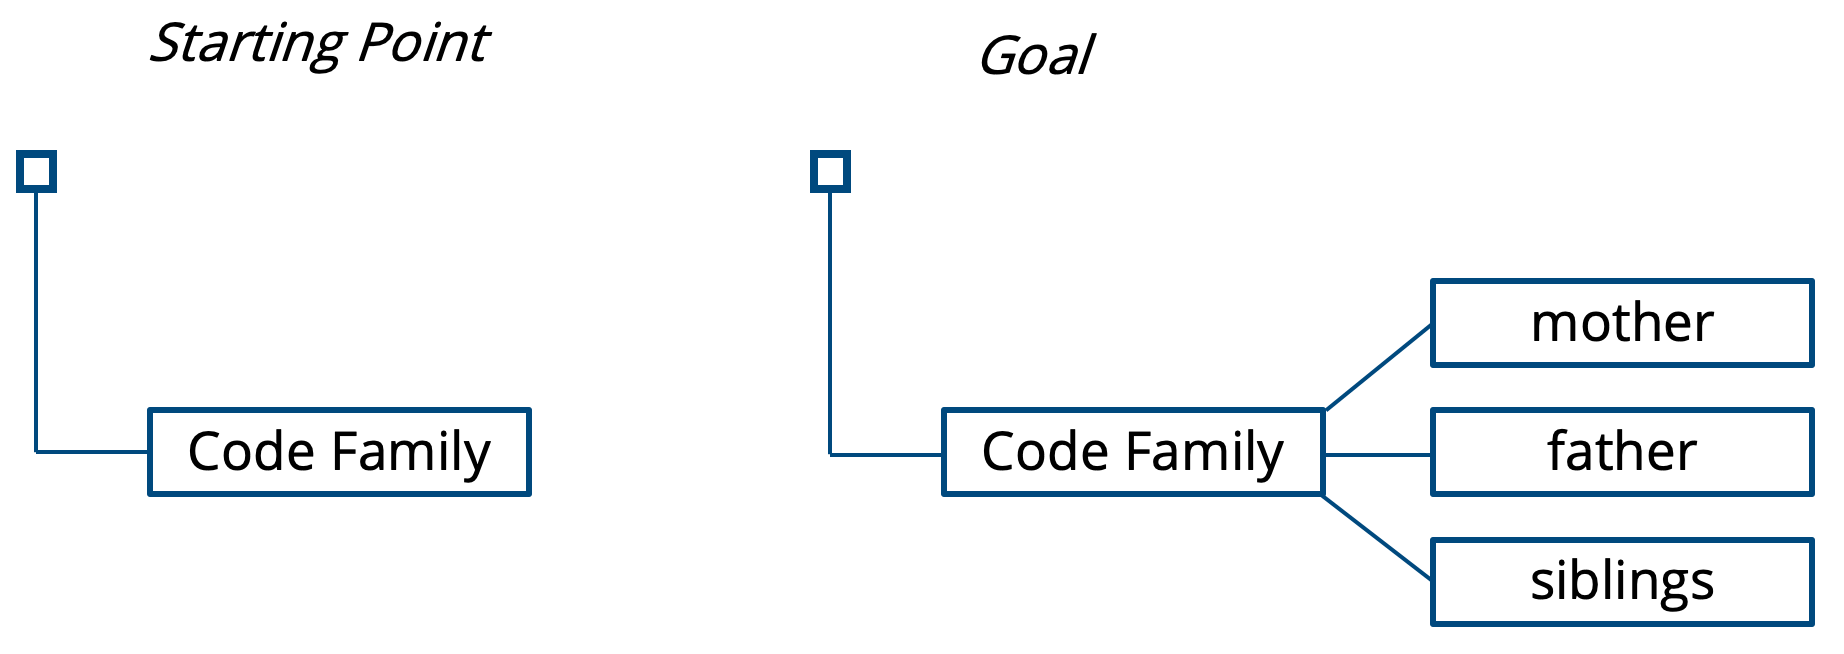
This differentiation of a category does not work automatically, but requires that each segment previously coded under "Family" is re-read by the researchers and assigned to one of the three new subcategories. This can be done particularly conveniently in the Smart Coding Tool, which was specifically designed for this purpose.
Codes can be divided as follows:
- Activate all documents and the code “Family.”
- Create three subcodes for “Family”: “Mother,” “Father,” and “Siblings.” Only the code to be differentiated, in this case "Family", should still be activated, but not the three new subcategories, in order to be able to carry out the reassignment conveniently.

- Start with the first segment in the "Retrieved Segments" window and decide to which of the three subcodes this segment is to be assigned.
- Click on the coding strip to the left of the segment and move it to the selected subcode while holding down the left mouse button. During this process, the segment is moved to the selected subcode, i.e. the coding with the parent code is deleted immediately.
This is how you can work with all segments, so you continue in the same manner for the second. When you get to the end of the list, all segments will have been re-classified - they have been assigned to one of the three codes in question.
Alternatively, you can click on the document name below a segment in the "Retrieved Segments" window in step 4 to display the segment in the "Document Browser". There you can code as usual, i.e. by clicking and dragging with the mouse and assigning the desired subcode. With this procedure, however, the old codings in the upper code are still retained, i.e. all segments still have the assignments to the code "Family".
However, this is normally not the intention - the old encodings of the parent code must be removed. You can double-click on the parent code to list its encodings in the "Overview of Coded Segments", select all encodings and then remove them by clicking on the delete symbol in the toolbar.
Merging Codes
It is often necessary to combine two or more codes that capture something similar in the data material into a single code.
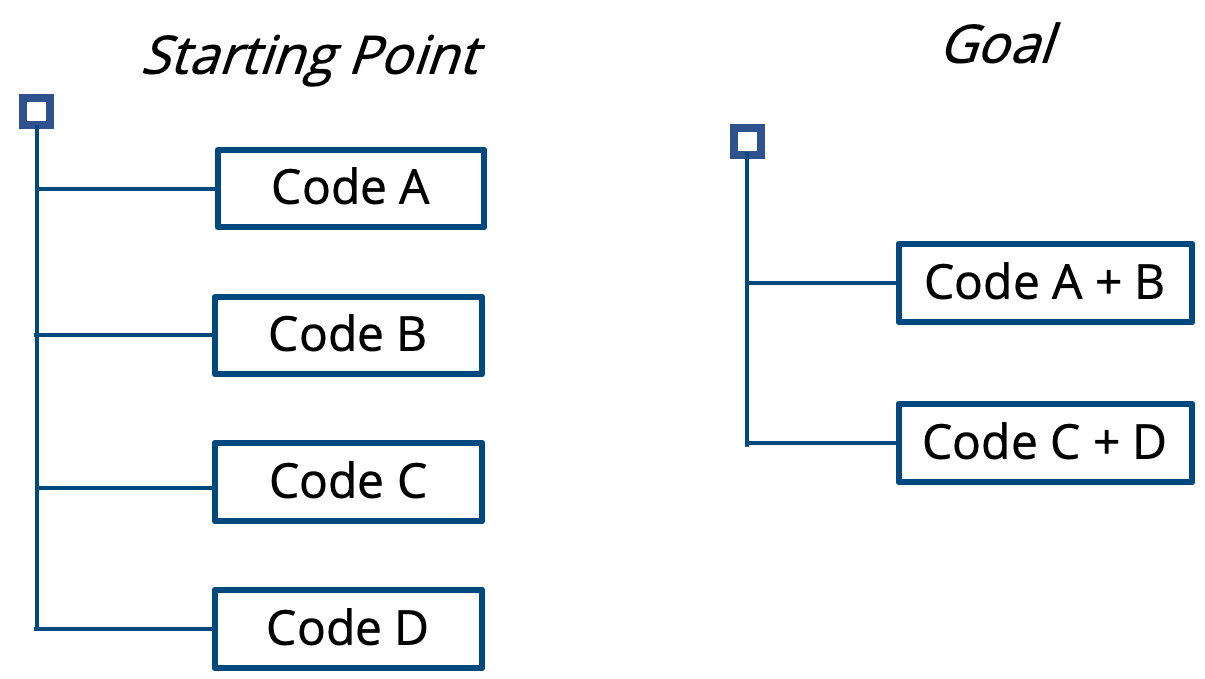
Merging two codes with the mouse
For two codes, this can be done very easily via drag & drop: Click on the code you want to merge with another code and drag it to the highlighted word "Merge" that appears to the right of the target code and release the mouse cursor on that word.

As soon as you release the mouse button on the word " Merge ", MAXQDA moves all encodings of the source code into the target code and deletes the source code. In the example, the coded segments of Code C are added to the segments already existing in Code D. The code C is then deleted.
To indicate that the segments of another code were inserted into a code by fusion, a plus sign in brackets "(+)" is added after the target code.
Merging multiple codes using the context menu
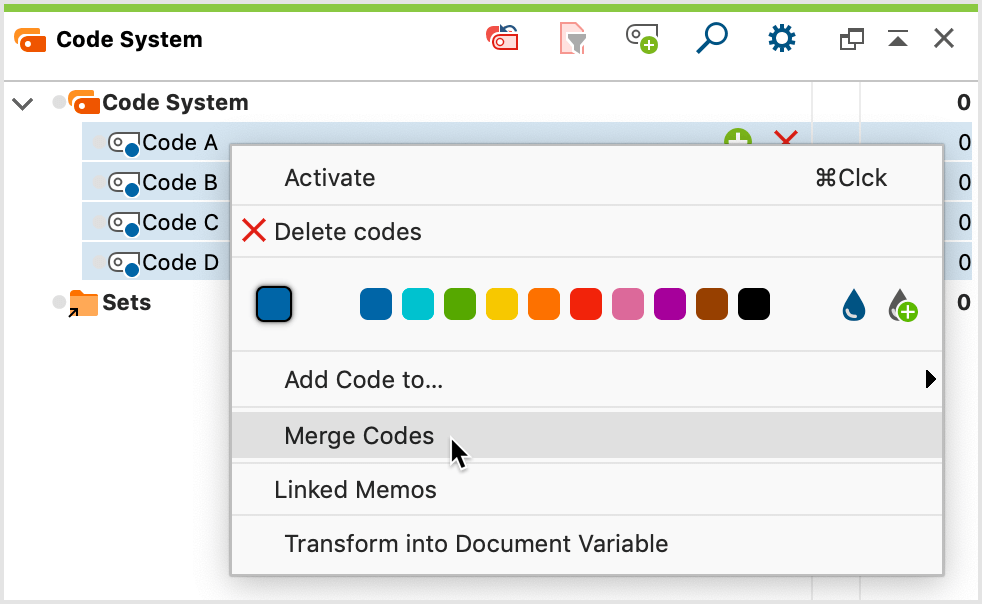
You can also merge several codes at once at any time:
- To select all codes you want to merge, hold down the Alt (Windows) or the option ⌥ (Mac) key and click on each code with the mouse button.
- After that, right-click on the code into which all other codes are to be merged.
- Select Merge Codes from the context menu that appears.
Code Memo behavior during mergers
In MAXQDA each code can have only one code memo, so the question arises what happens with the code memos of the codes that are being merged:
- If only one of the merged codes has a memo, it is attached to the remaining target code.
- If several codes have a memo, MAXQDA asks whether the memo texts should be combined at the target code or whether the memos should be converted into free memos. Free memos are not directly assigned to any element in MAXQDA and can be displayed e.g. via the Memos tab.
Copying subcodes
In some cases, you will be setting up the same subcodes for various codes. You might, for example, have the codes “Childhood,” “Teenage Years,” and “Adult Life,” which should each have the subcodes “Education,” “Family,” “Friends,” and “Memorable Experiences.” So that you don’t have to create these four subcodes three times, you have the option of setting them up for one of the main codes, copying its subcodes, and pasting them into the other main codes. To do so, you would follow these steps:
- Right-click on the code and select Subcodes... > Copy from the context menu.
- Click on any other code and select Subcodes... > Paste from the context menu.
MAXQDA then adds the copied sub-codes in the same order as the original code. The newly inserted sub-codes keep the Color previously assigned to them.