MAXQDA supports teams working on projects with an optional user management system, in which you can set different rights for different groups of users.
To activate the user management system, select Home > User management from the ribbon menu.

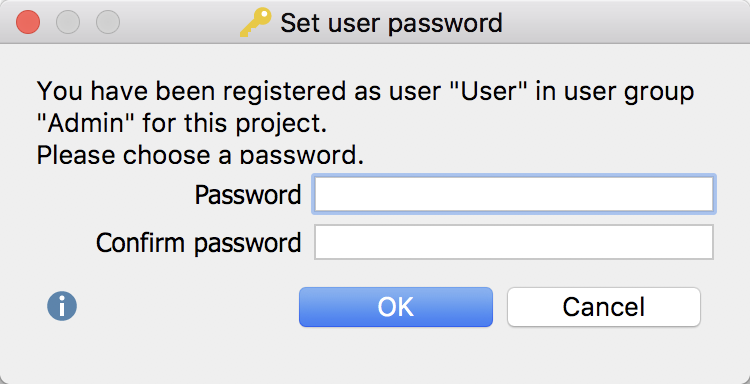
The user who activates the user management will automatically become administrator and has to set a password for his/her username.

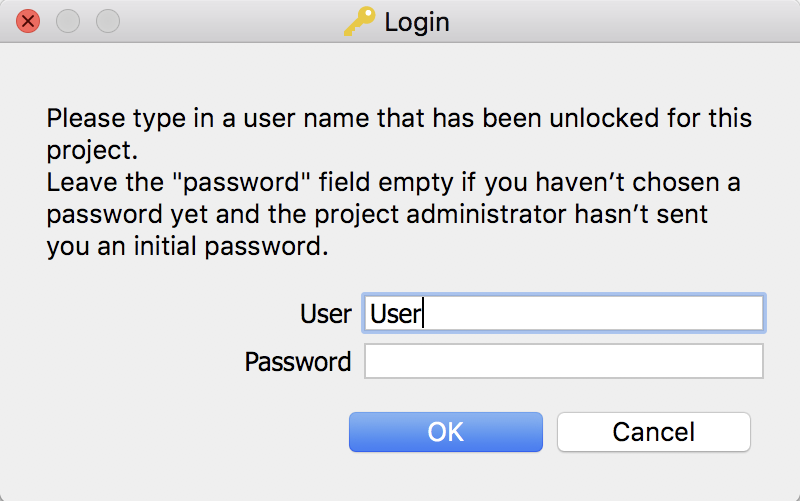
Once the administrator has been established, user management can only be opened with a valid administrator name and password. The next time the project is opened a login window will appear and you'll be prompted for a valid username and password.

In the default configuration, only administrators are able to open the user management, add users or change rights.
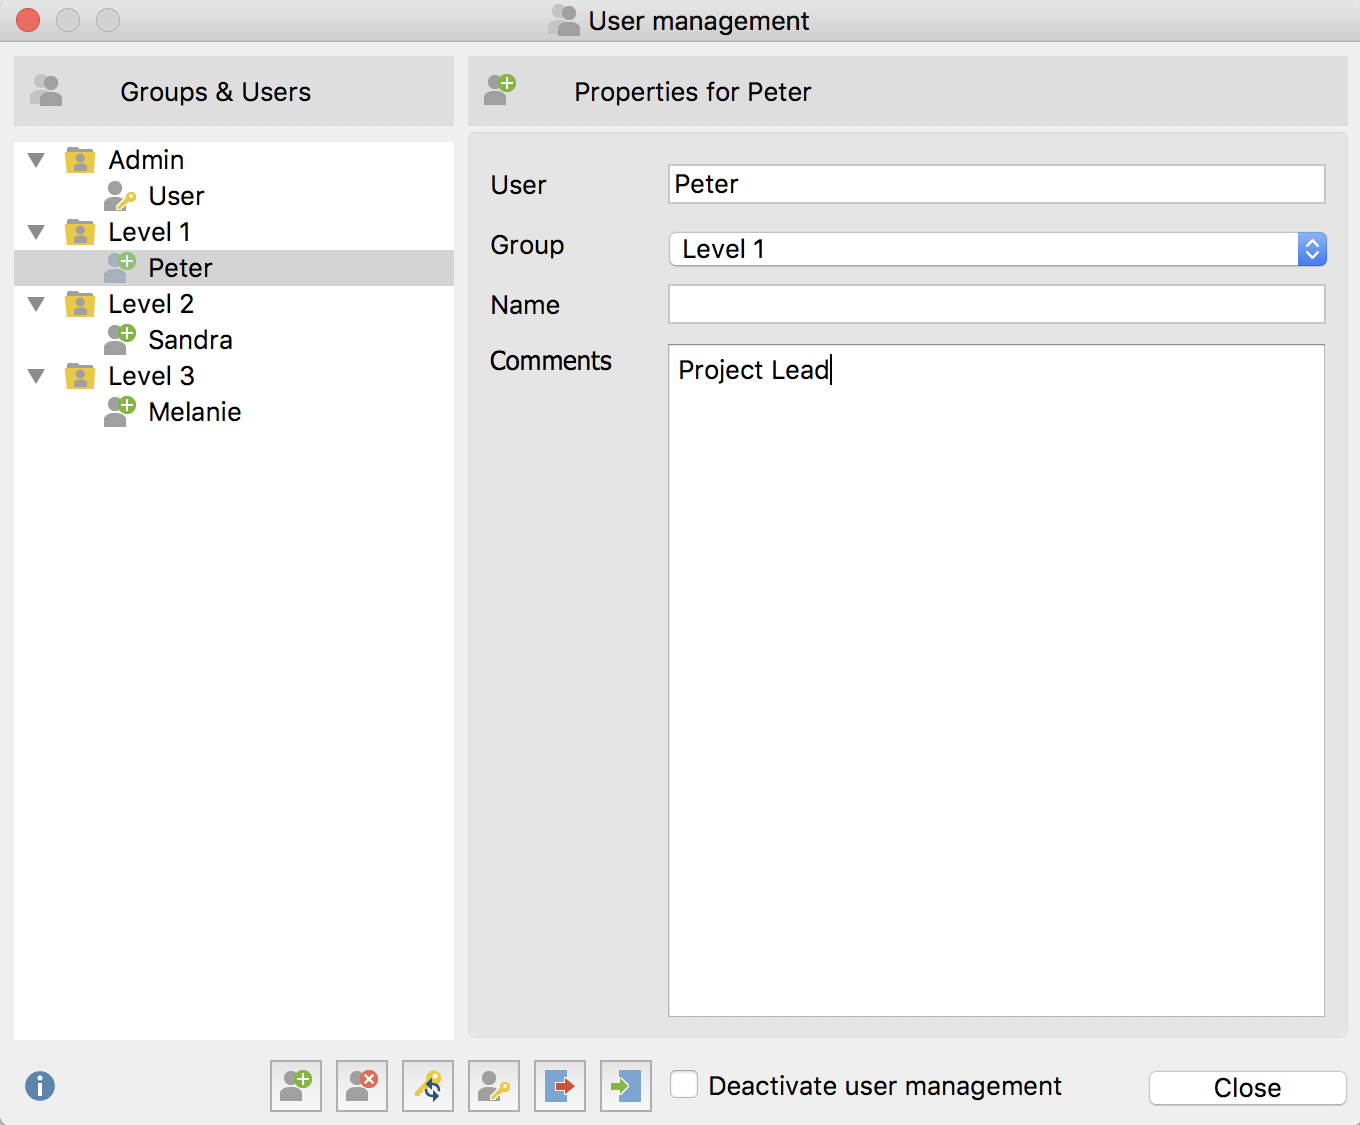
The User Management window
In the main user management window, you can create new users, remove existing users, and define the rights of individual user groups.

On the left side of the user management window, the various levels (Admin and Levels 1-3) are displayed. The right side of the window contains information about each user, which can be created or edited here; it is also here that users can be assigned to one of four user groups.
Adding a new user
Click on the Add user ![]() button to add a new user. The new user settings can subsequently be edited:
button to add a new user. The new user settings can subsequently be edited:
User: Here you can set the username (= Login name), with which the user can log into the project.
Group: Here you can set the level within the hierarchy to which the user is assigned.
Name: Here you can enter the user's real name.
Comments: In this field, you can post comments regarding the user.
The properties of a user can be modified at any time by clicking on the username in the left side of the window.
Deleting users
To delete a user, select the username in the left side of the window and click the ![]() Delete user button. You will be required to confirm your selection.
Delete user button. You will be required to confirm your selection.
User passwords
User passwords can be managed in two ways. If no password has been set by an admin, each user must first log in and set his own password. Alternatively, the administrator can set an initial password and communicate it to the other users. In order to set the initial password, click the ![]() Set initial password button. The users can then access the MAXQDA project with this password, and set their own passwords upon first use. Only the user will know this new password. If a user forgets his password, the administrator can reset it by clicking the
Set initial password button. The users can then access the MAXQDA project with this password, and set their own passwords upon first use. Only the user will know this new password. If a user forgets his password, the administrator can reset it by clicking the ![]() Reset user password button. The administrator can also reset the initial password in this way.
Reset user password button. The administrator can also reset the initial password in this way.
Initial password
The purpose of the initial password is to act as a barrier to entry into the project. New users must enter this password the first time they log into a locked MAXQDA project, before setting their personal passwords.
Hierarchical levels
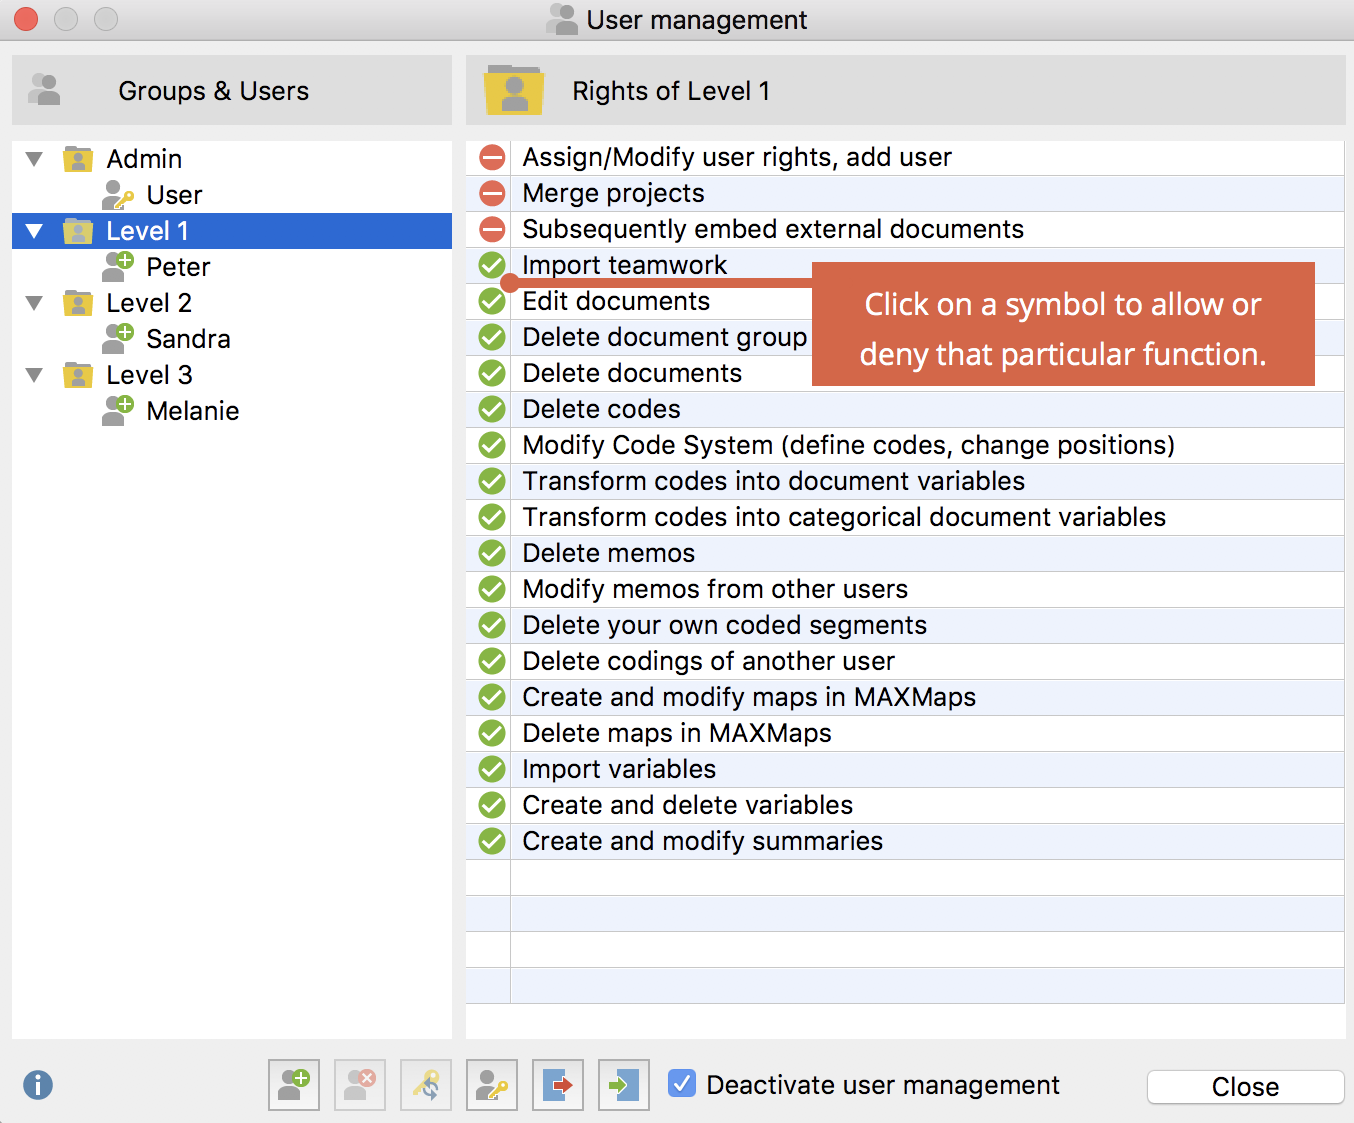
When you click on a particular level in the left side of the window, the rights of the users at this level will be displayed on the right side of the window. Aside from the Admin Level, users can be placed in three different groups, from Level 1 to Level 3. In a research project, the levels can be established, for example, in the following way:
- Level 1: Project leaders
- Level 2: Research associates, who can import and delete texts, work with the “Code System,” and write, edit and delete memos
- Level 3: Student associates, who work primarily on the coding of material
The following image displays the default Level 1 functions. For example, the top three functions are reserved by default for the Admin Level. User rights can be modified at any time by clicking on the red or green icon in front each program function. Any number of users can be assigned to each level, including the Admin Level. At least one administrator must be defined in any case, meaning the last entry in this list cannot be deleted.

Modifying user settings
Click on a username in the left side of the window in order to modify settings in the right side.
Importing and Exporting the Entire Admin System
It is possible to export the entire Admin System of a MAXQDA project, including usernames, passwords and user rights. Click on the ![]() Export button on the lower edge of the main window. The data will be saved in MXUSR format, which is, of course, encrypted. This file can be imported into another MAXQDA project by clicking on the
Export button on the lower edge of the main window. The data will be saved in MXUSR format, which is, of course, encrypted. This file can be imported into another MAXQDA project by clicking on the ![]() Import button, thus saving the administrator a lot of time.
Import button, thus saving the administrator a lot of time.
Deactivating the User Management system
It is possible to deactivate user management at any tim by opening the User Management window via Home > User Management > Deactivate User Management and checking the corresponding box at the lower edge of the window, then closing the window.

All usernames and passwords will be saved in the project, so it is possible to reactivate the user management at any time.
