Once you have clicked on ![]() Start Organizing Codes in the main ribbon menu, you can start structuring and organization your codes. The display will change at this point; the "Code System" on the left will close and a color panel will appear on the right side of the workspace that displays all of the colors currently in use.
Start Organizing Codes in the main ribbon menu, you can start structuring and organization your codes. The display will change at this point; the "Code System" on the left will close and a color panel will appear on the right side of the workspace that displays all of the colors currently in use.

All codes can be freely arranged on the workspace with the mouse. You can move multiple codes at once by drawing a border around them with the mouse and then positioning them as desired.
The following options are available in Creative Coding Mode:
- Creating relationships between codes
- Creating new codes
- Merging codes
- Modifying code colors
- Undoing changes
- Displaying coded segments and code frequency of a code
Creating connections between codes
As displayed in the image above, connections between codes are shown with an arrow: When an arrow is pointing at a code, it means that this code is a subcode of the other.
To make Code A a subcode of Code B, proceed as follows:
- Go into Link Mode by clicking the Link (Define as Subcode)
 symbol.
 - Click on the desired top-level code and draw an arrow to the desired subcode.
To avoid the occurrence of circular references, existing assignments of the subcode to other codes are removed.
To delete an arrow, right-click on it and select Remove from map.
Adding new codes
Users often wish to group multiple codes under an abstract concept. For this purpose, you can always create new codes by clicking the Insert new code ![]() symbol. MAXQDA will subsequently insert the new code in the top left of the workspace.
symbol. MAXQDA will subsequently insert the new code in the top left of the workspace.
As per usual, you can rename the code by double-clicking on its label.
Merging codes
To merge two codes, proceed as follows:
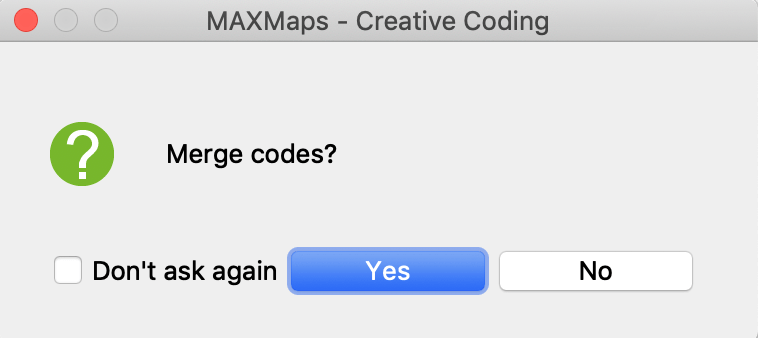
- Drag the first code onto the second code so that the “Merge codes” tooltip appears. When you release the mouse button, the following confirmation message will appear:

- After clicking on Yes the shifted code disappears from the map and its code assignments are assigned to the target code.
If you have activated the display of the code frequencies, you can directly see that the number of coded segments under the target code has increased. Since some segments may already be coded with the target code, the frequency displayed may be less than the sum of the code frequencies of the merged codes. The merge is provisional until you quit Creative Coding, thereby updating the code system. Then the coded segments are assigned to the target code and the source code is deleted in the code system.
If you choose Don’t ask again, the inquiry for the merging of codes will no longer appear in the current Creative Coding session.
Dealing with memos when merging codes
Of course, both codes may include a code memo. In this case MAXQDA will ask you how to deal with the memo content of the moved code:
Changing the color and appearance of codes
The color and appearance of codes can be modified as follows:
- First, make sure that the Link Mode is off. If necessary, click the Link (Define as subcode) icon to turn off Link Mode.
- Click the code whose color you wish to change. To select multiple codes at once, draw a border around the codes with the mouse or click on each code while holding the Ctrl key (Windows) or cmd key (Mac).
- Click on a color in the color panel on the right to select a color already in use. Alternatively, you can assign a new color from the color panel.
If you change the color of a parent code, the color of the subcodes will also be changed following confirmation. If you create a new color, MAXQDA will apply this new color to selected codes automatically.
To modify the appearance of an individual code, double-click on the code. A dialog window will appear in which you can define the font size, symbol size, etc.
Undoing changes
Recent actions can be undone step-by-step by clicking the Undo changes ![]() symbol.
symbol.
Displaying the code frequency and coded segments of a code
In order to organize codes, it can be helpful to visualize the number of each of their associated coded segments. By clicking the Display code frequency ![]() symbol, the code frequency will be automatically displayed in brackets after the code name.
symbol, the code frequency will be automatically displayed in brackets after the code name.
When you right-click on a code, a context menu will appear from which you can access the following options:
- Memo – Opens the associated code memo.
- Overview of coded segments – Opens the “Overview of coded segments” where you can inspect the coded segments of the code.
- Overview of linked memos – Opens the “Overview of memos” where you can browse all memos of the selected code.
Saving the current state of the process as a MAXMap
Working on the code structure with Creative Coding may take some time and may include different stages of development. While you start with arranging codes in groups first, you possibly are merging codes and creating new higher level codes later on. To track these different stages MAXQDA allows you to save the current status of your work as a regular MAXMap: just click on ![]() Save copy of current Creative Coding map as a standard MAXMap in the Creative Coding tab. The map will be available after quitting Creative Coding when you start Visual Tools > MAXMaps from the main menu.
Save copy of current Creative Coding map as a standard MAXMap in the Creative Coding tab. The map will be available after quitting Creative Coding when you start Visual Tools > MAXMaps from the main menu.