In this MAXQDA Getting Started Guide, we’ll take you through the basic features and functions of MAXQDA in less than 30 minutes – which means you can get started as quickly and easily as possible.
Starting the program
Once you have opened the program, the first thing you'll see is the MAXQDA welcome screen. On the left, you can start new projects or open any existing projects. On the right, you'll see videos and links with all the latest MAXQDA news and learning materials.

Enter your username in the top left text field and click the “New Project” button. Your username will then be linked to (almost) every action you perform, which makes it much easier to keep track of your work when analyzing your research in teams.
Your project file will be saved with the extension .mx18 – and since MAXQDA is a database program, every change you make to or within your project will be saved automatically as you go. Of course, it’s always a good idea to back up your project files regularly. The best way to do this is to duplicate your project file after longer sessions and copy it to a physically separate data storage device such as, for example, a second hard drive or USB. You can also make sure your project files are backed up automatically – learn more about this optione here.
Four functions – four windows
Let’s take a step-by-step approach to MAXQDA’s four basic functions, which correspond to the four main windows of the program’s user interface:
- Your data - import and organize your data in the Document System
- Code your data - view, edit and categorize (code) your data in the Document Browser
- Your codes - organize your codes (categories) in the Code System
- Display your coded data - search for and display certain “coded segments” (for example, all data selections assigned with the the codes A, B and C in the documents X, Y and Z) in the Retrieved Segments window.

1. Your data – the "Document System"
You can directly import and analyze the most common forms of data with MAXQDA, including text documents, tables, images, PDF documents or audio and video files. Additionally, you can import results from (online) surveys, webpages, Twitter data, transcriptions with timestamps or focus group transcripts in such a way that information beyond the text is also recognized by MAXQDA and automatically processed in the form of codes or variables.

To import any of these file types, go to the "Import" tab and select "Import documents". In the dialog box that appears, navigate to where your data is saved and select the documents you would like to import. Alternatively, you can simply drag and drop these files from Windows Explorer or Mac Finder into the "Document System" window.
2. View, edit and code your data – the "Document Browser"
View
All texts, tables or images that you import into MAXQDA can be viewed here in the Document Browser. (There is also a media player for audio and video files.) On the left side of the page, you will see your coded segments, any memos you have written, and any time stamps (for audio and video recordings).

Edit
By default, MAXQDA will open your documents in such a way that allows you to code them but not edit them. To edit the content and format of a text or table document, you first have to activate Edit Mode in the window’s toolbar.

Code
Analyzing your data usually involves categorizing it in line with both your research methods and your methodological approach. These categories are called "codes" in MAXQDA; a selection of data categorized under a code (e.g. a word, sentence, or section within an interview) is called a "coded segment".

There are several ways to code a text in MAXQDA. In each case, first select the part you want to code with your cursor. Then right-click on this selection and choose “(Code) With New Code" (or press ALT + W for Windows or ⌥⌘ + W for Mac). A window will then appear in which you can enter the name and color of your new code.

No matter which method of coding works best for you, after assigning your new code you'll see a coding stripe, in the color you selected, along the left side of the “Document Browser” window. To change the extent of this code, select your desired area again, right click on the coding stripe and select “Recode with Highlighted Segment”.
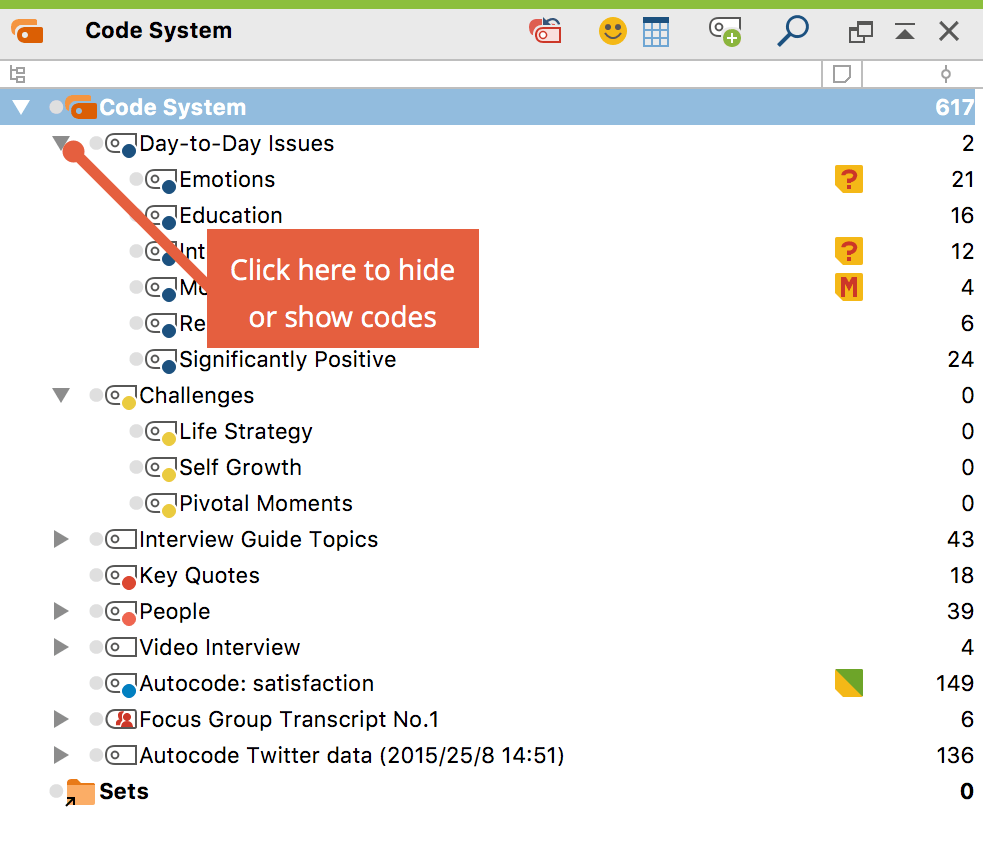
3. Your codes – the "Code System" window
Now that you have created your first few codes, you'll see them listed in your "Code System" window. The window now offers you several ways to organize these codes. You can create a hierarchical code system, with up to 10 levels, by simply dragging and dropping them together. Alternatively, you can organize your codes according to any criteria by creating different code sets.
4. Display your coded data – the "Retrieved Segments" window
If you activate a document and a code, all the data segments within the activated document that have been assigned with the activated code will be displayed in your "Retrieved Segments“ window. To do this more quickly, you can also click on the little grey circle next to every document or code. You can also use the Complex Coding Query function, for example, to display only those text passages in which code A and code B overlap.

All coded segments retrieved by activating your documents and codes are then loaded into your “Retrieved Segments” window one by one.

You now have multiple further options to continue working with your data in the “Retrieved Segments” window. By clicking on the info box of each respective segment, the document browser will jump to its location within the document, so that you can see the data segment in its original context. You can also use one of several export functions to, for example, create a list or table of the data assigned with a specific code.
Have fun getting started with MAXQDA!
Get more help with our Online Manual