With MAXQDA you can easily code and/or transcribe audio files (e.g. interviews) or video files (e.g. online clips or your own recordings). This tutorial introduces you to the transcription feature. To import the file, you have different options:
Import audio or video into MAXQDA
There are two easy ways to import an audio file into a MAXQDA project:
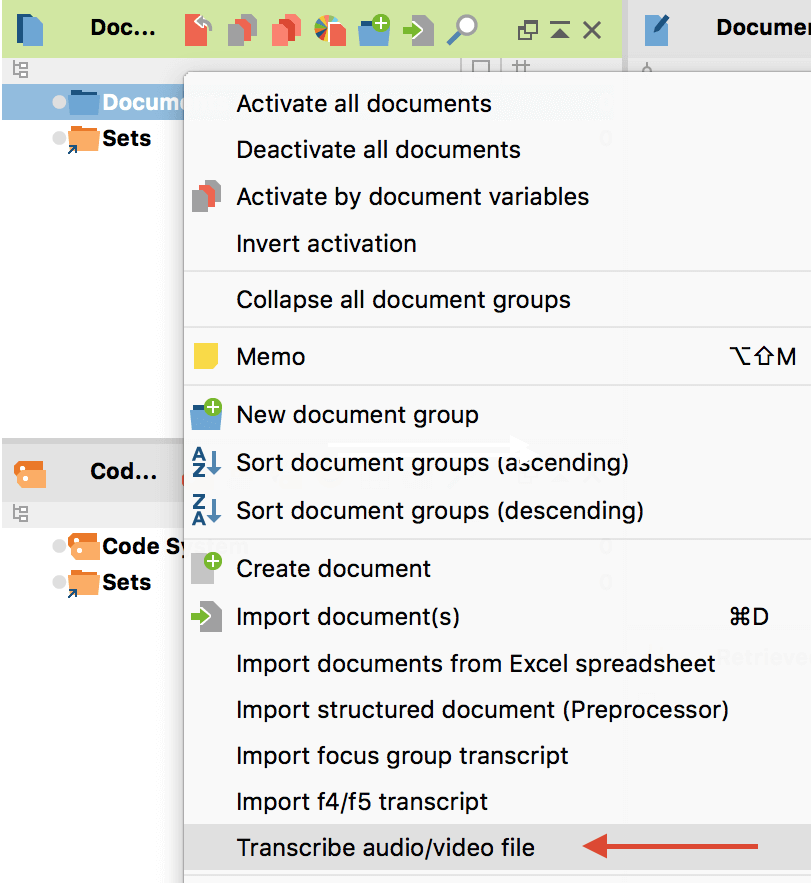
a) select Documents > Transcribe audio/video file from the top toolbar or
b) right click on a document group and select Transcribe audio/video file from the context menu.
Select the media file, you want to transcribe and import it into MAXQDA.
If the media file you want to trancribe is already part of your MAXQDA project, just right click on it and select the option “transcribe audio file” or “transcribe video file”.
Transcription options
MAXQDA automatically creates an empty document named like the media file and conntects it with the media file. Additionally you will automatically see the Transcription mode control panel, where you can set how MAXQDA behaves during the transcription.
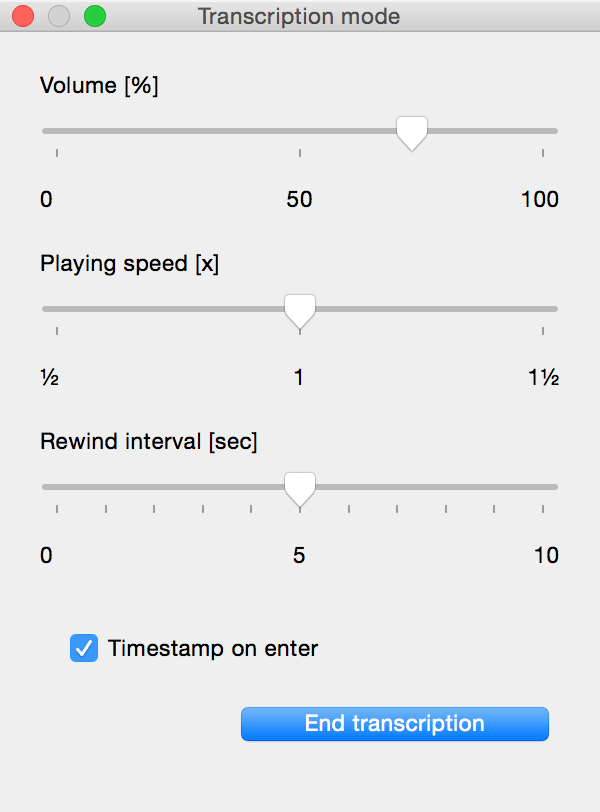
Volume [%]
Set audio/video volume. Especially useful for very loud or quite recordings.
Playing speed [x]
You can speed up or slow down the playing speed which can make it easier to keep up with the clips when typing and listening at the same time.
Rewind interval [sec]
The rewind interval defines for how many seconds the player jumps back to continue playing your media file after you stopped playing it. In most cases a rewind interval between 3 and 5 seconds will be your best option.
Timestamp on enter
If you check this option, a timestamp is automatically entered into your transcript, everytime you press the “Enter” key.
Start your transcription
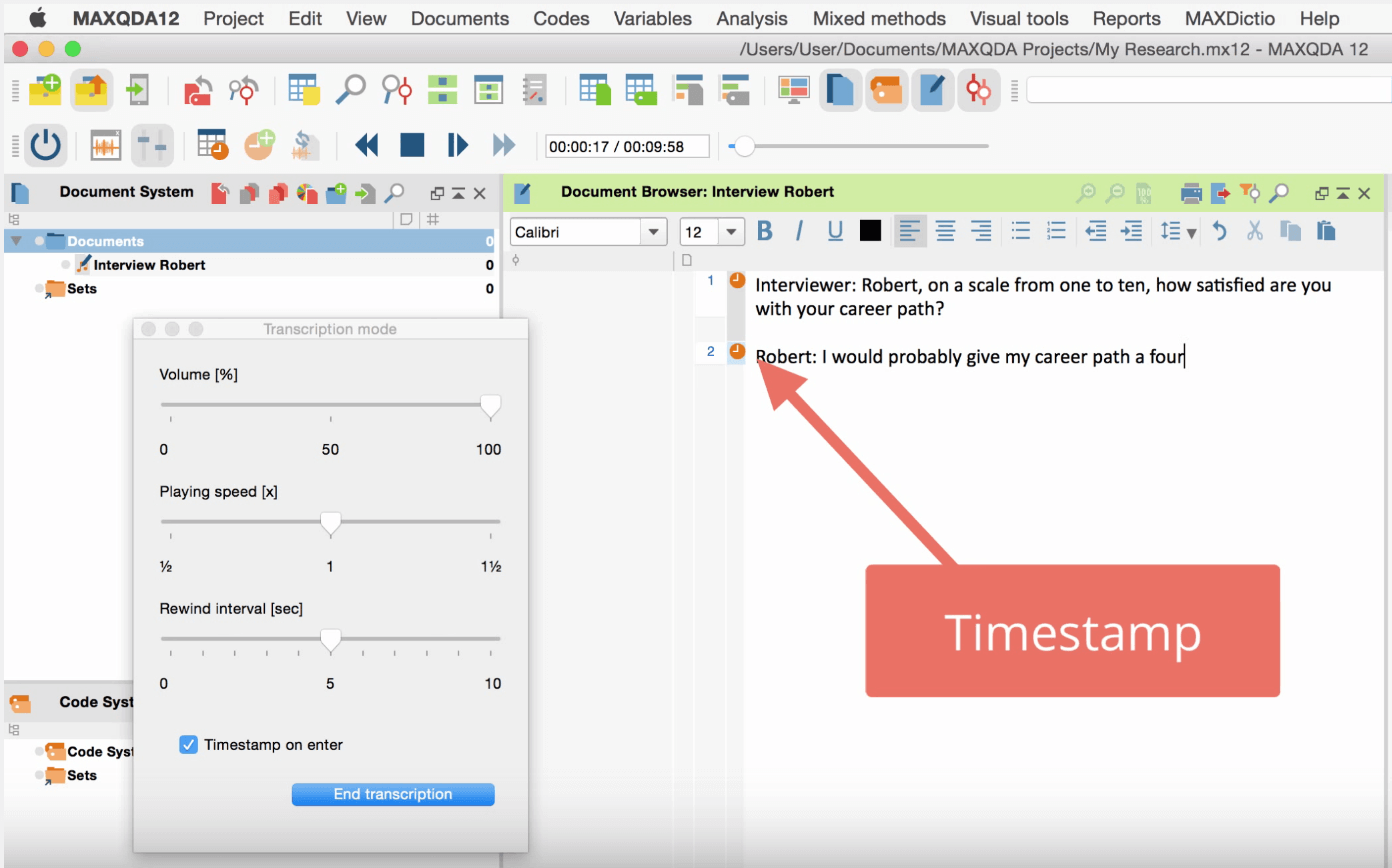
Leave the Transcription mode control panel open to start your transcription.

Play and Pause media file
Press the play button in the Media player toolbar to play your file. Press pause to pause playback and type what you heard into the empty text document. Depending on your setting a timestamp is entered automatically everytime you press “Enter”. Alternatively you can add timestamps manually by clicking on the New timestamp button in the toolbar.
Work faster by using keyboard shortcuts or foot pedals
Instead of clicking on the play/pause button with your cursor you can use keyboard shortcuts that will save you a lot of time when transcribing long recordings. Use the f4 and f5 keys of your keyboard to play and pause the media file. Another possibility is to use foot pedal to play and pause the sound. MAXQDA supports the foot pedals “Science” and “Science II”.
Hint: Mac users who find that the f4 and f5 buttons don’t work as expected, have to change their keyboard settings as described in this FAQ.
Time stamps
Time stamps create connections between the text in the document and the corresponding location within the media file. If you click on a time stamp the media file will start to play exactly that part of the media file. This makes it easy to replay a certain passage or to gain context information in case you want to listen to the tone of a sentence once more. You can also open a list of all timestamps from the media player toolbar that helps you to easily navigate within your transcript.
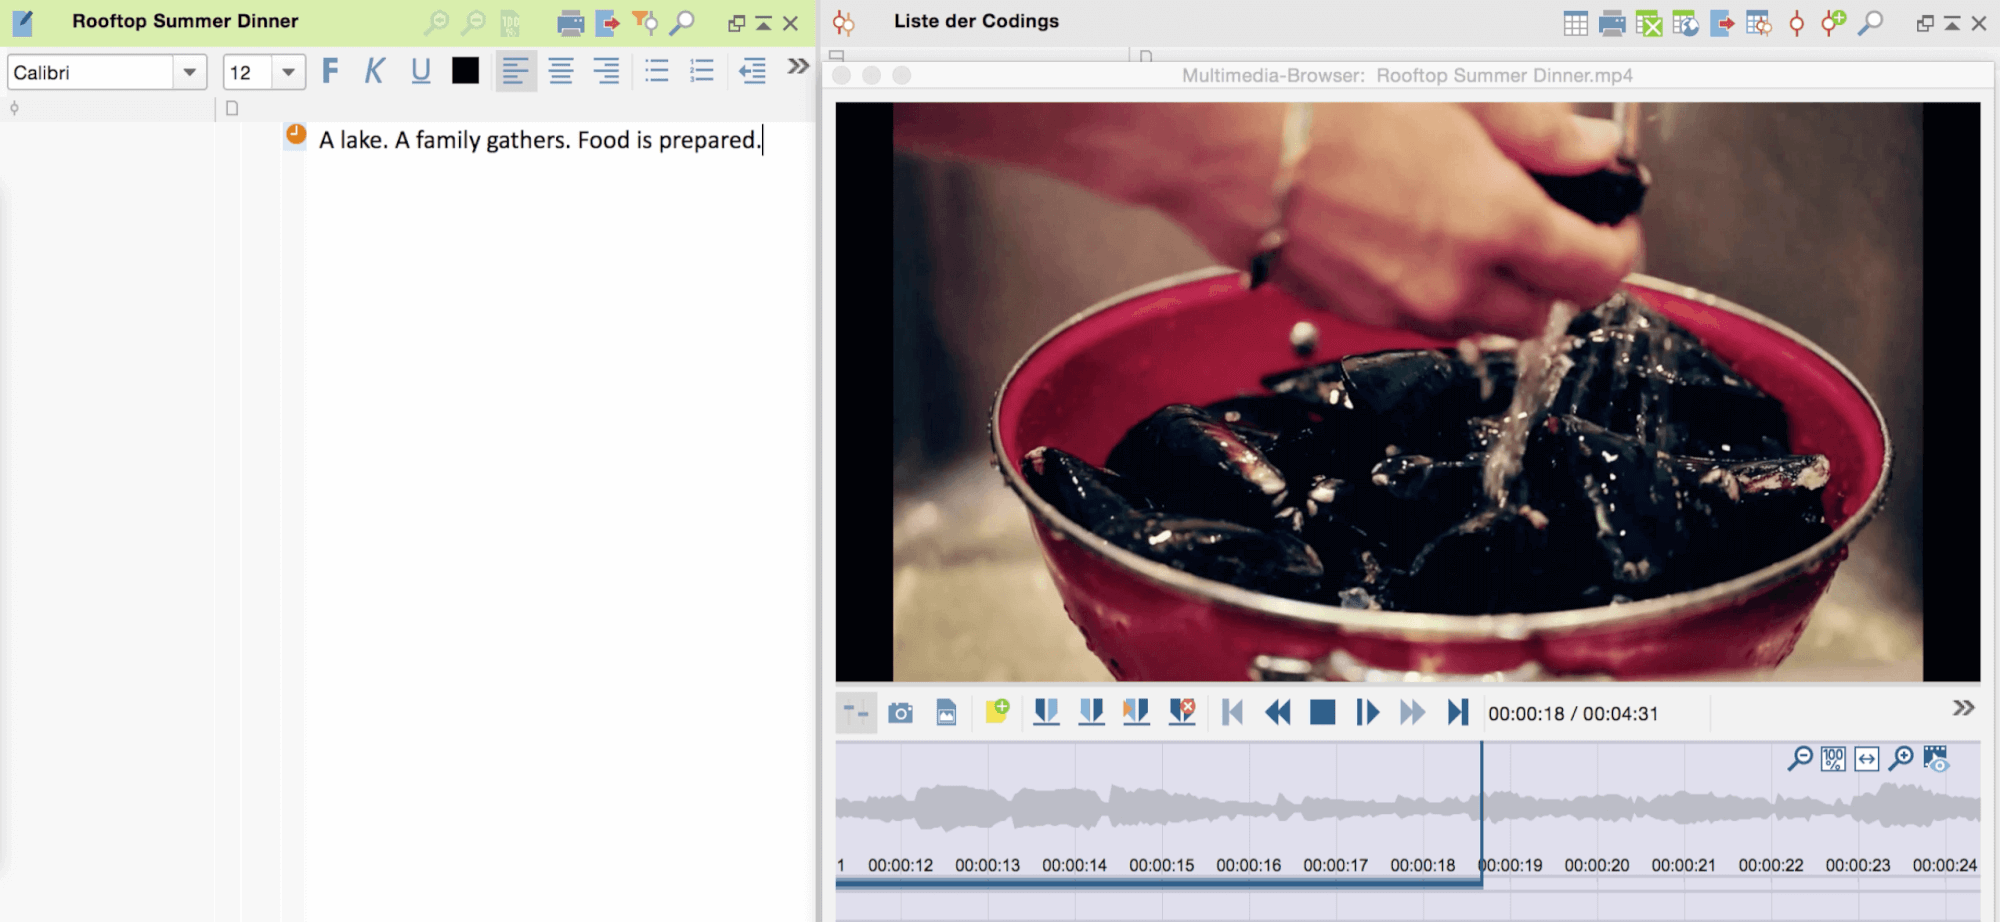
Transcribe video files
The transcription of video files and audio files is almost identical. Right click on the video file in the Document System and choose Transcribe audio/video file. You may choose the same settings in transcription mode as described above. In addition you may want to open up the multimedia browser so that you can watch the video at the same time as listening to the audio.
For a brief overview of this chapter watch our video summary on audio and video transcription: