In addition to the classic drag-and-drop coding technique, MAXQDA offers several other ways to code a selected segment:
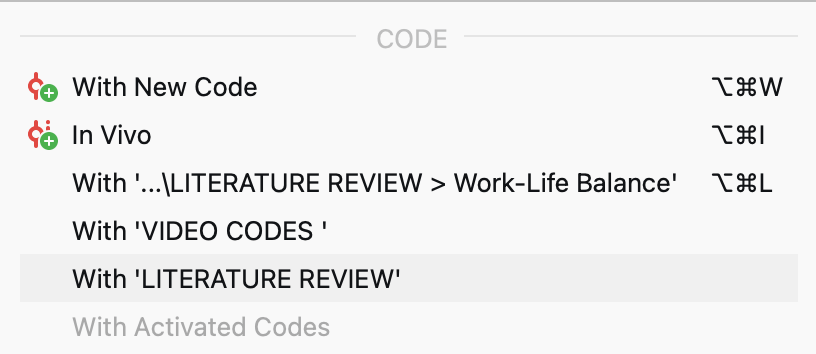
- Coding with newly defined codes: A new code is created and assigned directly to the highlighted segment.
- In vivo coding: Select and highlight meaningful terms in a text to automatically add them as codes to your code tree while coding the text segment with the new code.
- Coding with selected codes from the Quick List: Documents are reviewed for occurrences of one or more preselected codes, and relevant segments are coded accordingly.
- Simultaneous coding with multiple codes: A segment is coded with the activated codes.
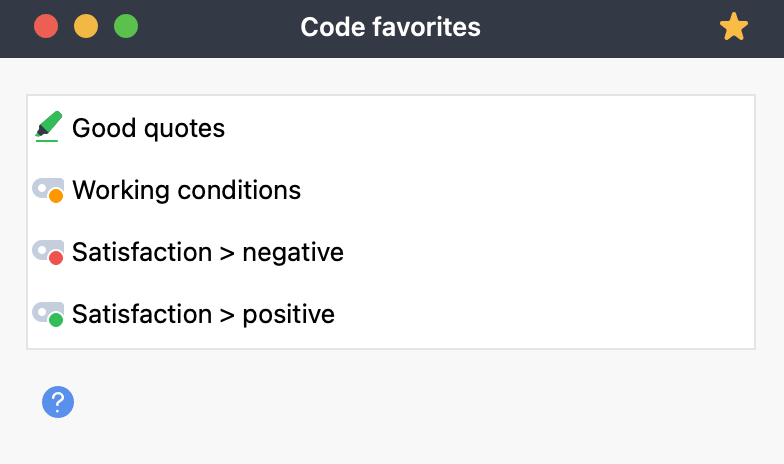
- Coding with Code Favorites: Selected codes are displayed in a separate window, from which they can easily be applied to selected segments.
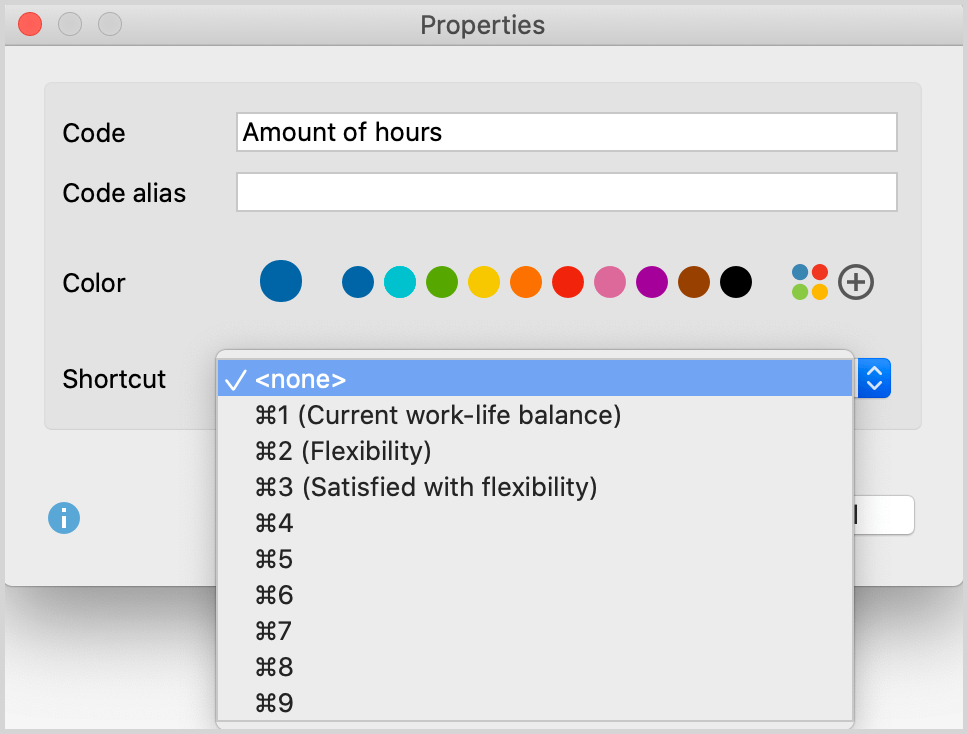
- Coding with custom keyboard shortcuts: Up to nine codes can be assigned keyboard shortcuts, which can then be used to code highlighted segments quickly.
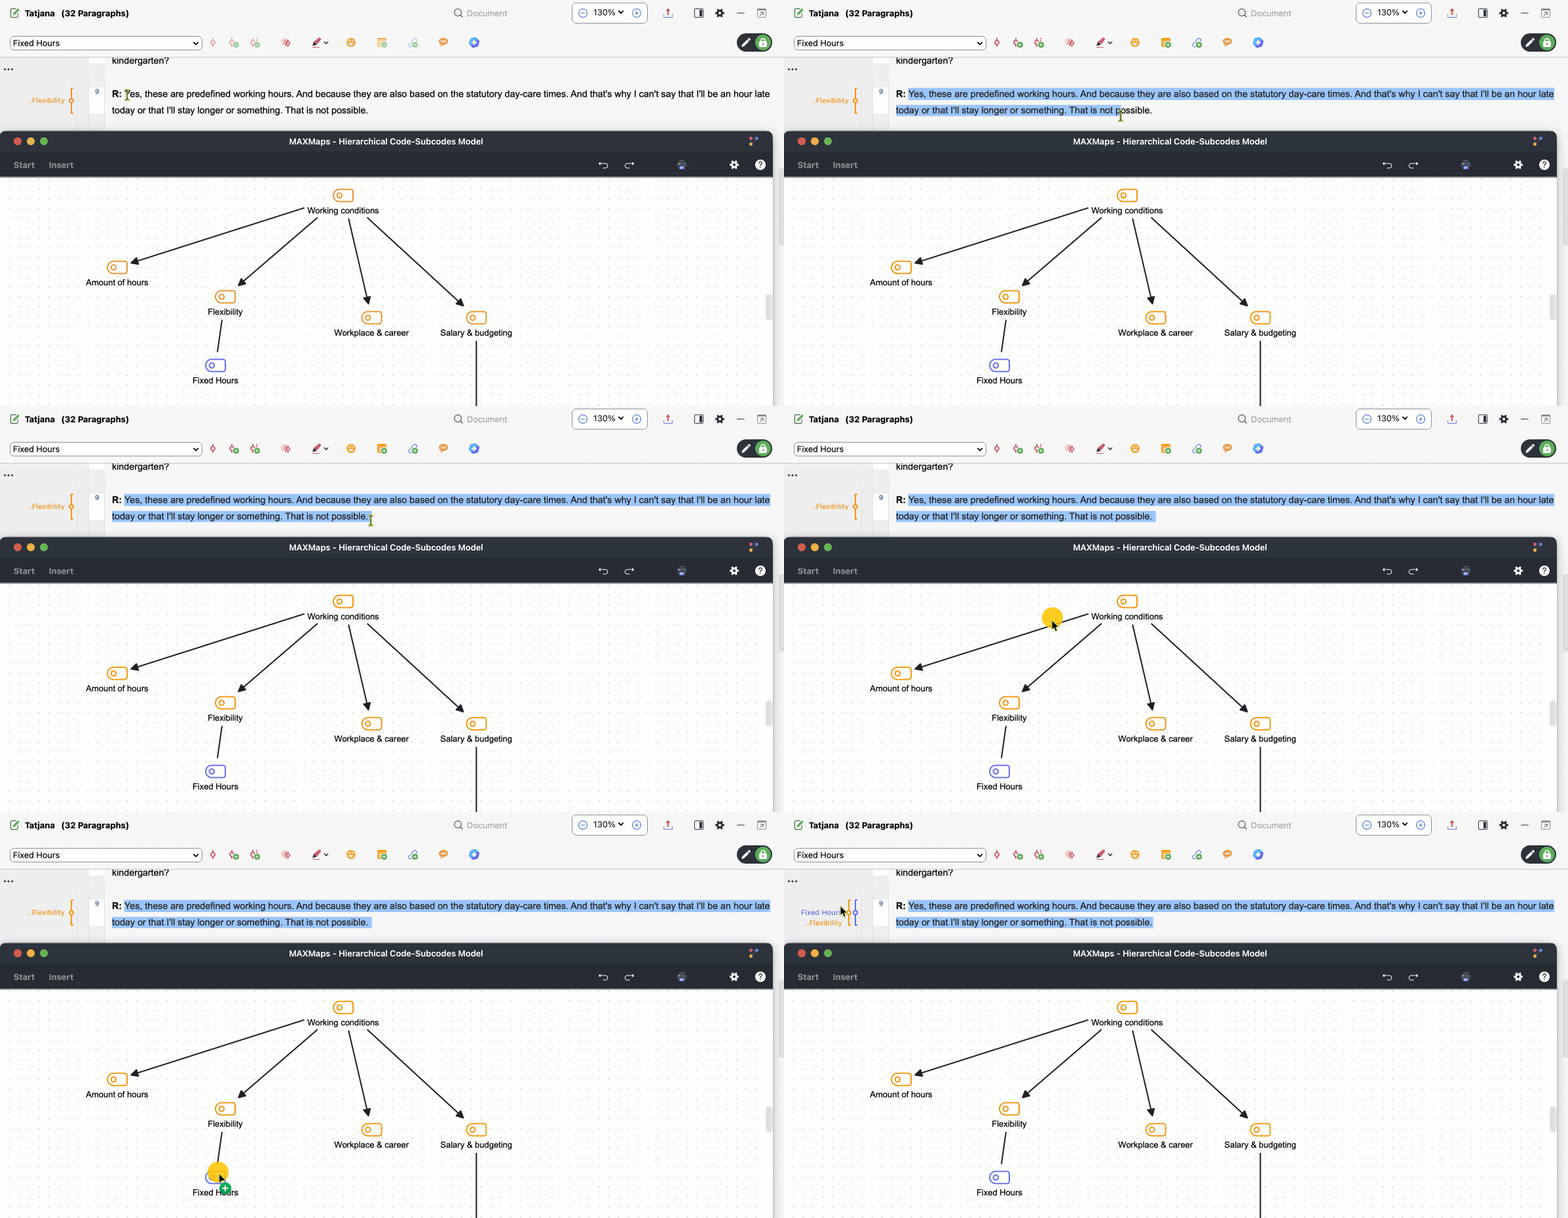
- Coding with MAXMaps: Highlighted segments are dragged onto selected codes arranged on a concept map, for example, on a surface.
- Coding with the Open Coding Mode: After you select a segment, a window for creating and assigning a new open code appears automatically.
- Color coding: This works like highlighting a passage in a book with a colored marker. In MAXQDA, five colors are available for color coding: red, green, yellow, blue, and magenta.
- Coding with symbols and emoticons: Selected segments are coded with emoticodes, that is, emoticons or symbols.
- Coding in the "Retrieved Segments" window and "Overview of Coded Segments": Coded text passages can be compiled in a list. Within these compiled segments, you can select and code additional text passages. For more information, see the relevant section.
This chapter describes in detail how to use the techniques listed. Some of these options are available from the context menu that appears when you right-click a selected segment in the "Document Browser" window.
1. Coding with newly defined codes
An easy way to create and apply a new code in one step is to use the shortcut Alt+W (Windows) or cmd+W (macOS). Alternatively, right-click the selected segment and choose With New Code, or click the Code with a new code icon in the "Document Browser" toolbar.
A dialog window opens in which you can enter the name of the new code. The code is added to the code tree at the highest level of the hierarchy. If necessary, you can later move it to another level of the code tree using drag and drop.
2. In vivo coding
Another coding method is known as "in vivo coding." For example, if you select the words “global village” in your document and then click the Code in vivo icon in the toolbar of the “Document Browser,” “global village” is added to the code tree as the code for this short text segment. The shortcut Alt+I (Windows) or ⌘+I (macOS) has the same effect.
If you want to code an entire text segment using the in vivo coding function, we recommend the following procedure: Because the name of the new code is automatically taken from the selected text passage, first use this function to code one or two meaningful words. Next, select the entire text segment, including those words, and drag it to the newly created code in the Codes window. MAXQDA automatically expands the coded segment.
3. Coding with a selected code from the Quick List
The coding toolbar in the "Document Browser," shown in the screenshot above, provides quick access to frequently used coding functions. Whenever you click a code in the Codes window, or while coding is in progress, the corresponding code appears at the top of the Quick List. Click the Code highlighted segment icon  directly to the right of the Quick List to assign the displayed code to the selected segment. This allows you to code multiple segments of a document without selecting the code each time.
4. Coding with multiple codes simultaneously
First, activate the codes you want to assign simultaneously in the Codes window. To activate a code, right-click it in the Codes window and select Activate. Then select the segment you want to code, right-click it, and choose With Activated Codes in the Code section.
5. Coding with Code Favorites
If you are working with a large code tree, it can be difficult to work efficiently because you need to scroll up and down to find the appropriate code. One possible solution is to use the "Quick List" to access a particular code quickly, but this option works with only one code at a time. If you need quick access to several codes, you can define "Code Favorites":
Right-click a code and select Add Code To...> Code Favorites. After you add the first code, the Code Favorites window appears. You can then repeat this step to add more codes to the list.
You can now begin coding your documents. Simply highlight a segment as usual and click the appropriate code in the Code Favorites window. The coding column on the left side of the “Document Browser” shows that the segment has been coded.
When you have finished using the Code Favorites window, simply close it. To reopen it, either add another code via the context menu or select Code Favorites from the Codes section of the main menu.
You can rearrange the codes in the Code Favorites list using drag and drop. To move more than one code at a time, hold down the Ctrl key (Windows) or ⌘ key (macOS) while selecting the codes. To remove a selected code from the Code Favorites list, hover over it and click the X that appears next to the code name.
6. Coding with keyboard shortcuts
For quick keyboard-based coding, you can assign keyboard shortcuts to up to nine codes. To do so, select Keyboard Shortcuts for Codes on the Codes tab of the main menu:
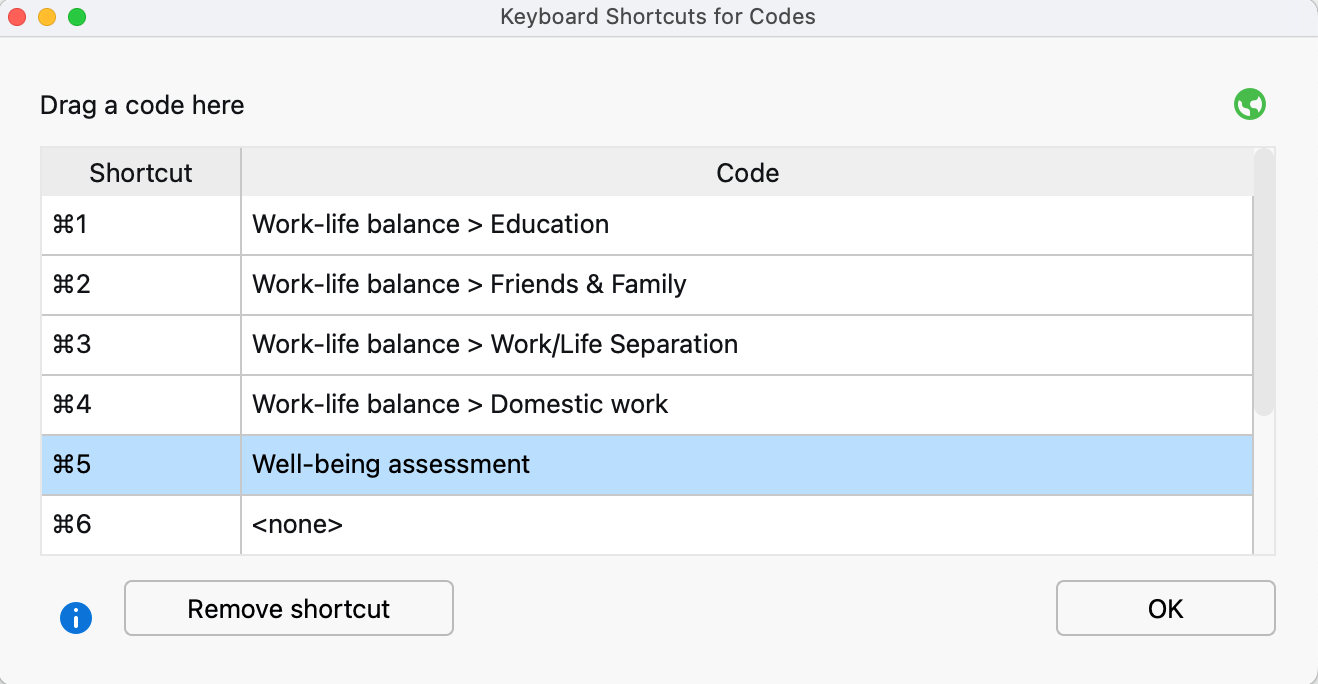
The left column displays the available keyboard shortcuts, Ctrl + 1 through Ctrl + 9 on Windows or ⌘ + 1 through ⌘ + 9 on macOS. To assign a keyboard shortcut, drag and drop a code from the Codes window into one of the nine rows. If the shortcut has already been assigned, the existing assignment is overwritten. For clarity, the right column displays the code name and, if necessary, its parent code rather than the entire code hierarchy.
To remove a shortcut assignment, select the appropriate row and click the Remove shortcut button.
While coding, it may be helpful to leave the Keyboard Shortcuts window open until you have memorized the shortcuts. However, the window does not need to be open for the shortcuts to work. Simply highlight a segment in the “Document Browser“ and press the assigned shortcut. MAXQDA then codes the selected segment with the corresponding code.
7. Coding with MAXMaps
The code tree is organized hierarchically, which does not allow multiple cross-relationships between subcodes. In some cases, you may need to create a non-hierarchical structure to represent network relationships and organize codes differently.
You can do this with MAXMaps, the mapping tool included with MAXQDA. Open MAXMaps on the Visual Tools tab and create a new map. Use drag and drop, Alt+double-click (Windows), or option+double-click (macOS) to copy codes from the code tree to the map. Codes can be freely arranged on the map and linked to one another with arrows or lines. You can also add free symbols or images to the map.
Coding is simple: drag a selected segment from the “Document Browser” onto a code in the map.