Backup of TeamCloud Project
Regardless of whether you are working on a project independently or as part of a team, it is important to regularly create and store copies of your project files.
These copies serve two key purposes. First, they provide transparency by capturing snapshots of the project at various stages, which allows you to track its progress over time. Second, they function as a backup. If an undesirable change is made that cannot be automatically undone, you can revert to one of these copies.
Automatically backing up a TeamCloud project
Regular automatic backups
If you've enabled automatic project backups in the global MAXQDA preferences, the same settings also apply to your TeamCloud projects. When you open a TeamCloud project, MAXQDA automatically creates a backup in your local TeamCloud workspace at the specified interval.
Action-triggered automatic backups
In addition to the regular interval backups, MAXQDA also creates extra backups for TeamCloud projects when certain actions are performed. These backups are stored in the TeamCloud backup folder for the current project cycle.
The following actions trigger an automatic backup, saving the current state of the project before the selected action is carried out:
- Team lead: When starting a new project cycle
- Team members: When downloading the new project file after a new cycle has started
(applies to downloads from the MAXQDA start screen, the TeamCloud menu, or the in-project notification about the new cycle) - All: Before reverting to a backup from the current project cycle
Manual backup of TeamCloud project data
We recommend creating a backup before or after making major changes to your project, e.g., after significantly modifying your code system.
To manually back up your TeamCloud project, make sure you are signed in to your MAXQDA Account.
Manually backing up your TeamCloud project
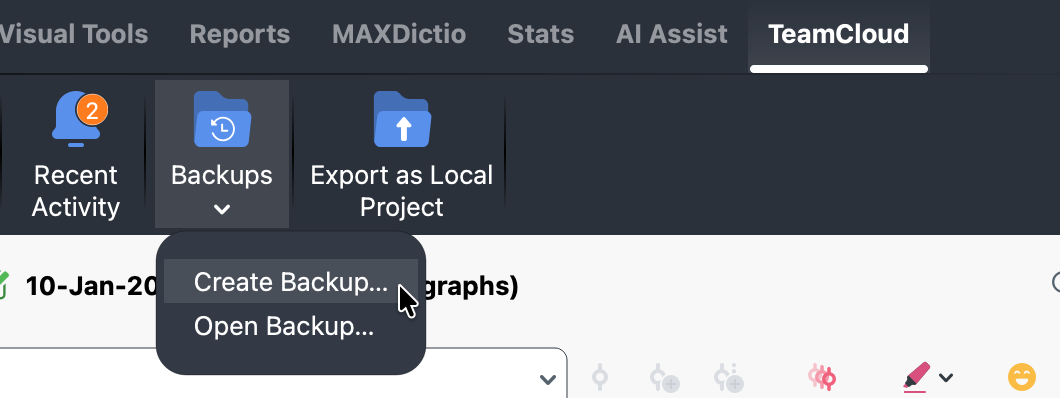
- Go to TeamCloud >Backups > Create Backup.
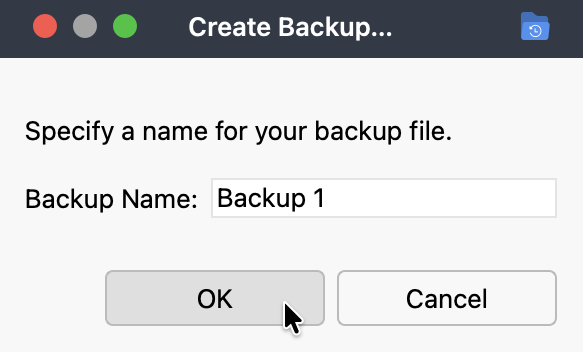
- Name your backup and click OK.
Exporting as local project
You can also create a local backup of your TeamCloud project. This generates an .mqda file that can be opened in any MAXQDA installation. You can create it from the MAXQDA start screen or from the TeamCloud menu while your project is open.
From the MAXQDA start screen:
- Select Team Projects.
- Hover over the project you want to export, then click the More menu (three dots).
- Select Export as Local Project.
- Choose where to save the file, then click OK.
Open TeamCloud project:
- Go to TeamCloud > Export as Local Project.
- Select where you'd like to export your project and click OK.
Restoring a TeamCLoud Project
If necessary, you can access an older version of your project by restoring it from a backup file. Note, however, that this is only possible for backups created during the current project cycle.
To restore a project from a back up file:
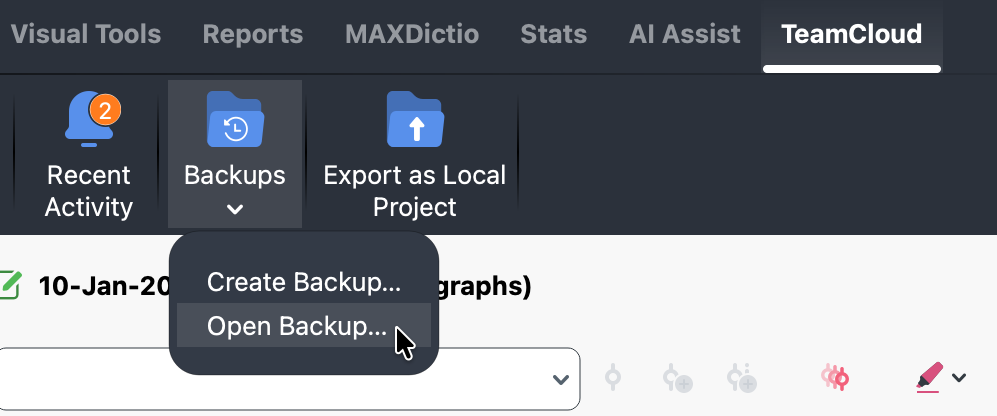
- Click TeamCloud > Backups > Open Backup.
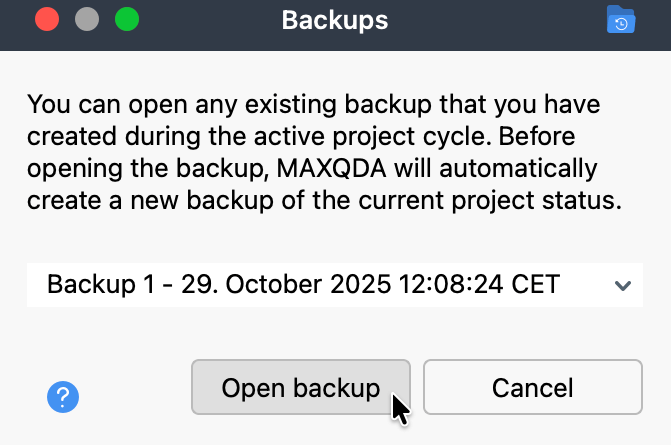
- Select the backup file you would like to restore.
- Click Open backup.
Before restoring a project from a backup file, MAXQDA automatically creates a backup of your current project. This ensures you can revert to that version if needed.
Manually backing up your TeamCloud Logbook
The TeamCloud project logbook is stored online on the cloud server (in contrast to local projects where the logbook is stored locally on your device). Therefore, it can only be viewed on the MAXQDA Account website and can only be exported and saved from
there.
- Log in to the MAXQDA Account website: https://account.maxqda.com/login.
- Click on the MAXQDA TeamCloud tile to access the TeamCloud Dashboard.
- Select the desired project and go to Project Logbook.
- Use your browser's Print function by right-clicking on the page or selecting the print option from your its menu.
- Save the page as PDF.
This way, along with the logbook, you also save the Recent Activity history of your TeamCloud project.
Tip:If you're using Google Chrome with the
MAXQDA Web Collector extension, you can import the logbook into your MAXQDA project as a complete web page.


