
As soon as you have coded a document or image segment, a vertical stripe appears in the column on the left side of the Document Browser. Those visualizations are called "coding stripes" or "coding brackets" and show where the document has been coded.
By default, the coding stripes appear on the left side of the document. You can easily change this setting: click the gear icon in the Document Browser toolbar to open the local preferences, then select Display coding stripes on the right.
You can resize the coding stripe column by clicking the vertical line between the column and the document, then dragging the separator left or right.
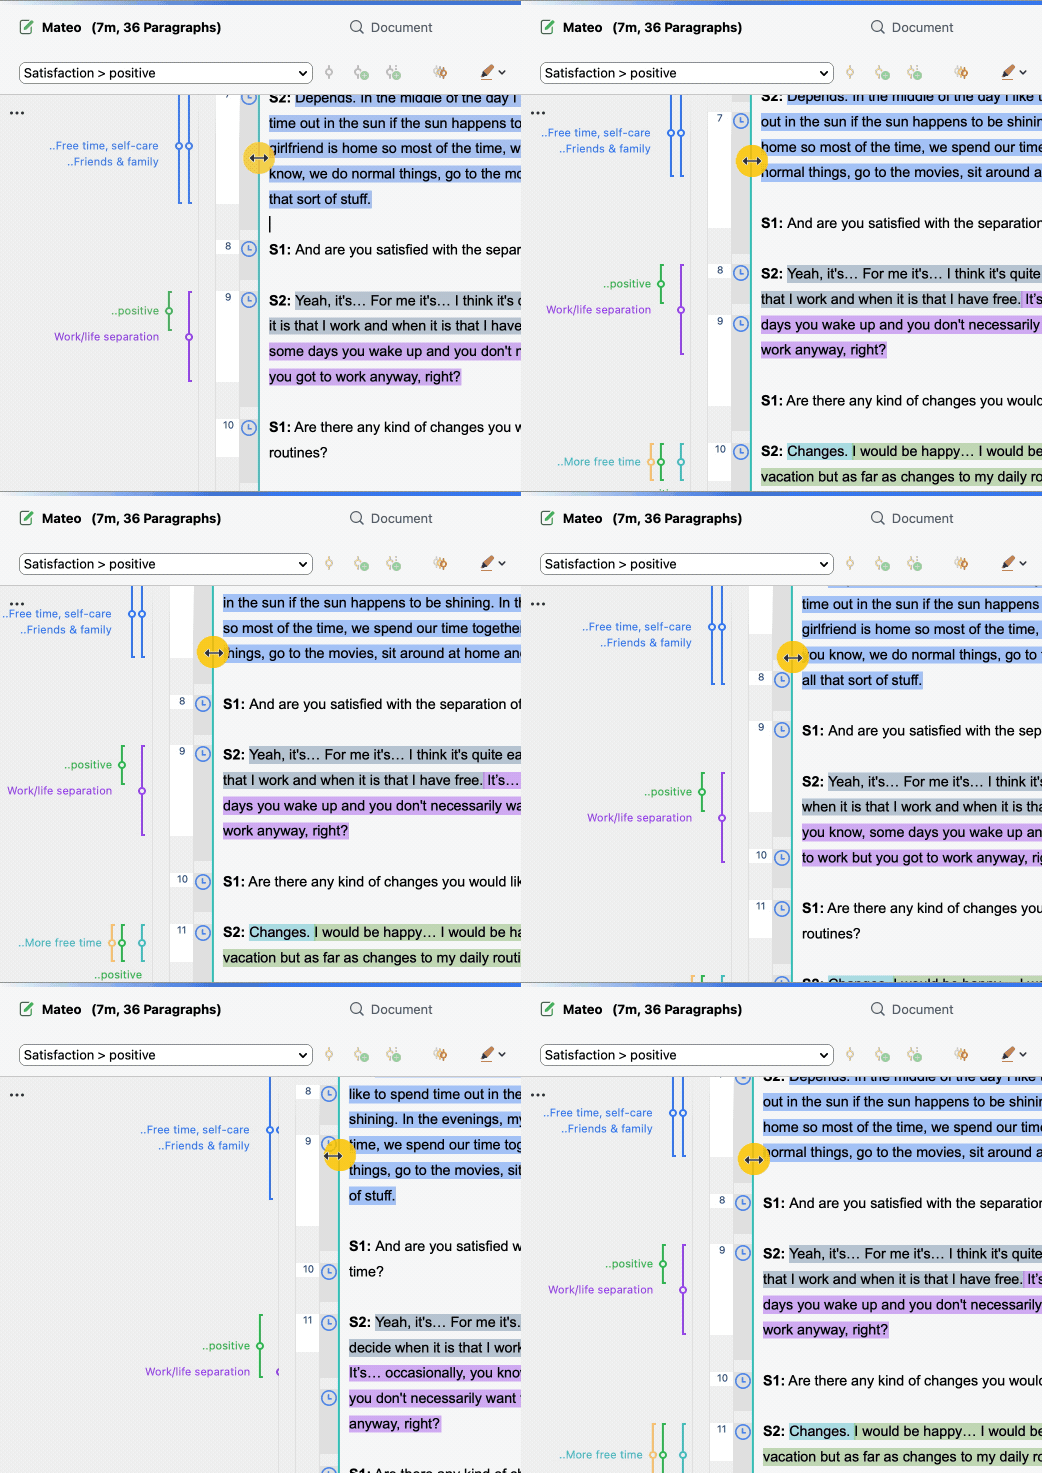
You can also choose whether to permanently show code names in the coding stripe column. Click the gray gear icon at the top of the column to open a window with various options, including Display code names.
You can always see the code name in the tooltip that appears when you hover over a coding stripe in the coding stripe area. The tooltip also shows the assigned weight.
The tooltip always displays the full code name, including any parent codes. Next to the coding stripe itself, however, only the lowest code level is shown permanently. In the example above, the full code name shown in the tooltip is "INTERVIEW CODES/Dissatisfaction/Dissatisfied with time spent working". In the coding stripe column, it appears as "..Dissatisfied with time spent working". The two preceding dots indicate that the code is a subcode.
If many coded segments overlap, it can be difficult at first glance to tell which coding stripe belongs to which code name. In that case, just hover over a coding stripe: its color turns paler, and the corresponding code name is underlined.
Coding stripe column visualization options
By clicking the three dots in the coding stripe column (or right-clicking anywhere in the column), you can open a window with various visualization options for coded segments.
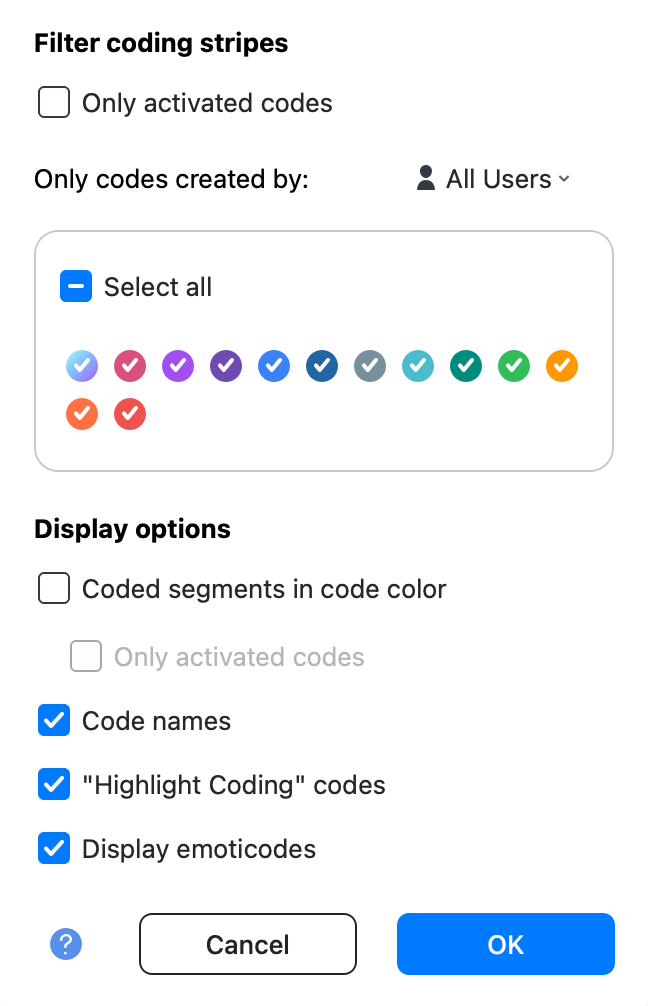
You have the following display options:
- Only activated codes - You can choose to only display activated codes.
- Only codes created - You can choose to only display coded segments created by a certain user. Select All Users, the first entry in the list, to show coded segments from every user again.
- Colors - You can choose to only display coded segments of certain colors.
- Display coded segments in code color - You can choose to use the code color as background color of coded text segments in text and PDF documents.
- Display frames around coded image segments - You can choose whether frames around coded image sections should be shown permanently.
- Display code names - You can choose to display or hide code names.
- "Highlight Coding" codes - Choose to display color highlighter codes.
- Display emoticodes - Display or hide emoticodes.
Highlighting text in its code color only makes sense when you don't have many overlapping codes. Overlapping codes blend their highlight colors, which can make the text difficult to interpret.
It's often useful to see which codes are assigned to a specific text or image excerpt. To do this, select a text segment or image section, right-click on it and select List Assigned Codes. This opens a menu listing all assigned codes. Click an entry in the list to highlight the code in the Code System window.
