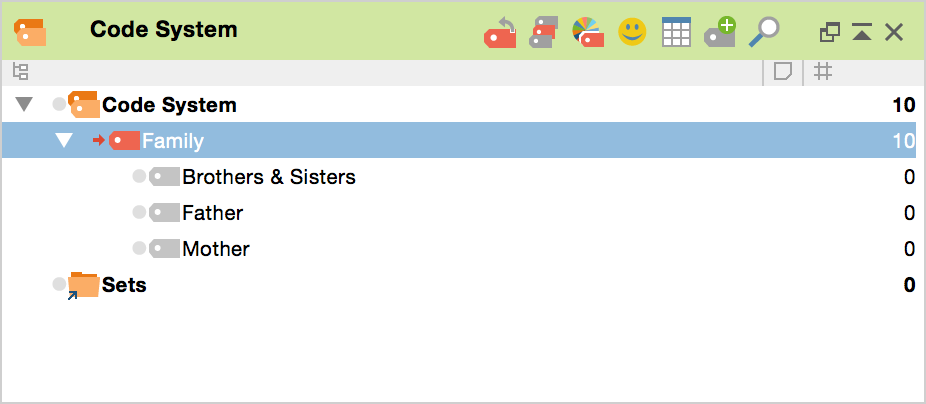
Often when working with a “Code System,” it is desirable to differentiate between elements grouped under one code. In MAXQDA this corresponds to dividing a code in two or more subcodes. For example, imagine you have created a code named “Family” and have assigned document segments, in which an interviewee talks about his family, to this code. Then imagine that it becomes necessary to differentiate between “Mother,” “Father,” and “Brothers&Sisters.”
The division of a code into subcodes can obviously not happen automatically, since you must decide which references of the code are to be placed in which subcode. You must read each coded segment and decide which of the subcodes is appropriate. In this case the subcodes will not be exclusive since a person could talk about his father and his mother in the same segment.

Codes can be divided as follows:
- Activate all documents and the code “Family.”
- Create three subcodes for “Family”: “Mother,” “Father,” and “Brothers&Sisters.”

A convenient way to separate the code references into the new subcodes is to bring all the coded segments (in our example with “Family”) into the “Retrieved Segments” window. Then, beginning with the first segment, click the information box left of the segment for each segment. After having decided which subcode the segment belongs to, you can assign the segment to the appropriate subcode as follows:
- The easiest option: Click on the information box and drag it to the chosen subcode.
- When you click on the info box, the coded segment will also be selected in the “Document Browser.” It can now be coded as usual, for example using Drag & Drop.
- Alternative Method: Right-click on the selected subcode in the “Code System” window (i.e. “Father,” “Mother” or “Brothers&Sisters” in the example above) then select Code in the context menu.
When you reach the end of the list you will all have worked through all the coded segments and these will have been assigned new subcodes. But all segments will still be coded with the original code “Family” too, which is obviously not what you want. To finish the job, you have to delete these code references, which may seem tricky, since now deleting the code “Family” would also delete its subcodes – including the three subcodes that you just created.
In effect, you need to delete not the code itself but only its references. Since the command “Delete Code References” does not exist in MAXQDA’s “Code System,” you have to do a work-around to get the desired result:
- Create a new code called “trash.”
- Right-click on the code whose references are to be removed (in this example “family”).
- Select Move coded segments from the context menu.
- Move the mouse pointer to the code “trash,” click with the right mouse button, and select Move coded segments from ‘Family’.
- Delete the code “trash.”
