Importing Documents with Drag-and-Drop
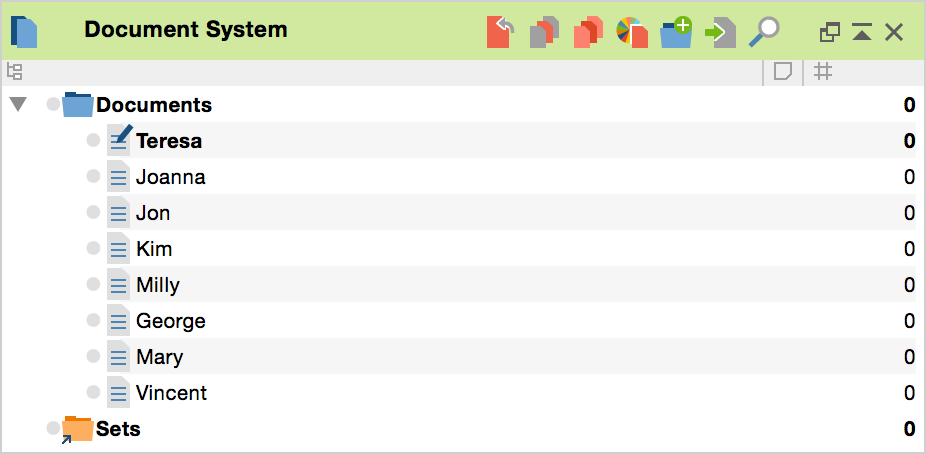
Importing files into MAXQDA is simple and intuitive: you can simply highlight the documents in Windows Explorer or Mac Finder and drag them with the mouse into the “Document System.” They will then be inserted on the upper level of the “Document System” hierarchy, directly under the “Documents” icon. In the following screenshot, you can see that eight documents (Teresa, Joanna, Jon, etc.) have been imported.

By moving the mouse over a document name, you will see a tooltip that gives you information about the document, including its size, the author (MAXQDA user logged in at the time of import), the date of import, and the number of coded segments and memos in the document.
Ordering the documents in document groups
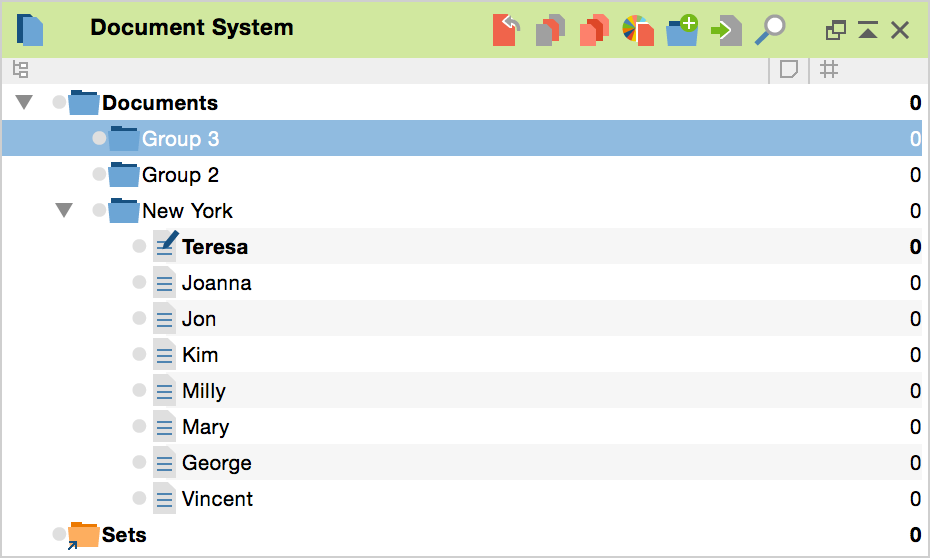
All you have to do is drag documents into the “Document System,” and you’re ready to start your analysis of those documents. Most people don’t start with the analysis immediately, though, and prefer to organize the documents in folders, as they might do on their computer’s hard drive. Rather than using folders, MAXQDA uses document groups. They work just like folders do in Windows Explorer or Mac Finder – you can name them and drag documents into them. The number of document groups is not limited in MAXQDA; you can make as many of them as you want. When you create a new document group, it will automatically be named “Group 2,” “Group 3,” etc.

Import of documents into document groups can also be done via drag and drop. You just need to highlight the documents in Windows Explorer or Mac Finder and drag them onto the document group name. You’ll see that the documents are imported into the document group when the file names appear under the document group icon and name.
In addition to Drag & Drop, documents can be imported into MAXQDA in the following ways:
- Select a Document Group, then click the Import document(s) button
 in the “Document System” toolbar.
 - or you can also import documents by using the keyboard shortcuts Shift+Ctrl+T (import to the upper level) or Alt+T (import to the selected document group).
- Or you can right-click on the root in the “Document System” and select Import document(s).
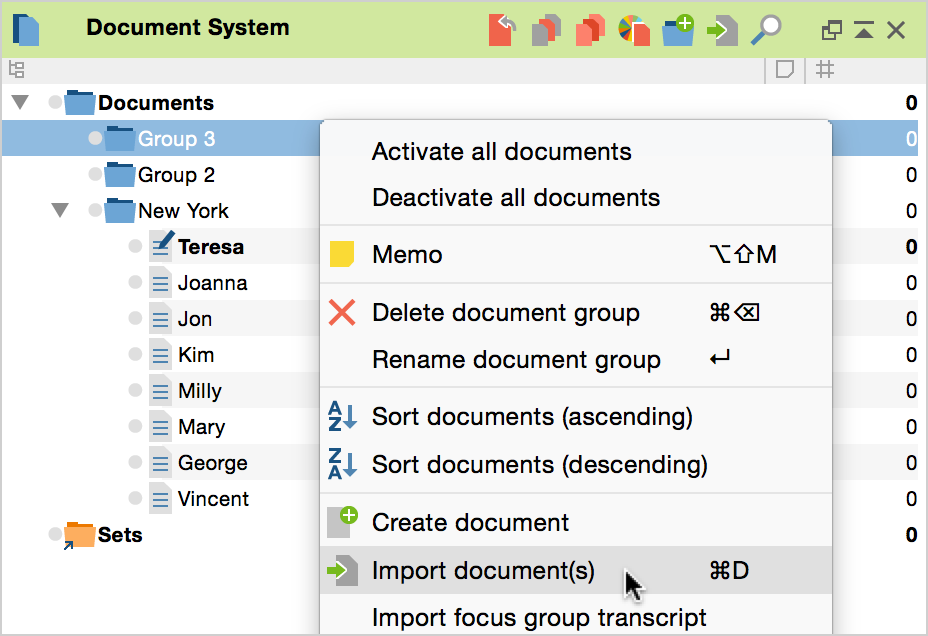
- or you can right-click on the document group that you want to hold the imported documents and select Import document(s) from the context menu that appears.

A dialog box will appear that allows you to select the documents that you would like to import.
Newly imported documents are put at the top of the list of documents in the document group. They are given the same name as the original file, but you have the option of renaming them at any point. If you want to import several files at once into the same document group, you can select more than one document by holding the Ctrl (Windows) or the cmd button (Mac) while clicking on the documents to import.
The order of document groups in the “Document System” can also be changed at any time. You simply need to click on the document group icon and drag it to the location you would like to have it. In other words, it is not necessary to know how you will organize all of your documents when you import them.
Document variables generated automatically during import
Each document contains a data record of variables ("Document variables"). When you import a document, a record is simultaneously generated - much like during your first visit to a new doctor. If at the time of import a data record containing variables is generated, firstly only certain internal MAXQDA variables will be saved.
To view these internal variables (“System Fields"), click Overview of Variables in the context menu of the document. Here, you can see the date, time, and user name (author), among other information. In the Number of Coded Segments and Number of Memos columns, MAXQDA will display the existing coded segments and memos for this document.

This information will appear as a tooltip if you hover the mouse over a document name in the Document System and wait a moment.
