Elephants are one of the world’s largest land mammals – they also have the largest brains, and it is said they are highly intelligent. We also find them incredibly adorable! In this blog post, we will show you how to analyze videos with MAXQDA 2020 using videos of these highly intelligent und extremely cute animals.
MAXQDA 2020 has several unique tools for the analysis process itself, as well as for when it’s time to publish your findings. Let’s go through them while analyzing some short clips where we can see elephants in their natural habitat.
Of course, you can use the tools and tips shown in this article for your more serious and advanced video analysis needs. If you don’t already have a MAXQDA license, download the 30-day free trial to get started:
Step 1: Import the Video
Whether your video file is an MP4, MOV, MPG, M4V, 3GP, 3GGP, or WMV on Windows – you can import all of these video files into MAXQDA exactly the same way you would a text document. Open your MAXQDA project and click the Import tab as you normally would and select ‘Documents’. You can also simply drag and drop your video in the “Document System” window.
Please note: To avoid the creation of extremely large project files, video and audio files are stored in the MAXQDA externals folder on your computer, not in the project itself. For more information about importing video files, MAXQDA externals folders, and how to reduce the video file size, check out our free Online Manual.
Tip: We recommend using HD resolution (720p) or Full HD resolution (1080p) instead of higher resolutions to avoid long loading times.
The Multimedia Browser
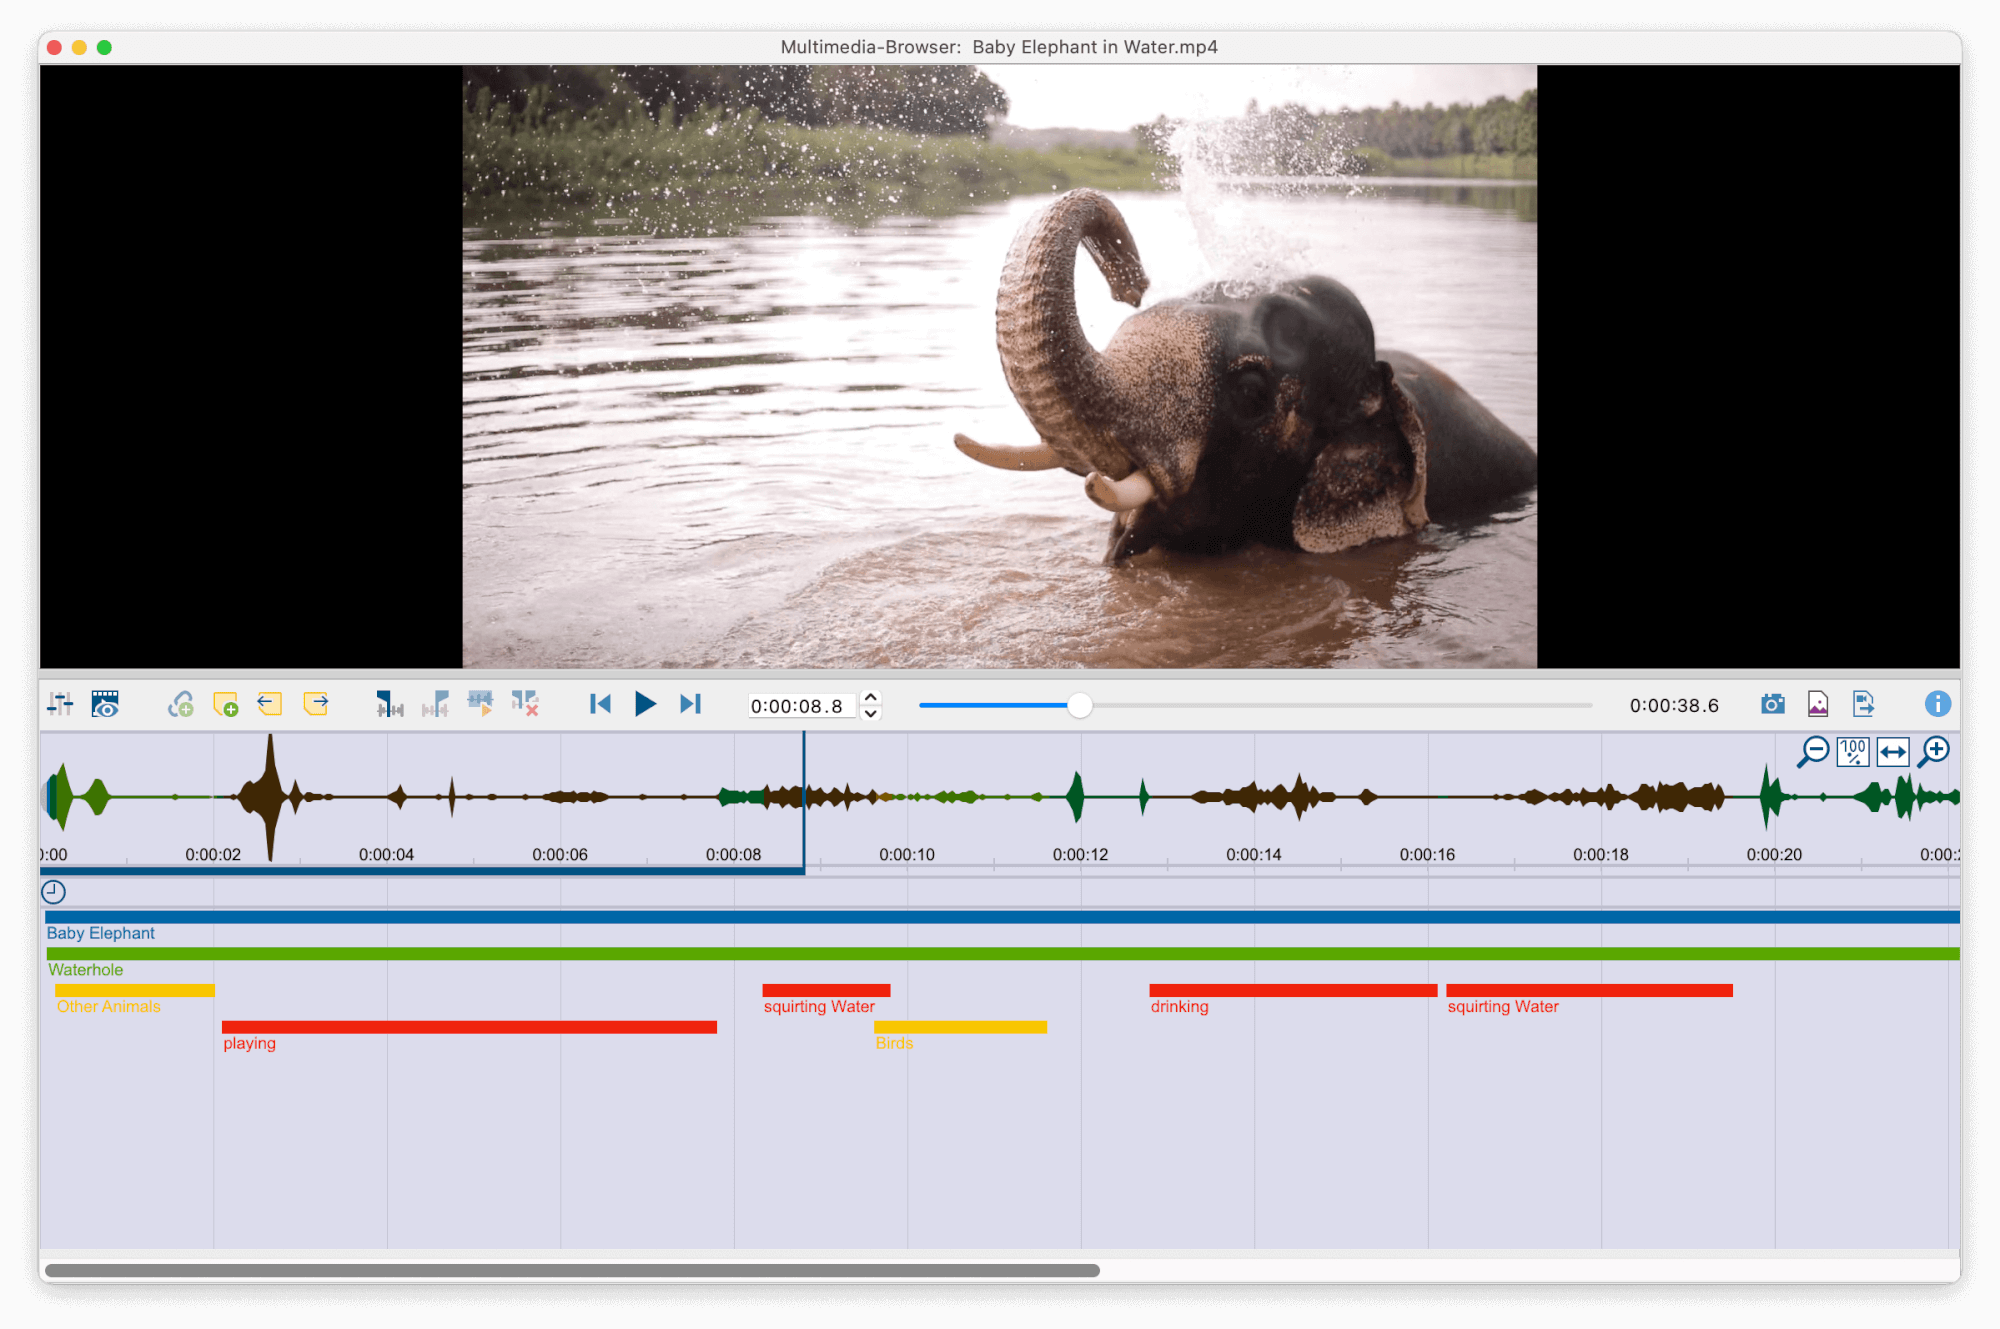
MAXQDA’s central element for playing and analyzing videos is the Multimedia Browser. There are at least two ways to play your video in the Multimedia Browser:
- You can use the context menu (‘Open video file’) for your video file document in the “Document System” window.
- You can open the video file document in the “Document Browser” window and click on the video camera icon in the “Document Browser” toolbar.
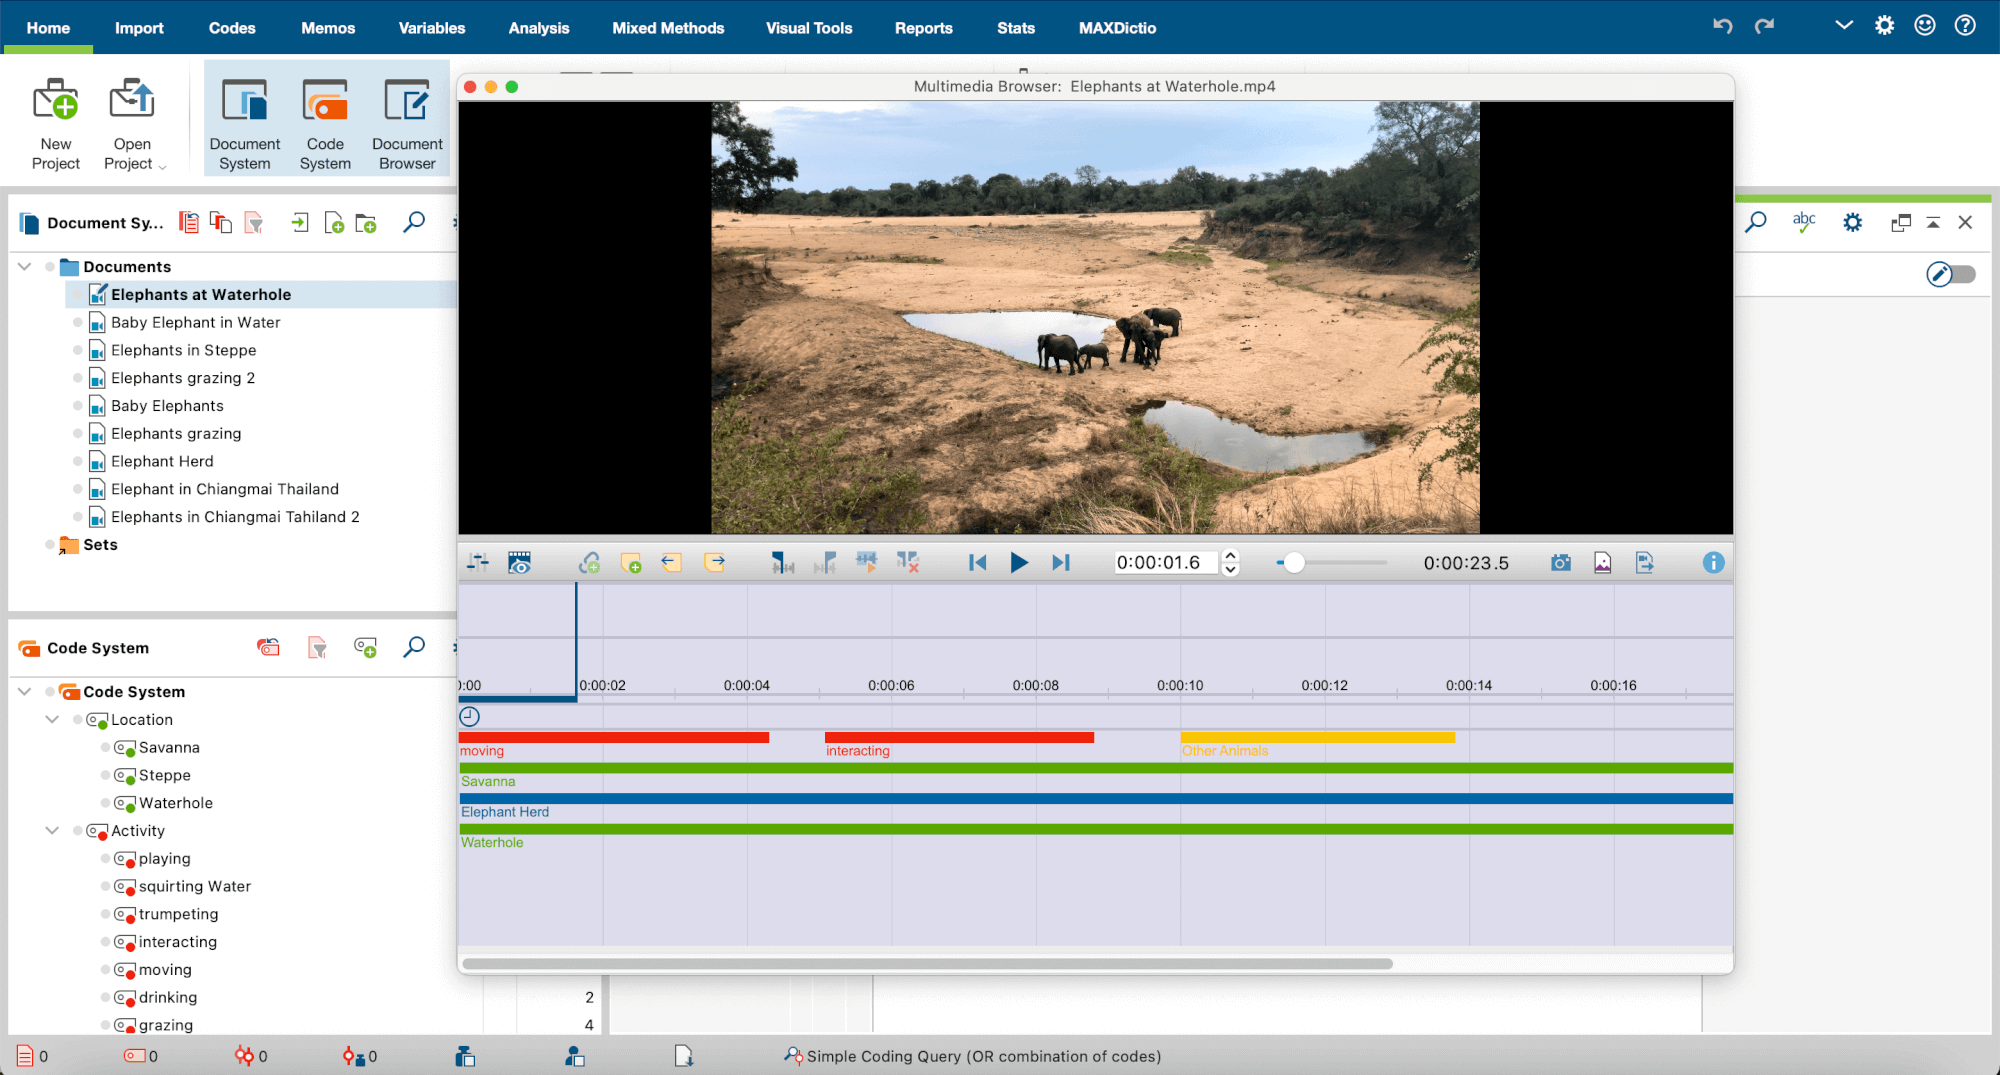 MAXQDA and the Multimedia Browser
Step 2: Transcribing the video file
Alongside coding the video, the Multimedia Browser is also the perfect tool to help you transcribe video files. Transcribing videos is especially helpful for researchers using data gathering methods, such as interviews and observation. For our example project, we have created a transcript of what we see in the videos to be able to analyze the actions of the elephants in more detail at a later stage.
To begin transcribing, right-click on a point in the waveform from which you want to start the transcription and select ‘Transcribe’ in the context menu. You can now use timestamps to link your transcript to the video, making it easier to find specific segments later. For more tips and tricks around transcribing video and audio data with MAXQDA 2020, check out our how-to video tutorial on transcription below. You can also use MAXQDA’s spellchecking function to check for spelling errors within your transcript!
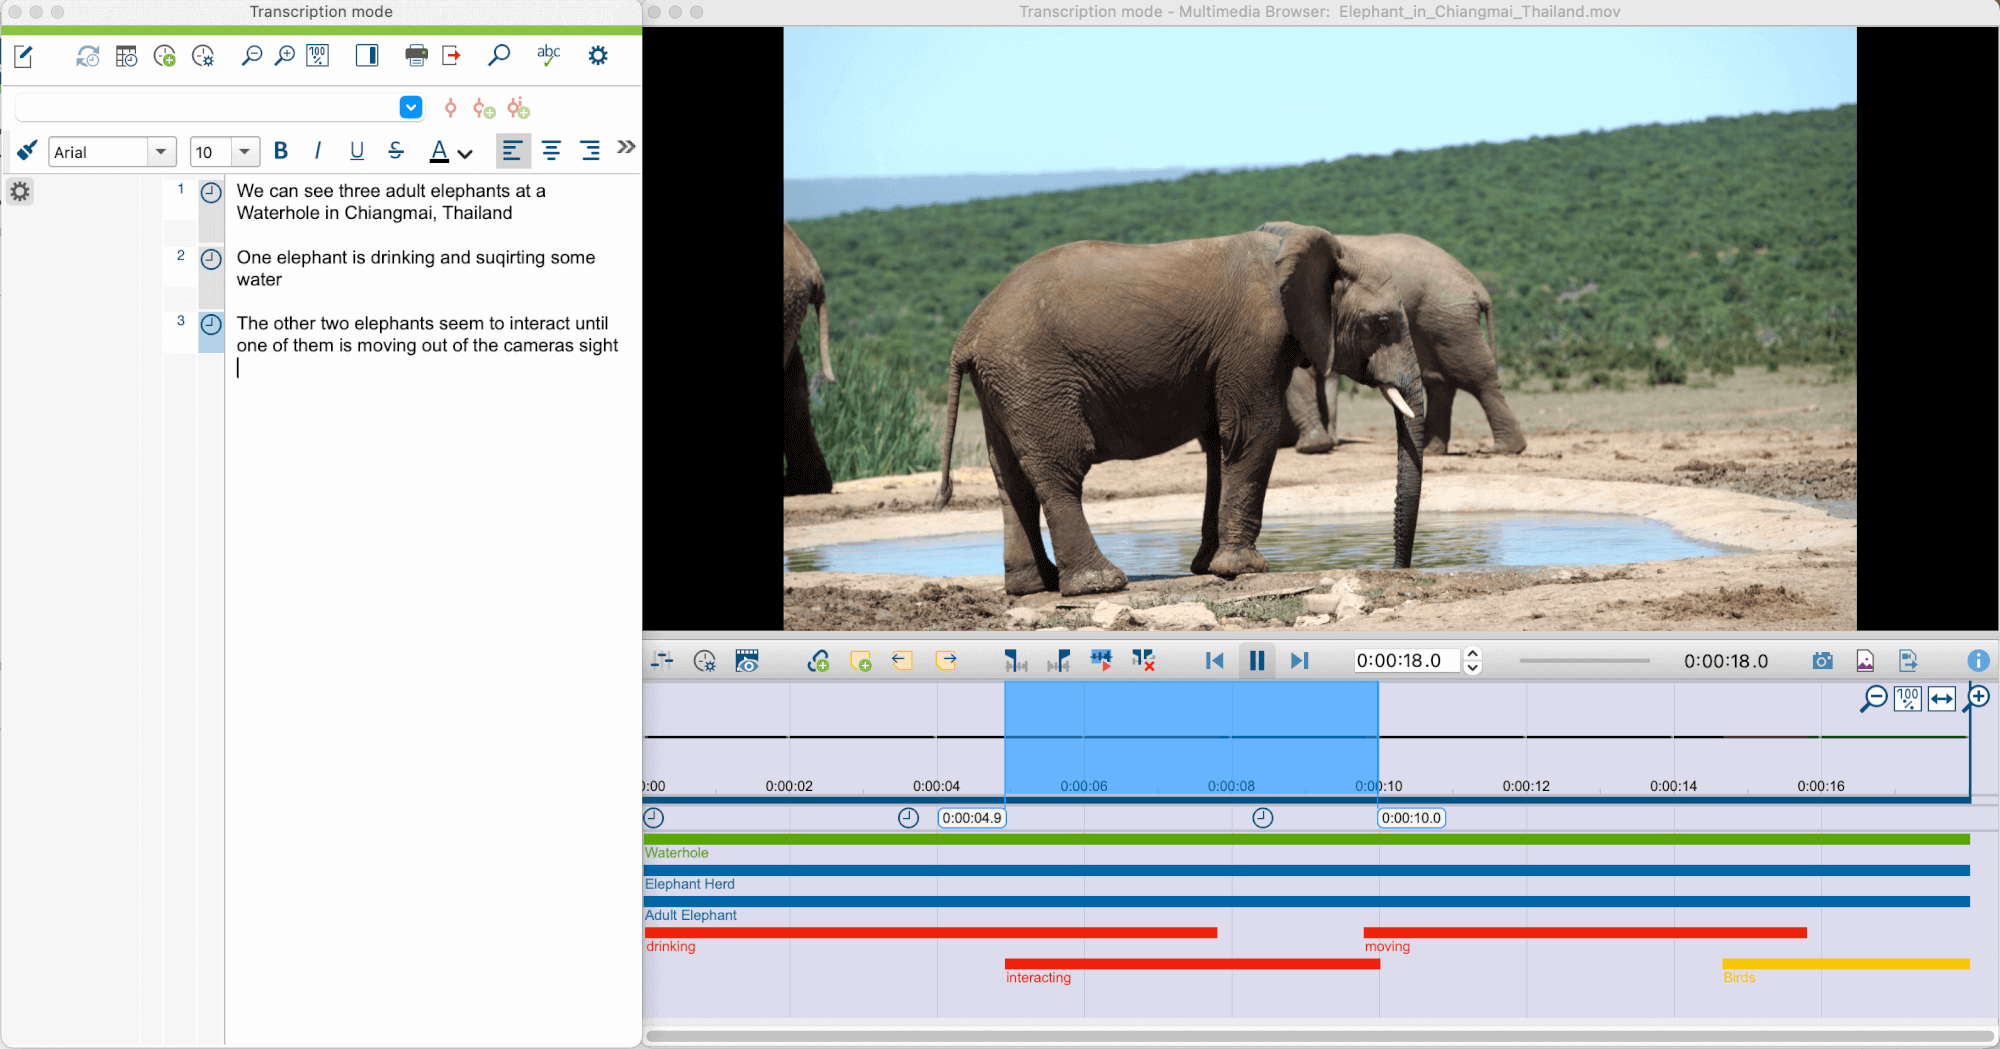 Transcript and video file with timestamps
Create Video Images
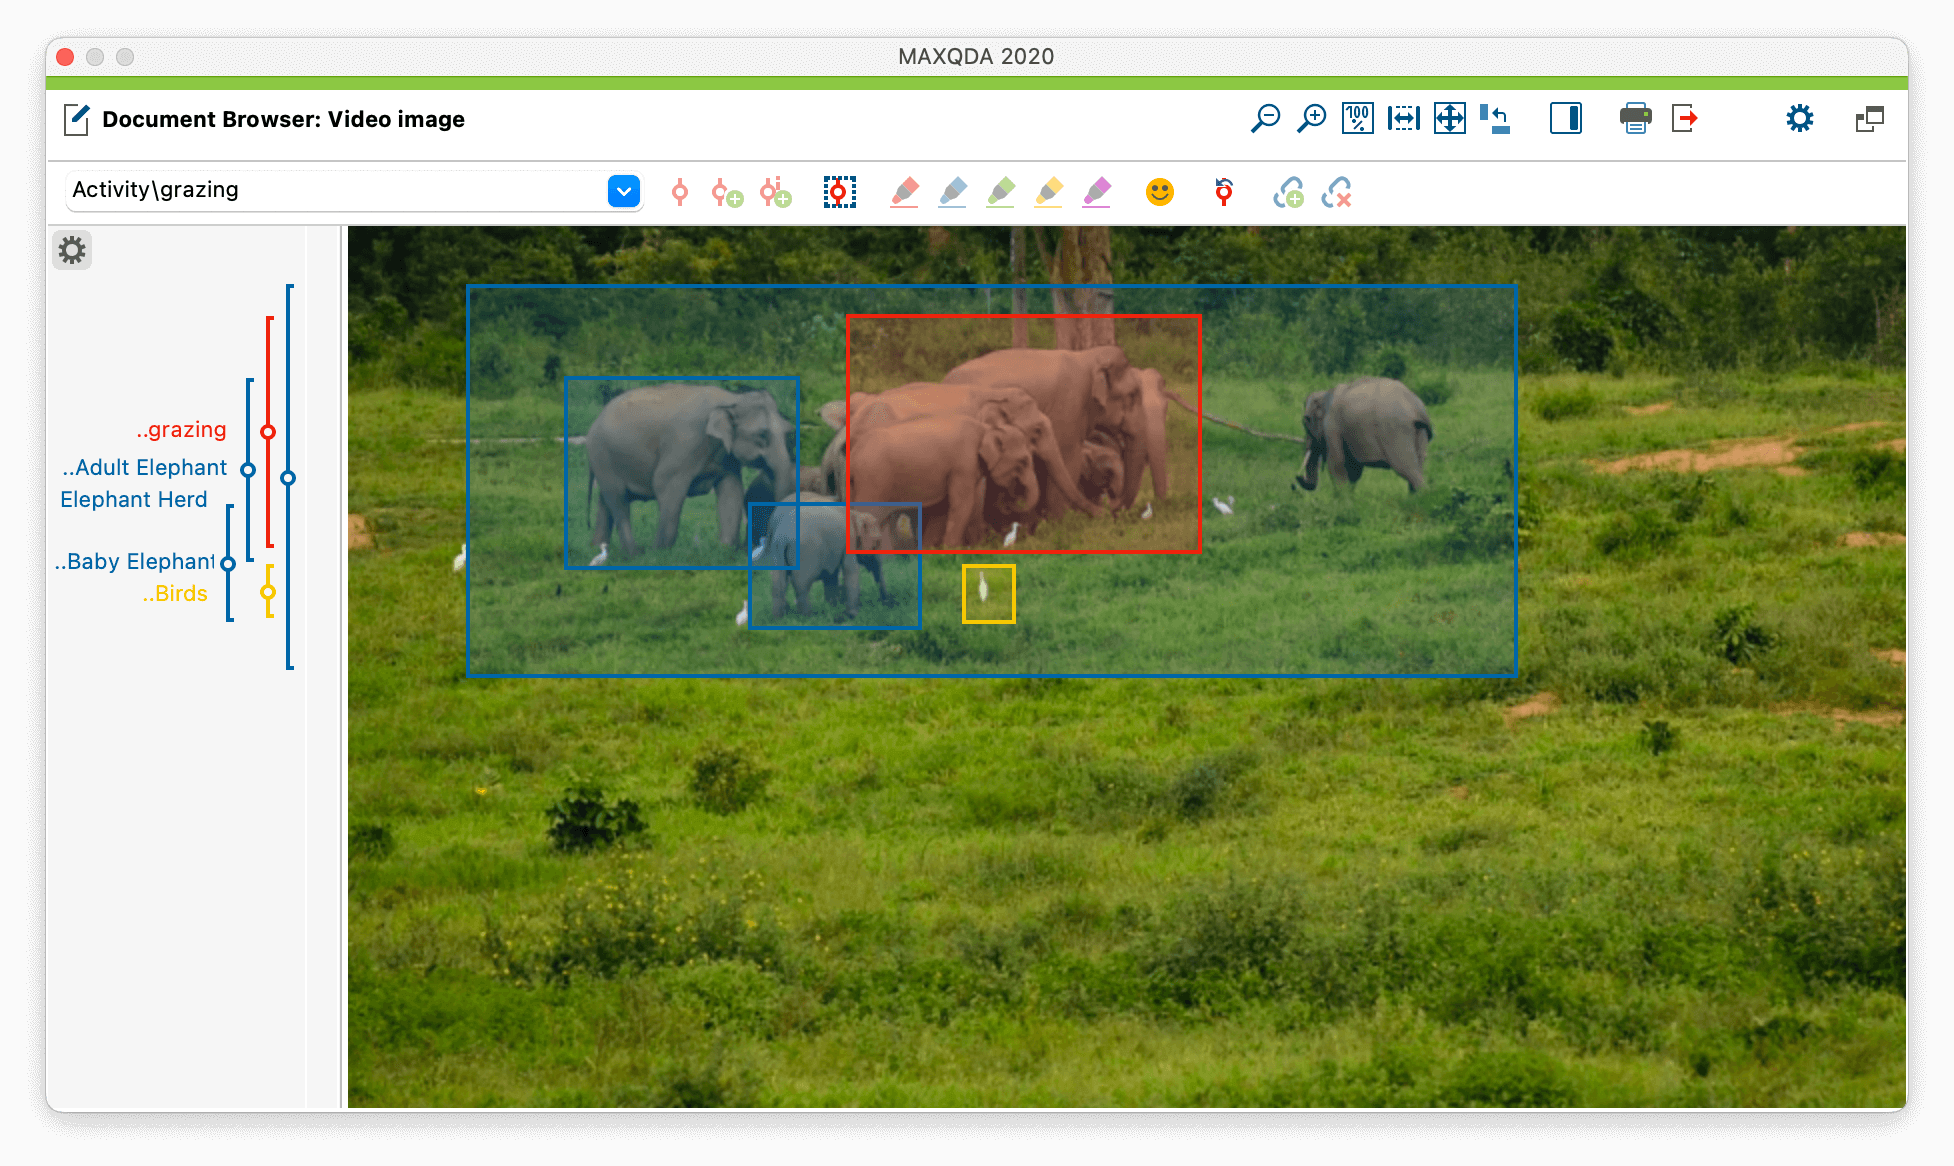
Another useful function of MAXQDA’s Multimedia Browser is the creation of video images. While transcribing, you can create and save specific images as individual ‘documents’ in the “Document System” window so that you can investigate them further later. Simply click the camera icon on the right side of the control panel to copy a video image to your clipboard. You can then code the image on its own or save it for later to insert into a presentation or Word document report. In our example project, we chose to code a video image to further investigate a specific part of the video:
Step 3: Code the Data
If you are unfamiliar with coding in Qualitative Data Analysis, or you would like a refresher, check out this 5-minute tutorial Let’s take a look at our example project. We created codes for the various actions of the elephants in order to compare them later in the research project.
There are two ways to create codes: You can either…
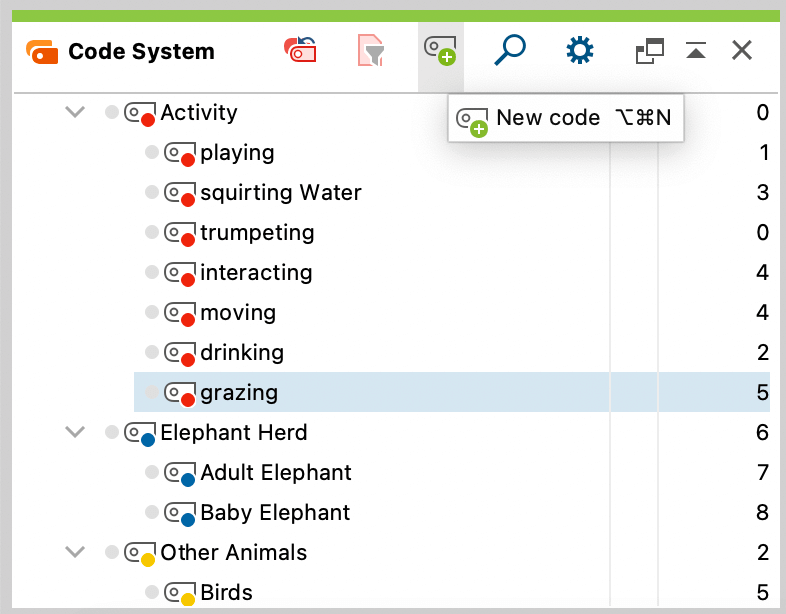 Adding a new code to the Code System
…create codes, as you would normally do it, in the Code System window or…
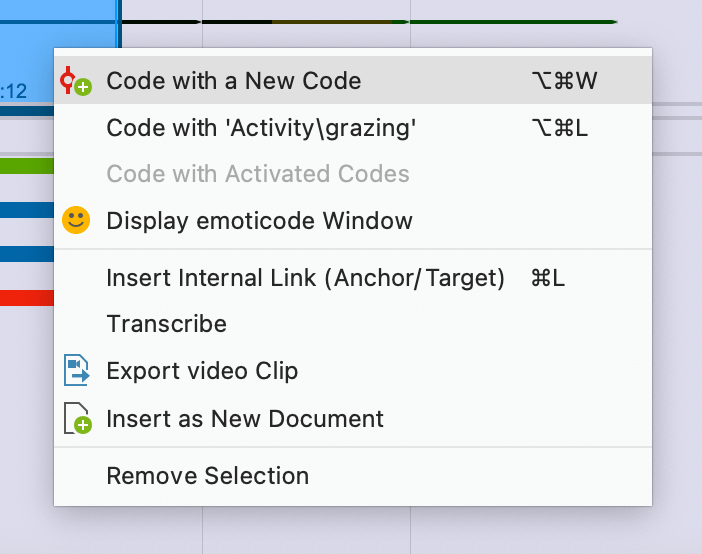 Coding a video track with a new code
…mark a certain video sequence in the multimedia browser, right-click and select ‘Code with a New Code’
Coding Steps
After creating the codes, it is now time to code the content of the video. Simply play the video to review the data; next:
- Use F4 and F5 on your keyboard to start and pause your video when you find a piece of information that fits the codes you created earlier (or create new codes directly from the data if you are using a methodological framework that calls for in-vivo coding, such as Grounded Theory).
- Mark the segment of the waveform that you want to code by clicking where you want to start, pressing down your left mouse button, and dragging it across to the time when the scene/video segment you wish to code ends (like highlighting in Word).
- Drag the code you want to assign to the video segment with from the “Code System” window onto the highlighted segment.
- A code will appear under the time segment you have chosen (see the screenshot below) and you will be able to instantly find this piece of the video during the next stage of your analysis in MAXQDA’s “Retrieved Segments” window, just like any other coded information in your project.
- If you would like to adjust the boundaries of your coded video segment, use the >zoom function to enlarge the waveform and move the boundaries of your coded segment with your mouse more precisely. You can also use the right and left arrow keys to jump by one-tenth of a second if you would like to be very exact.
If you want to code your video from more than one perspective or refine your coding categories throughout your analysis process, we recommend coding in several rounds. By going back and coding the same data (in this case, a video), you can concentrate on one aspect at a time in each round and thereby reduce errors, such as missing an important data segment. You may also find that the more times you review your data, the more nuanced your “code tree” will become and the more new ideas will arise regarding the results you have drawn from your data.
Tip: Memos are a great place to store any ideas that come to mind while coding. To attach a memo to the video, right-click in the waveform segment you are working with and select ‘New Memo’. You can easily move your memo around by dragging it wherever you need later.
Retrieve Coded Video Segments
During your analysis, you may find it necessary to check the content of coded video segments for a particular code. The “Retrieved Segments” window facilitates and accelerates exactly this step. It shows you all of the coded segments that were coded with any of the activated codes in any of the activated documents.
Simply click on your video document in the “Document Browser” window and activate the codes that you want to revise. In our example, we activated the code “interacting”. All video segments coded with “interacting” are automatically displayed in the “Retrieved Segments” window (see screenshot below). They are also automatically linked to the original material, which makes rewatching the context of the coded video segment extremely easy.
When working with videos, the first image of the video clip is displayed as a preview. For audio clips, a (standardized) image of a waveform is displayed. By simply clicking on the source information box, the Multimedia Browser plays the coded video segment. You can now rewatch and compare the coded video segments- e.g. when the elephants are interacting- to refine your coding system (creating and assigning new, more specialized codes, etc.). For example, you can break down the category “Interaction” in more detailed subcategories, such as “playing together”, “tussling” and so on. You can recode your data directly from the “Retrieved Segments” window, by either dragging & dropping the selected segment onto a code in your Code System or by creating a new code using the corresponding button in the Retrieved Segments window’s toolbar.
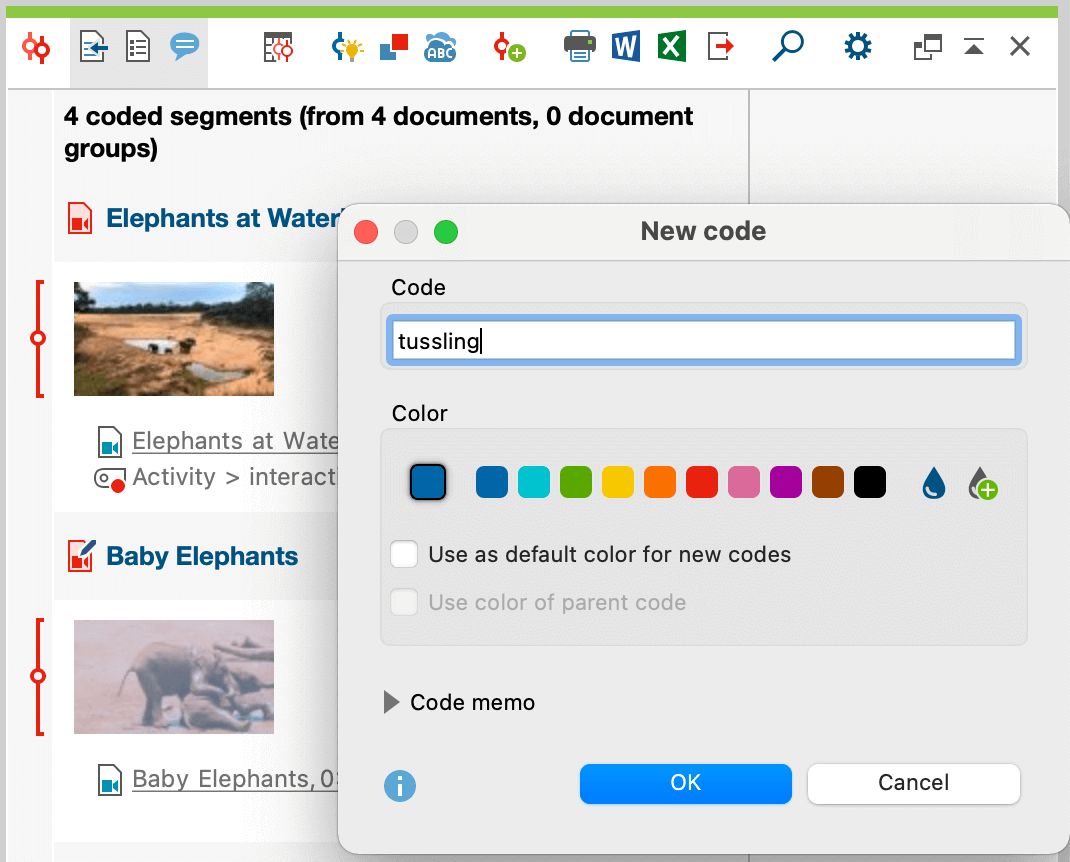 Coding coded segments with a new code
Step 4: Visualize the Analysis
Once you have finished coding your video, MAXQDA offers you a wide range of options to further analyze and present your research data. Review and compile your coded segments in the “Retrieved Segments” window, visualize your data analysis, present frequencies, and much more – it’s up to you!
Codeline
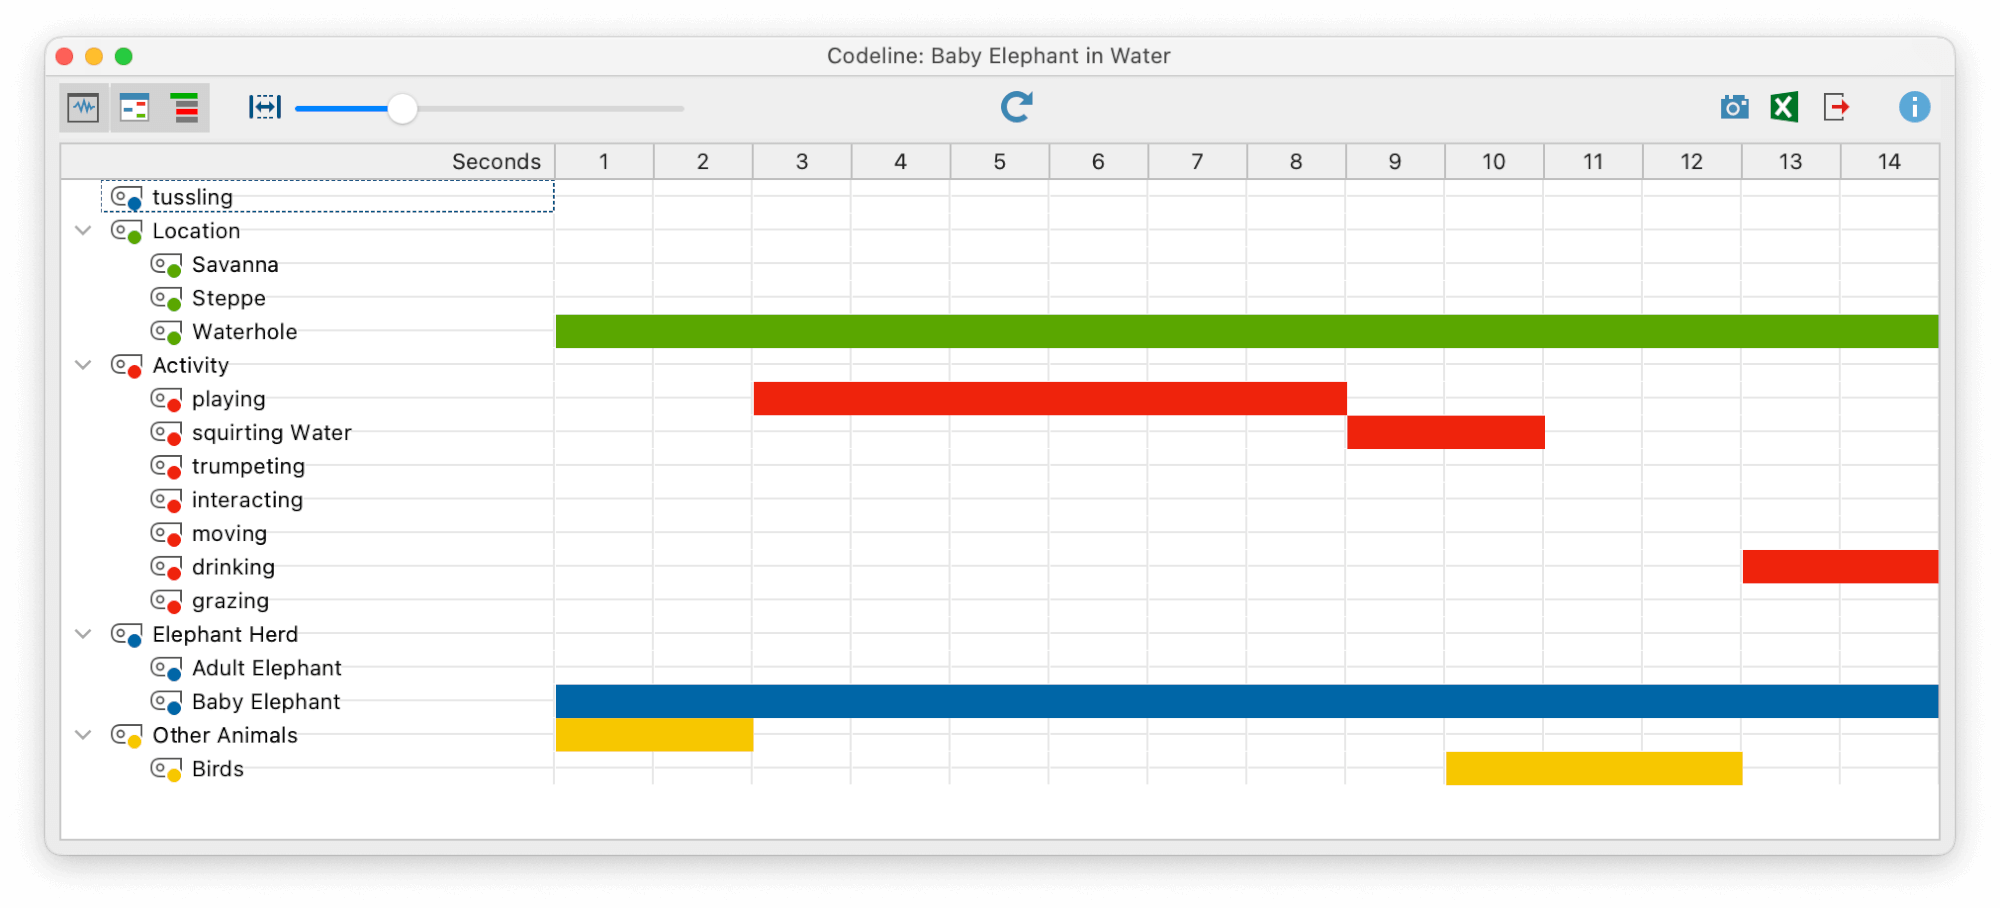 Codeline for the analyzed video
Document Portrait
The Document Portrait feature helps you visualize all the video segments assigned to specific codes according to their order in the video. You can sort the coded segments by color frequency, which allows you to visualize and compare the total time of the (sub-)codes. Please note: The Document Portrait only makes sense if you have assigned different colors to each of the codes you are analyzing.
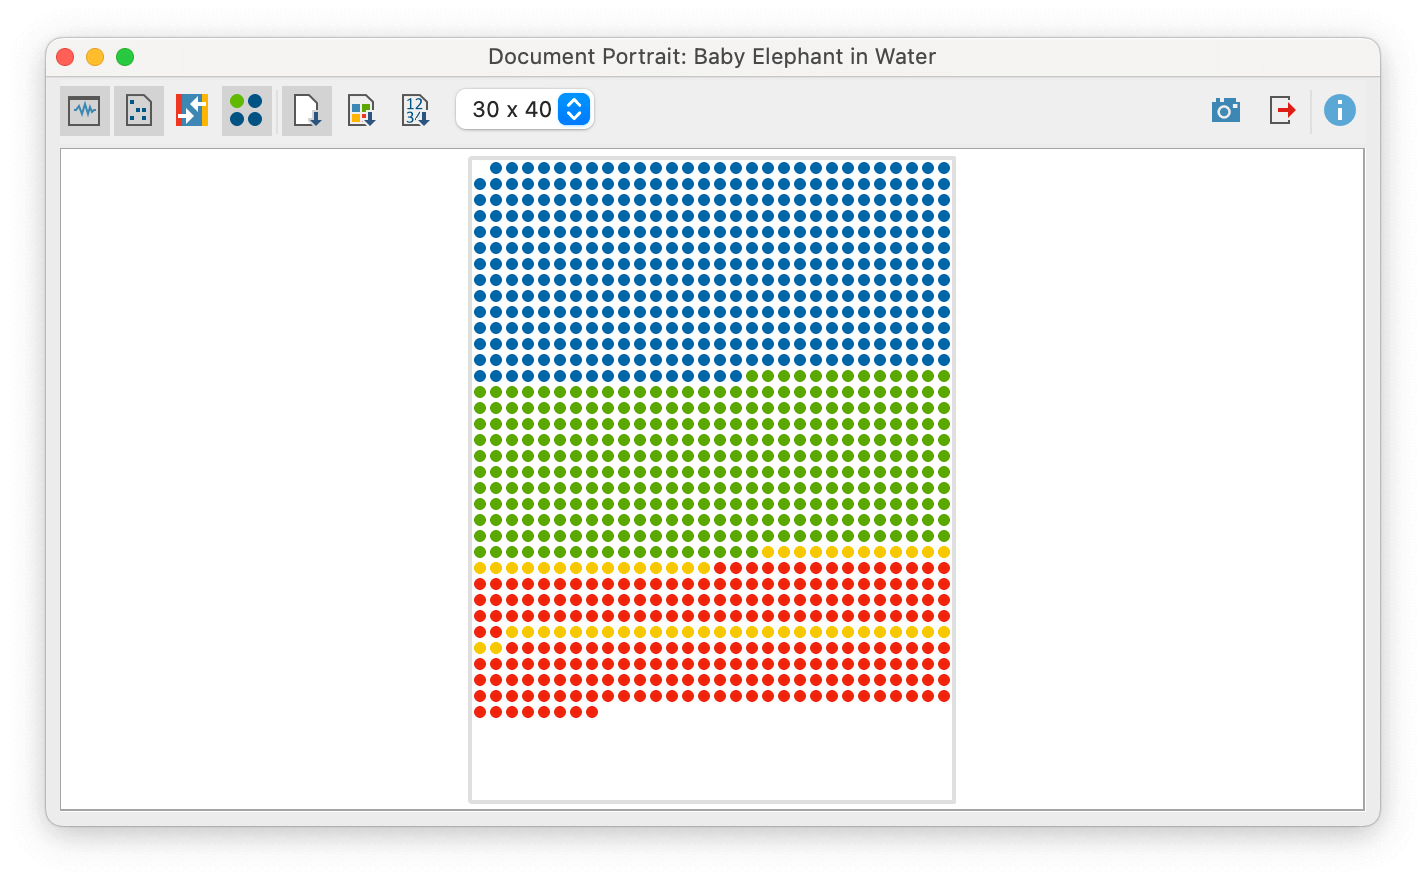 Document Portrait for the analyzed video
Subcode Statistics
Create frequency tables and charts for subcode frequencies to compare subcodes. Choose from different chart types, color schemes and other display options to customize the chart to your needs. This is a great tool for mixed methods researchers! The following chart is an example of a subcode statistic where we have visualized the different activities of the elephants in the videos.
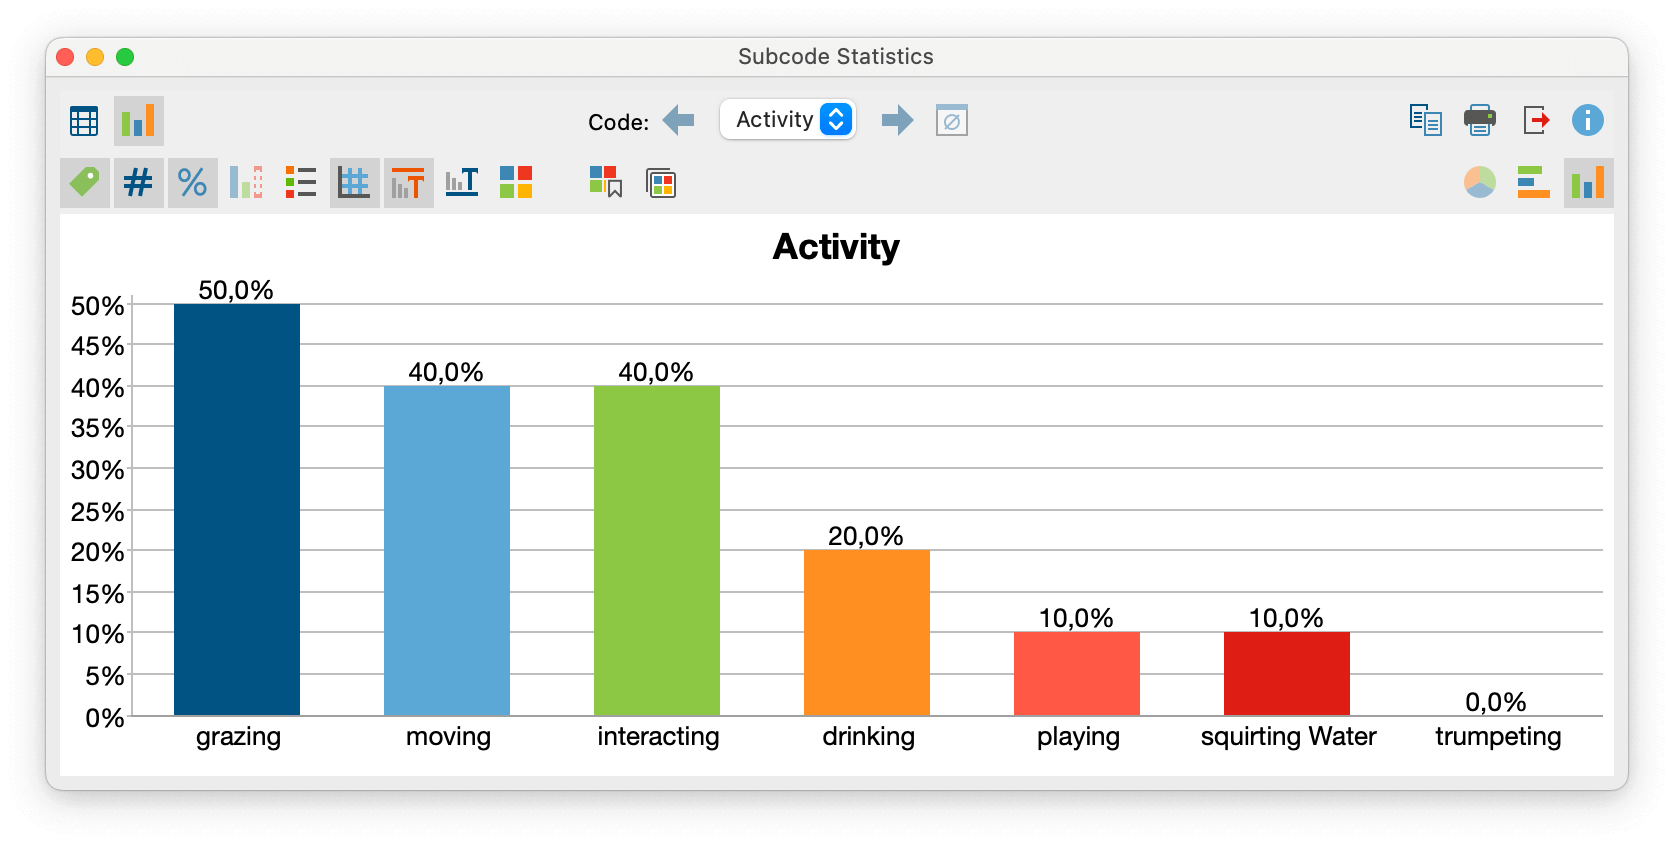 Subcode Statistics for the code “Activity”
Code Cloud
Another, even more visual, way to explore, present, and publish the most frequently assigned codes is the Code Cloud. MAXQDA 2020 has even more options available to design the code cloud for your needs.
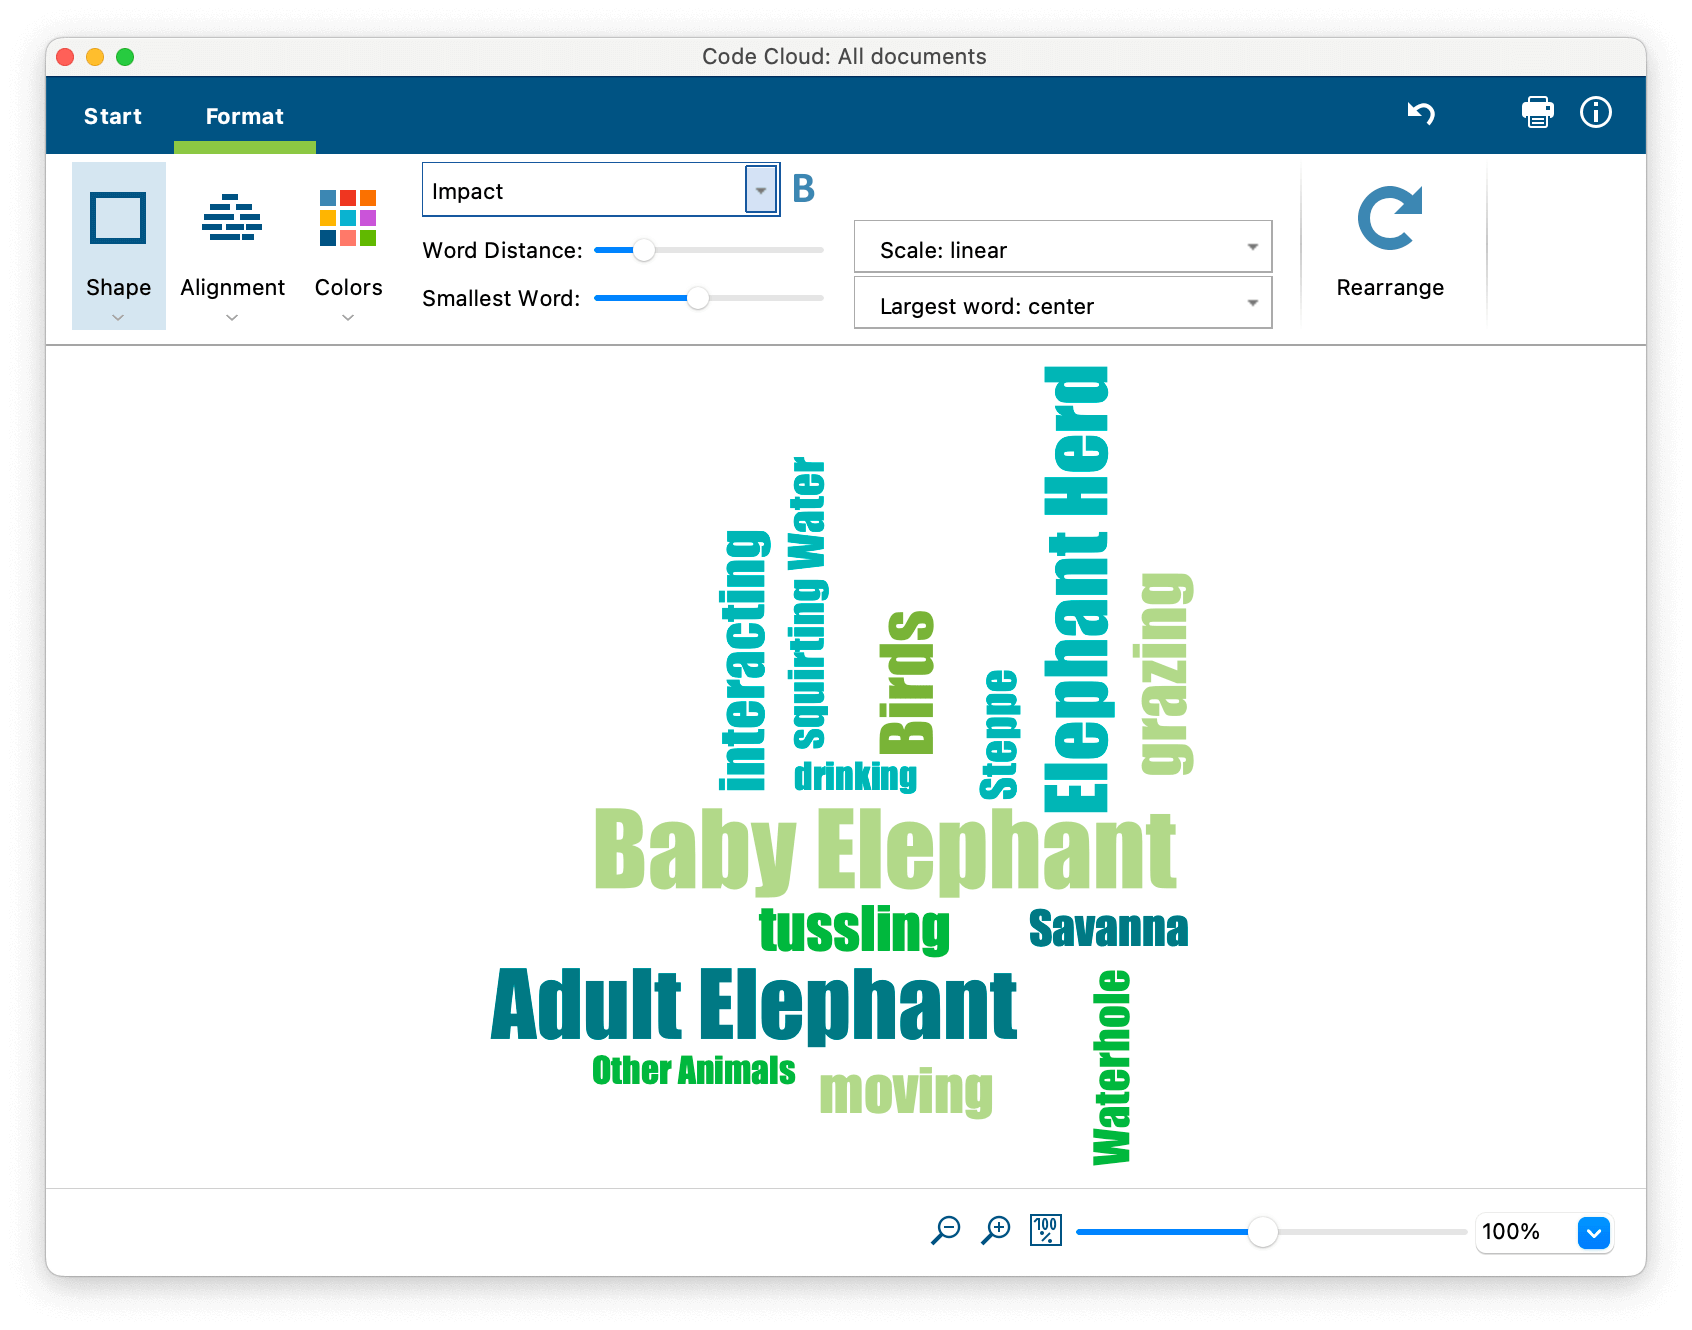 Code Cloud for all documents in the project
MAXMaps
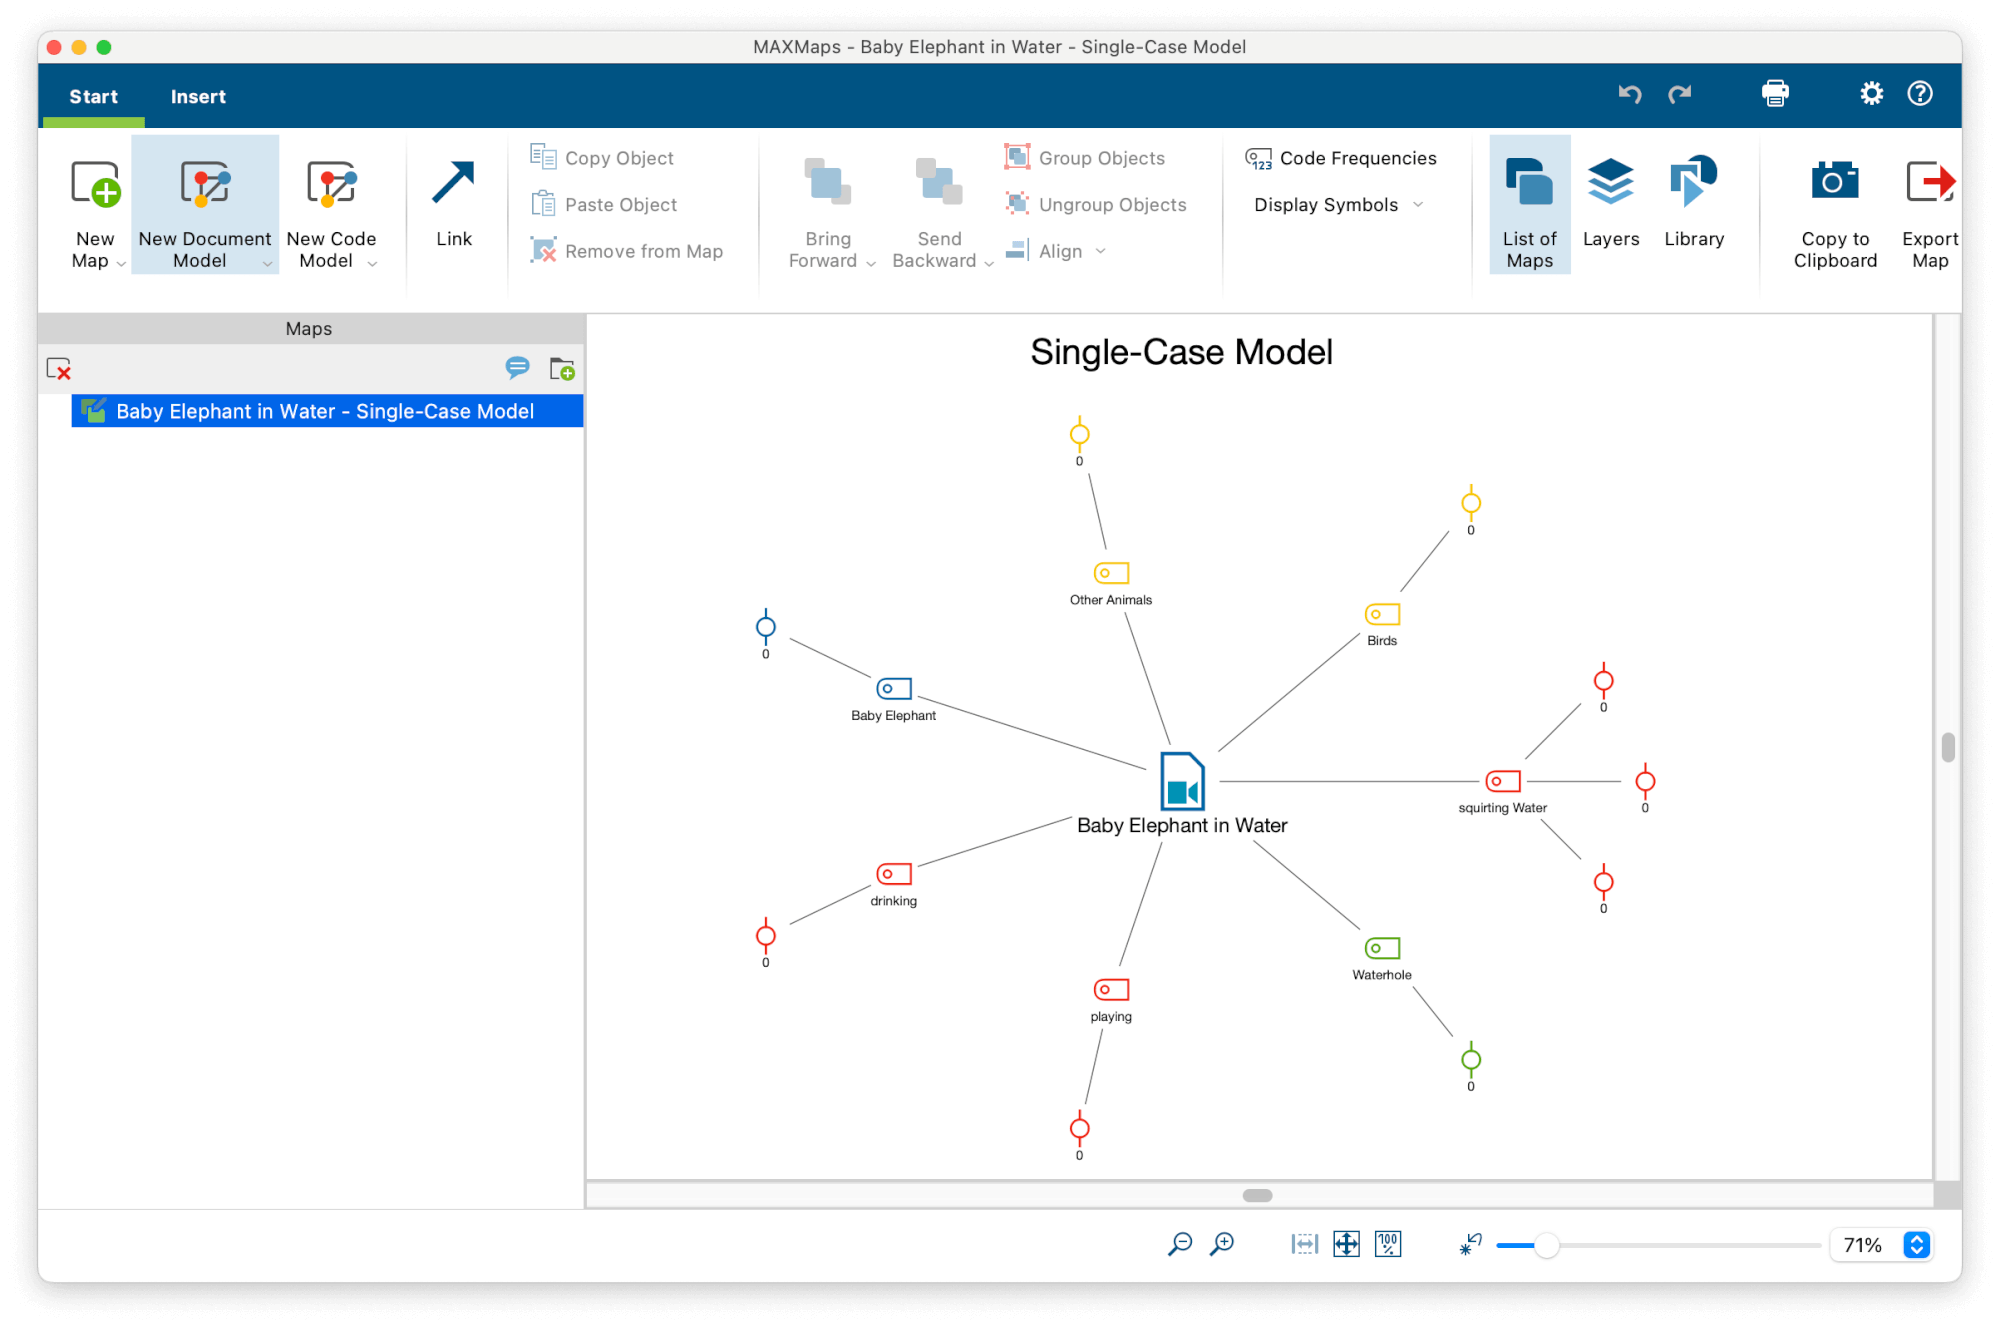
Finally, when it comes time to theorize about your analysis work, you can use MAXMaps, MAXQDA’s tool for creating concept maps to graphically present connections in your data. You can import almost anything into your map: codes, memo texts, coded image segments, and so forth. One huge advantage of MAXMaps is that all the elements used in your map are interactive, meaning they are connected to the MAXQDA project. Simply double-click on the icon and MAXQDA opens whatever is behind it. In addition, MAXMaps offers many ways to customize your map that are worth checking out.
Step 5: Export the Results
MAXQDA supports your research all the way from gathering data to exporting your results. Whether you are looking for an Excel table, an image, or HTML code, simply click the corresponding export icon to save your work on the computer outside your MAXQDA project. Another way to include MAXQDA’s visualizations or graphs is to copy the current window to the clipboard and insert it directly into your Word document – this is a really easy way to enrich your research report with eye-catching visualizations. The export options can always be found in the upper right corner of the tool window.
But wait, there’s more! When it comes to video analysis specifically, MAXQDA allows you to export short extracts of your video material for presentations or analysis. These clips are stored as distinct video files and can be inserted as new video files into your MAXQDA browser. All you need to do is mark the video segment that you want to import and select ‘Export Video Clip’ from the context menu. A dialog will pop up in which you can define your output preferences. If you want to export all the coded video segments of one or more codes, use the corresponding function in the upper right corner of the Multimedia Browser.
What else than a picture of two cute baby elephants tussling in the mud would be better for closing this article?
Editor’s note: this post has been updated from its original version published in December 2018.

