MAXQDA lets you open several table overviews that list project data such as coded segments, memos or variables:

Customize the view of tabular overviews
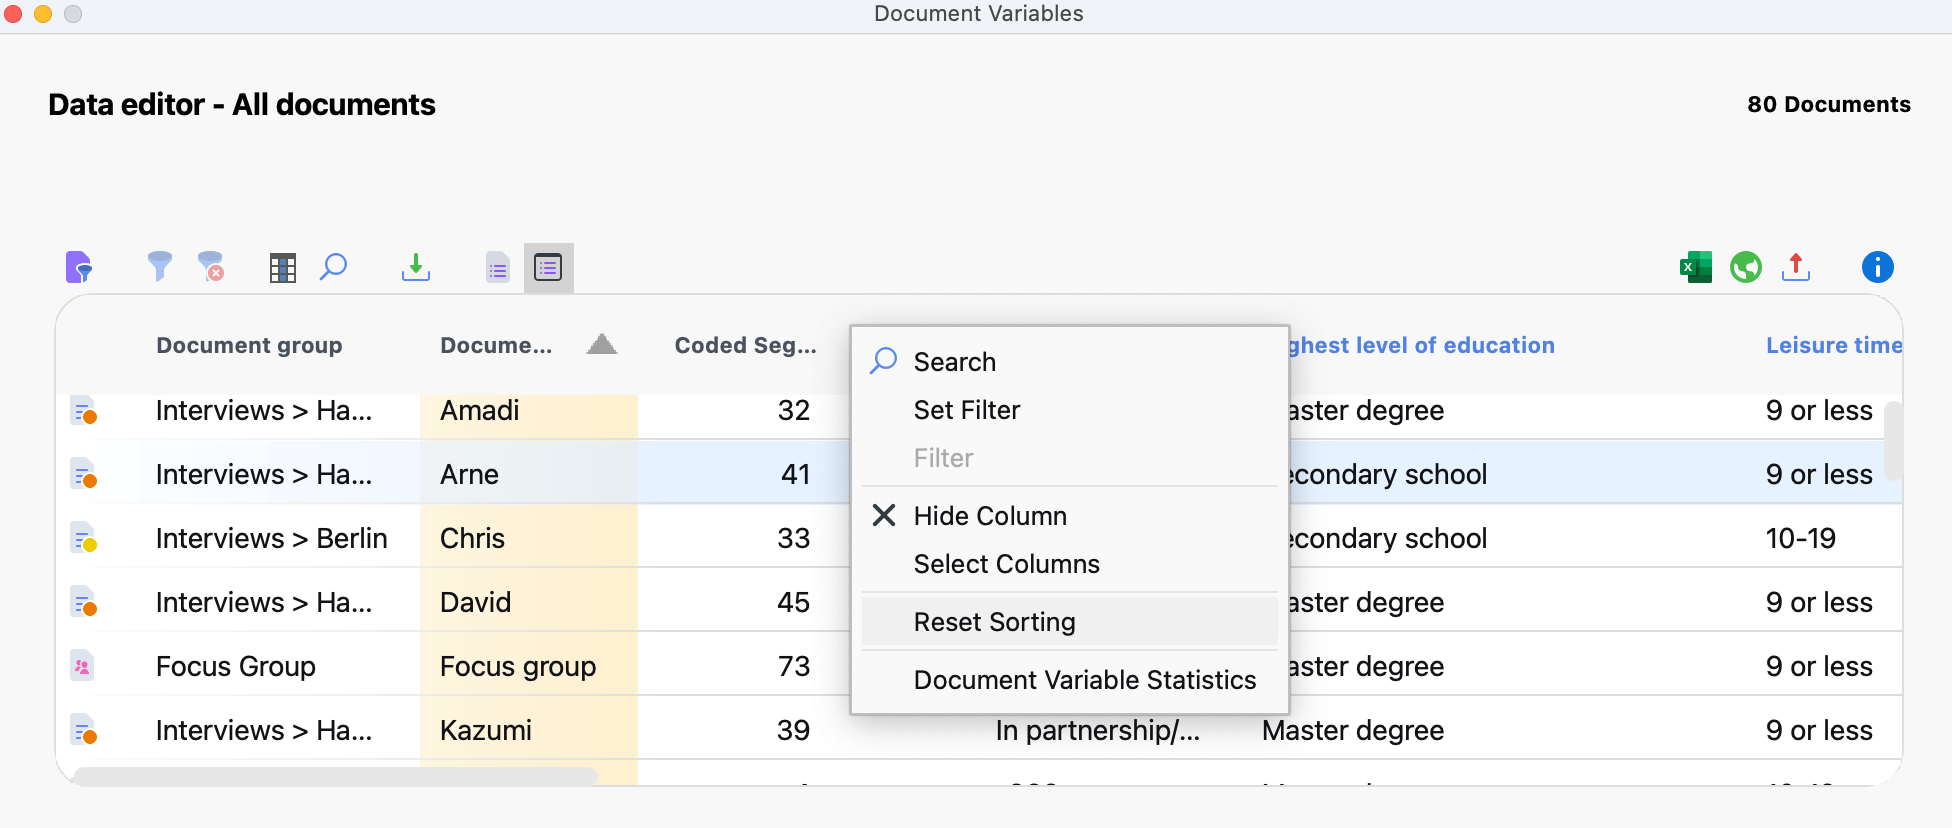
- Sort the table: Click the column header to sort in ascending order. Click again to sort in descending order.
- Reset sorting: To reset the sorting, right-click a column header and choose Reset Sorting.
- Change column width: Drag the column dividers in the header while holding down the left mouse button. Double-clicking a column separator sets the column to the optimal width, which is the maximum space occupied by a value in that column.
- Change the column position: Click on the desired variable name in the table header and drag the column to the desired position.
- Hide and show columns: Right-click a header row and select Hide to hide a column. Right-clicking on a visible header row and selecting the Select Columns option (or clicking on the corresponding icon in the toolbar) opens a dialog for selecting the visible columns.
Changing the contents of tabular overviews
Tables in MAXQDA have editable and non-editable columns. Values can be entered in the editable areas of the table by double-clicking on the corresponding cell.
Table overviews with a detailed display
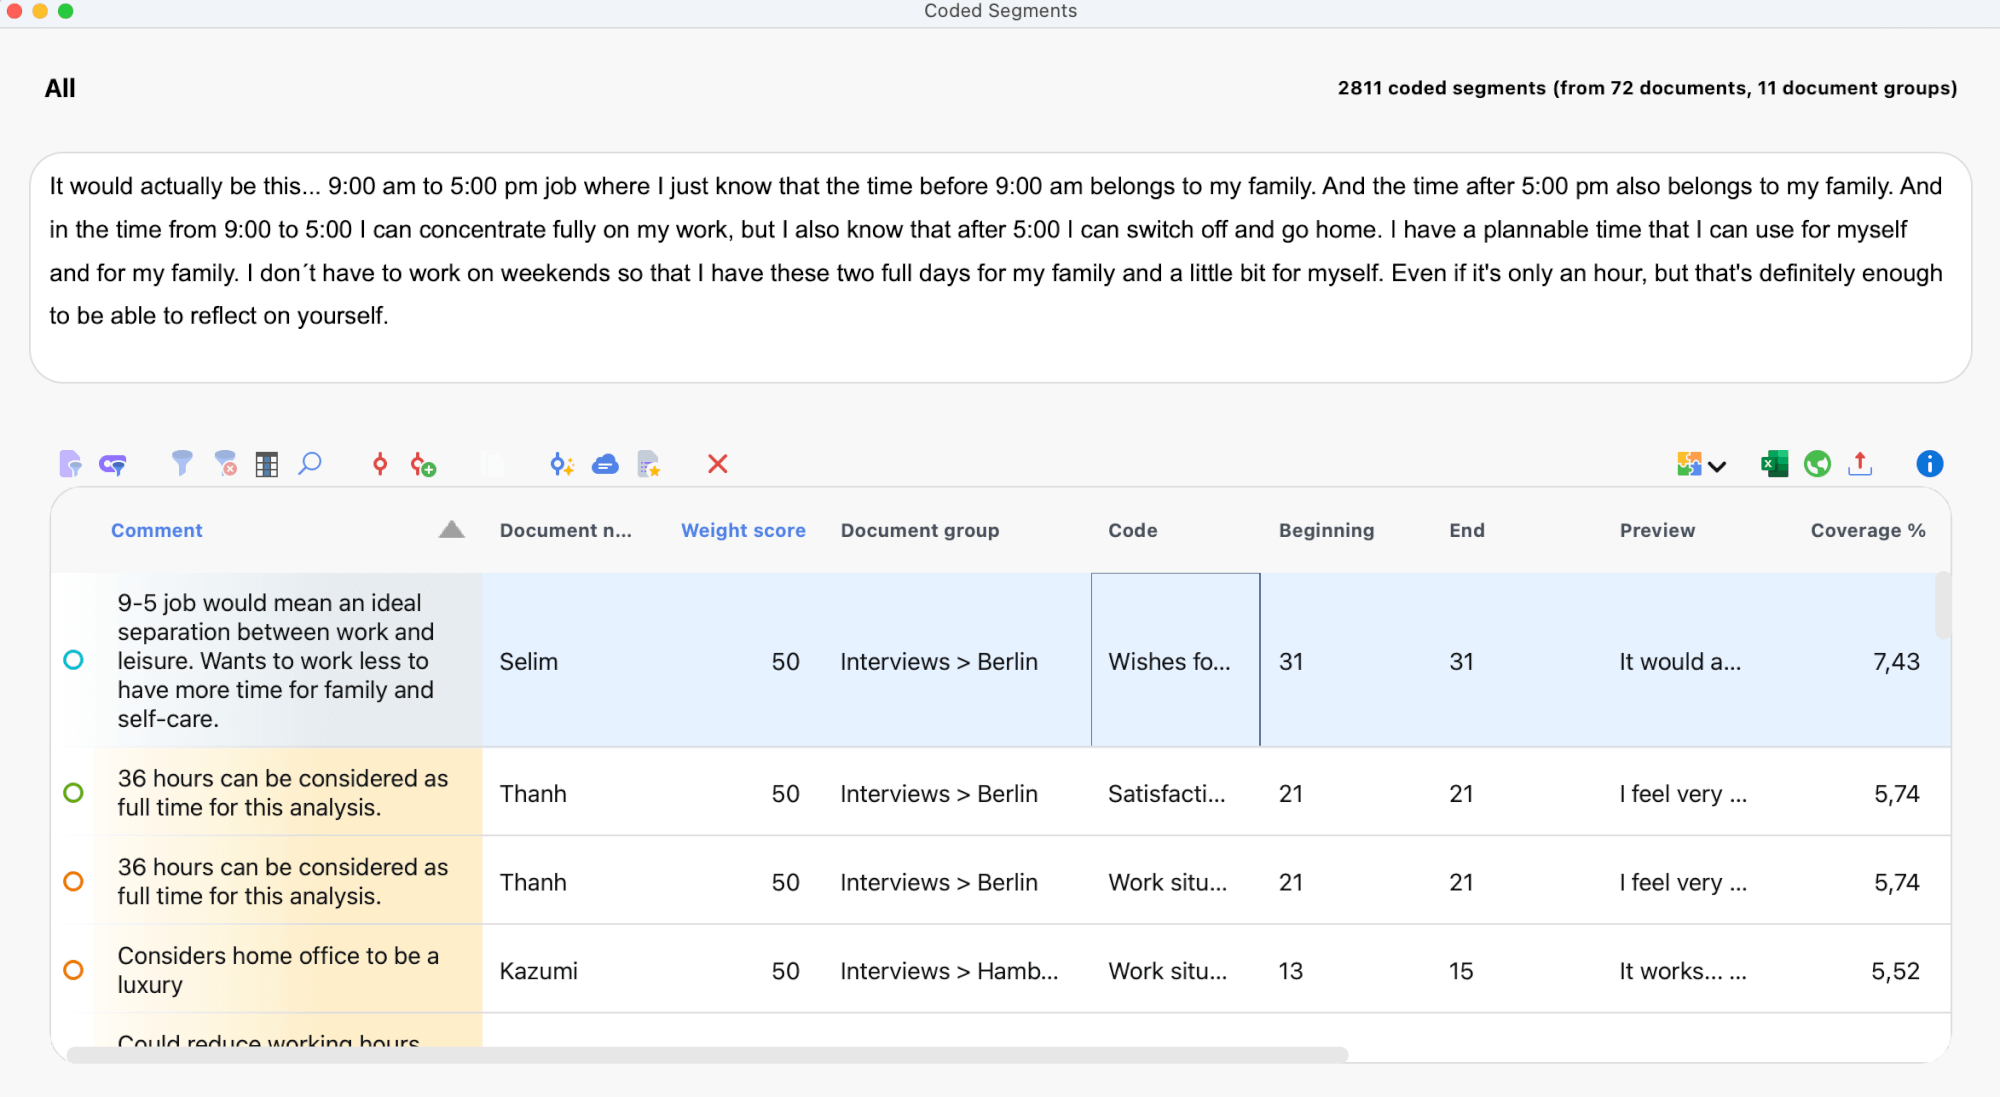
The Overview of Coded Segments differs from other overviews that it is divided into two parts. The lower part is used as in other tables. The upper part serves as a detailed view. It shows the coded text or image segment selected in the lower part. The same applies to the “Overview of Memos”: here, the detailed view of the memo will appear.

The toolbar in table overviews
All overviews have a toolbar below the title bar that provides direct access to frequently used functions. The overviews have different icons in the toolbar depending on their functionality. However, some icons are available in almost all windows:
![]() Only activated documents – Displays only the rows with activated documents. The icon is clickable only if at least one document is activated.
Only activated documents – Displays only the rows with activated documents. The icon is clickable only if at least one document is activated.
![]() Only activated codes – Displays only the rows with activated codes. The icon is clickable only if at least one document is activated.
Only activated codes – Displays only the rows with activated codes. The icon is clickable only if at least one document is activated.
![]() Switch on Filter – Turns the filter for all columns on and off. The icon can only be clicked when a filter has been set for at least one column. Set the filter by right-clicking on the column header (see below).
Switch on Filter – Turns the filter for all columns on and off. The icon can only be clicked when a filter has been set for at least one column. Set the filter by right-clicking on the column header (see below).
![]() Reset all filters – Deletes the defined filter for all columns of the table.
Reset all filters – Deletes the defined filter for all columns of the table.
![]() Search – Turns the search toolbar for the table on and off.
Search – Turns the search toolbar for the table on and off.
Filtering table overviews
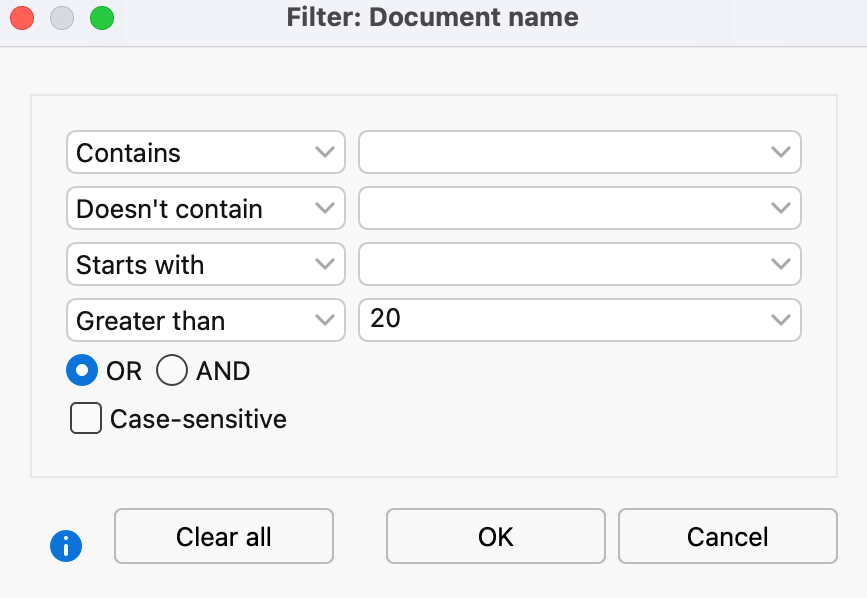
Table overviews can easily be filtered. For example, in the Data Editor you can display only the rows with documents containing more than 20 codes or whose names begin with “B”:
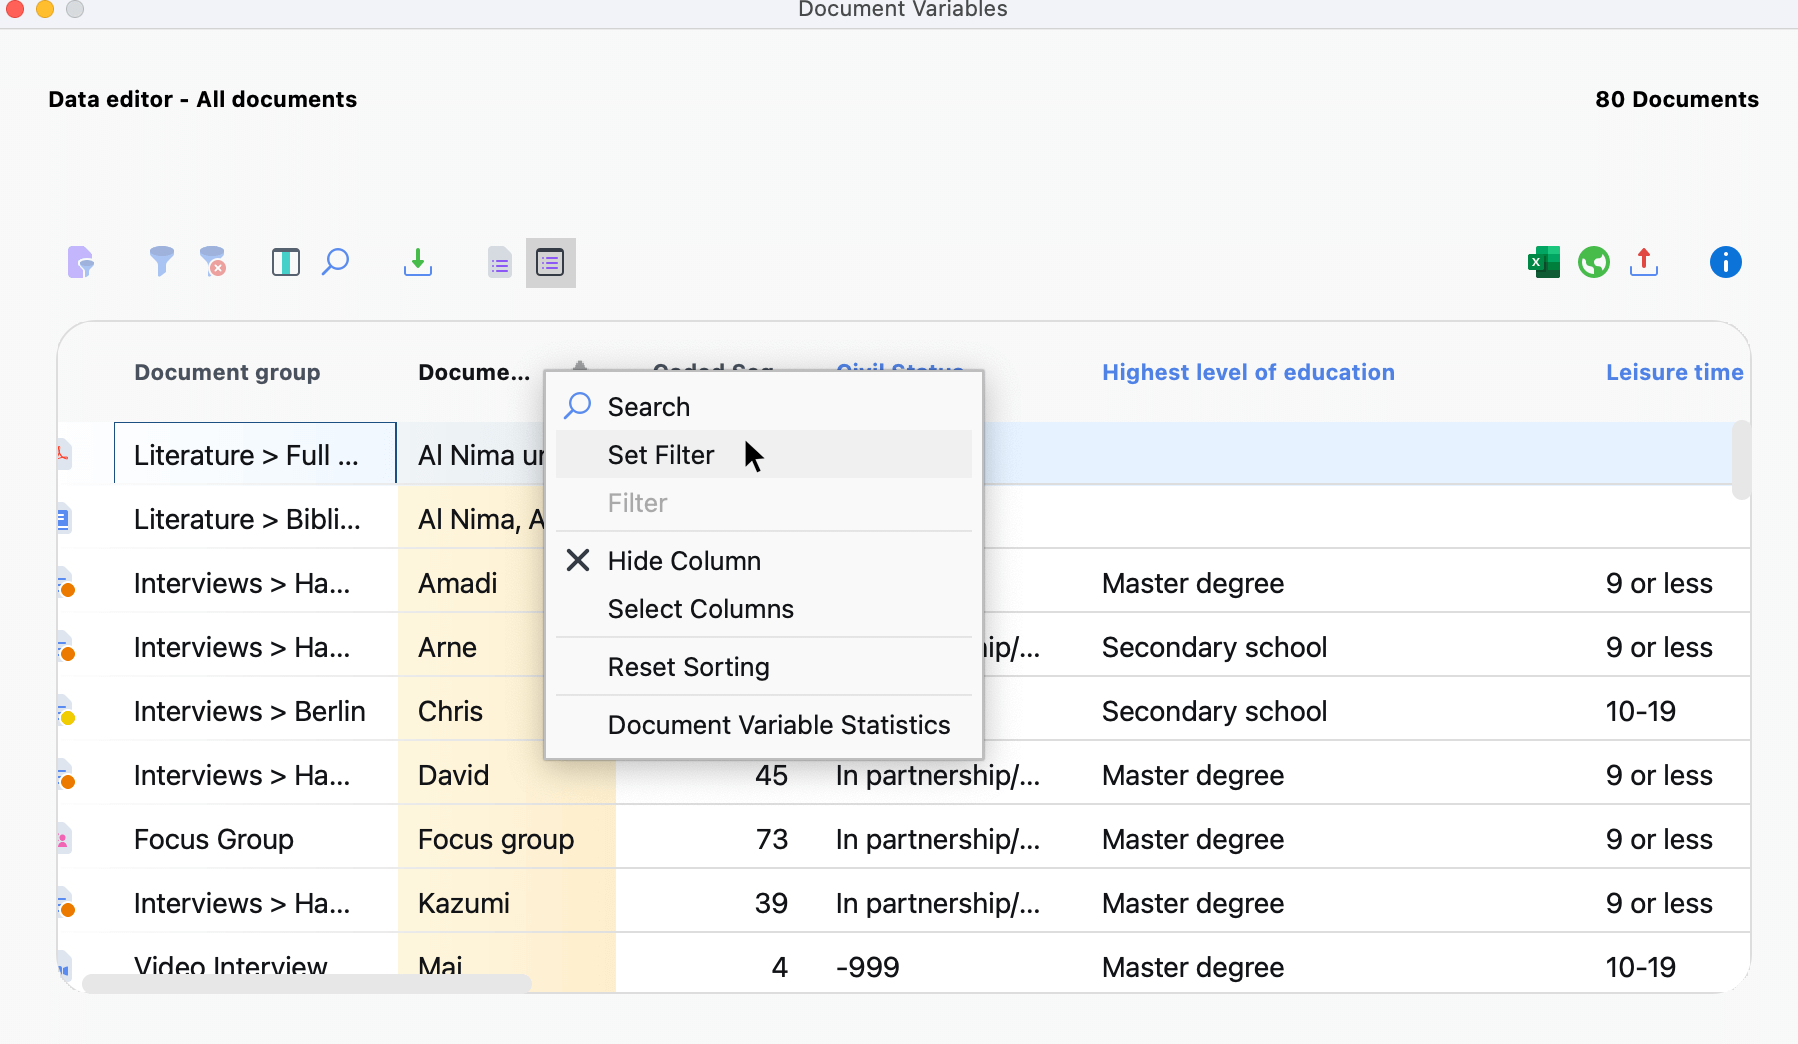
- Right-click on the heading of the column you wish to filter, and select the Set Filter option. (If a filter is already set for the column, this option is called Edit Filter.)

- Set the desired filter options in the window that appears.

In all four input fields, you can define criteria to filter. The following criteria are available:
- Contains
- Doesn’t contain
- Starts with
- Greater than or Lesser than (applies to both numbers and the alphabet)
- Earlier than and Later than (available only in columns containing a date)
OR/AND – Here you can choose how the four input fields are combined. OR lists the rows where at least one of the criteria is true. AND lists the rows where all criteria are true.
Case-sensitive – Enable this option to distinguish between uppercase and lowercase text in the text column. In this case, if "interview" appears in lowercase in the filtered column, "interview" that begins with an uppercase letter would not be considered.
After clicking OK, MAXQDA filters the table overview according to the defined criteria. At the top right MAXQDA indicates how many of the originally existing rows are currently displayed.
- Each time your reopen an overview, the filters are automatically be set to “off”. The filter settings are saved individually for each overview in the project, so if you have defined a filter and reopen the project at a later time, you can turn on the filter by simply clicking the Filter icon.
- If you set a filter for multiple columns, they are combined with the AND function.
- You can toggle a table view filter on and off at any time using the Switch on filter icon.
- If you want to clear all defined filters, click on the Reset all filters icon.
