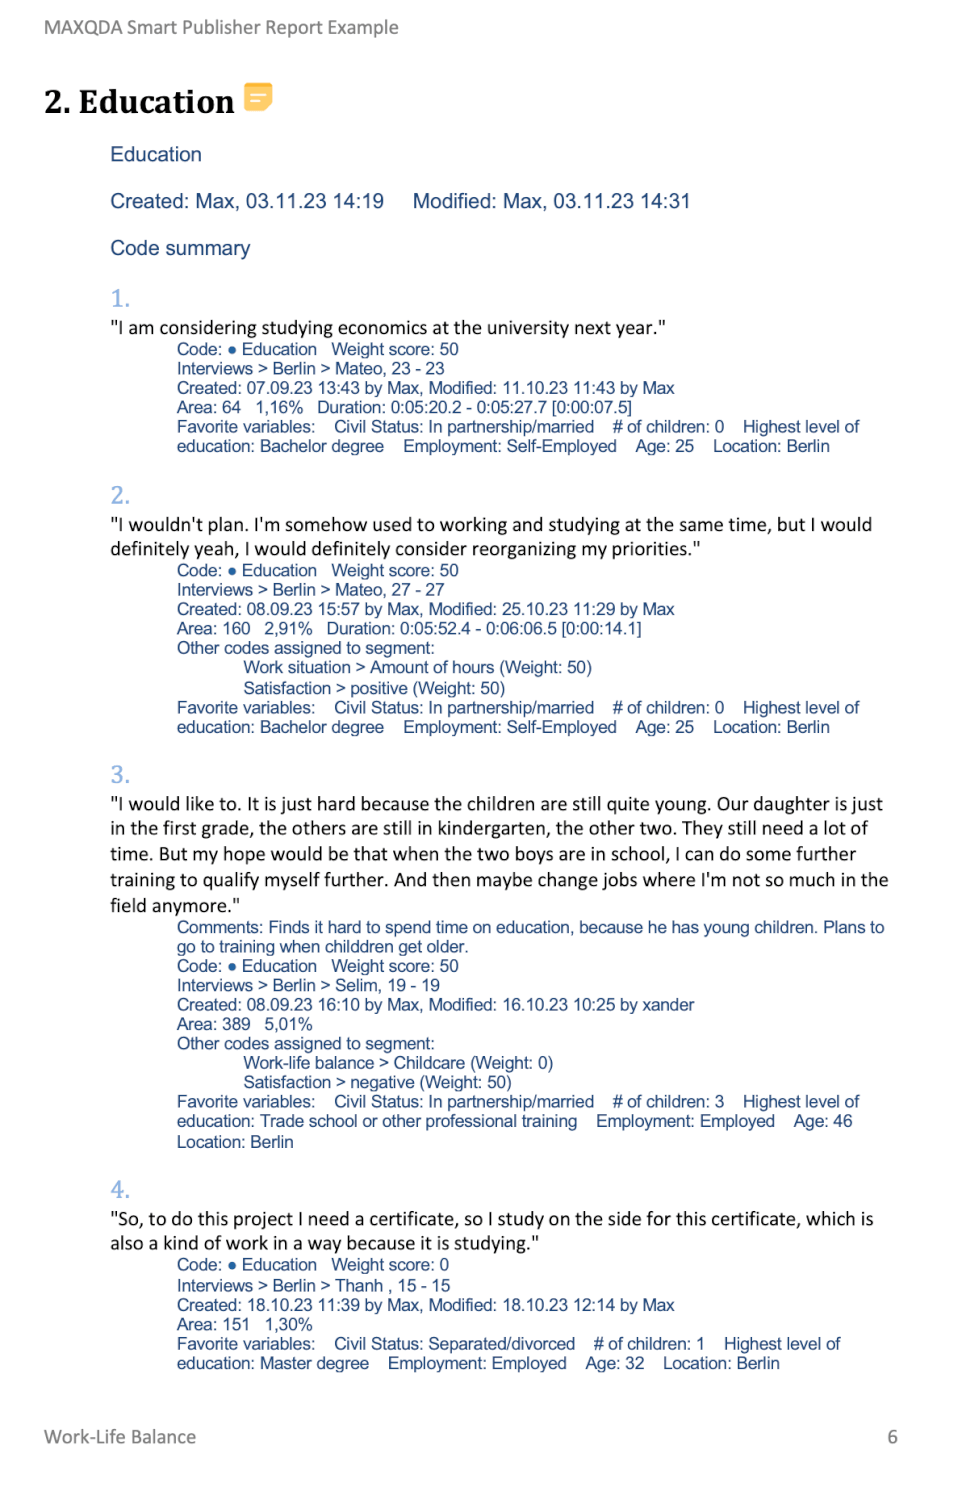
Smart Publisher is a convenient report generator. It exports selected coded segments in a formatted Word document report, including title page and table of contents. The structure of the report is determined by the “Code System:”
- An individual chapter will be created for each top-level code.
- A subchapter will be created for each subcode.
- Coded segments of each code form the content of each (sub)chapter.

Starting the Smart Publisher
Smart Publisher can be accessed via the main ribbon menu: Reports > Smart Publisher.
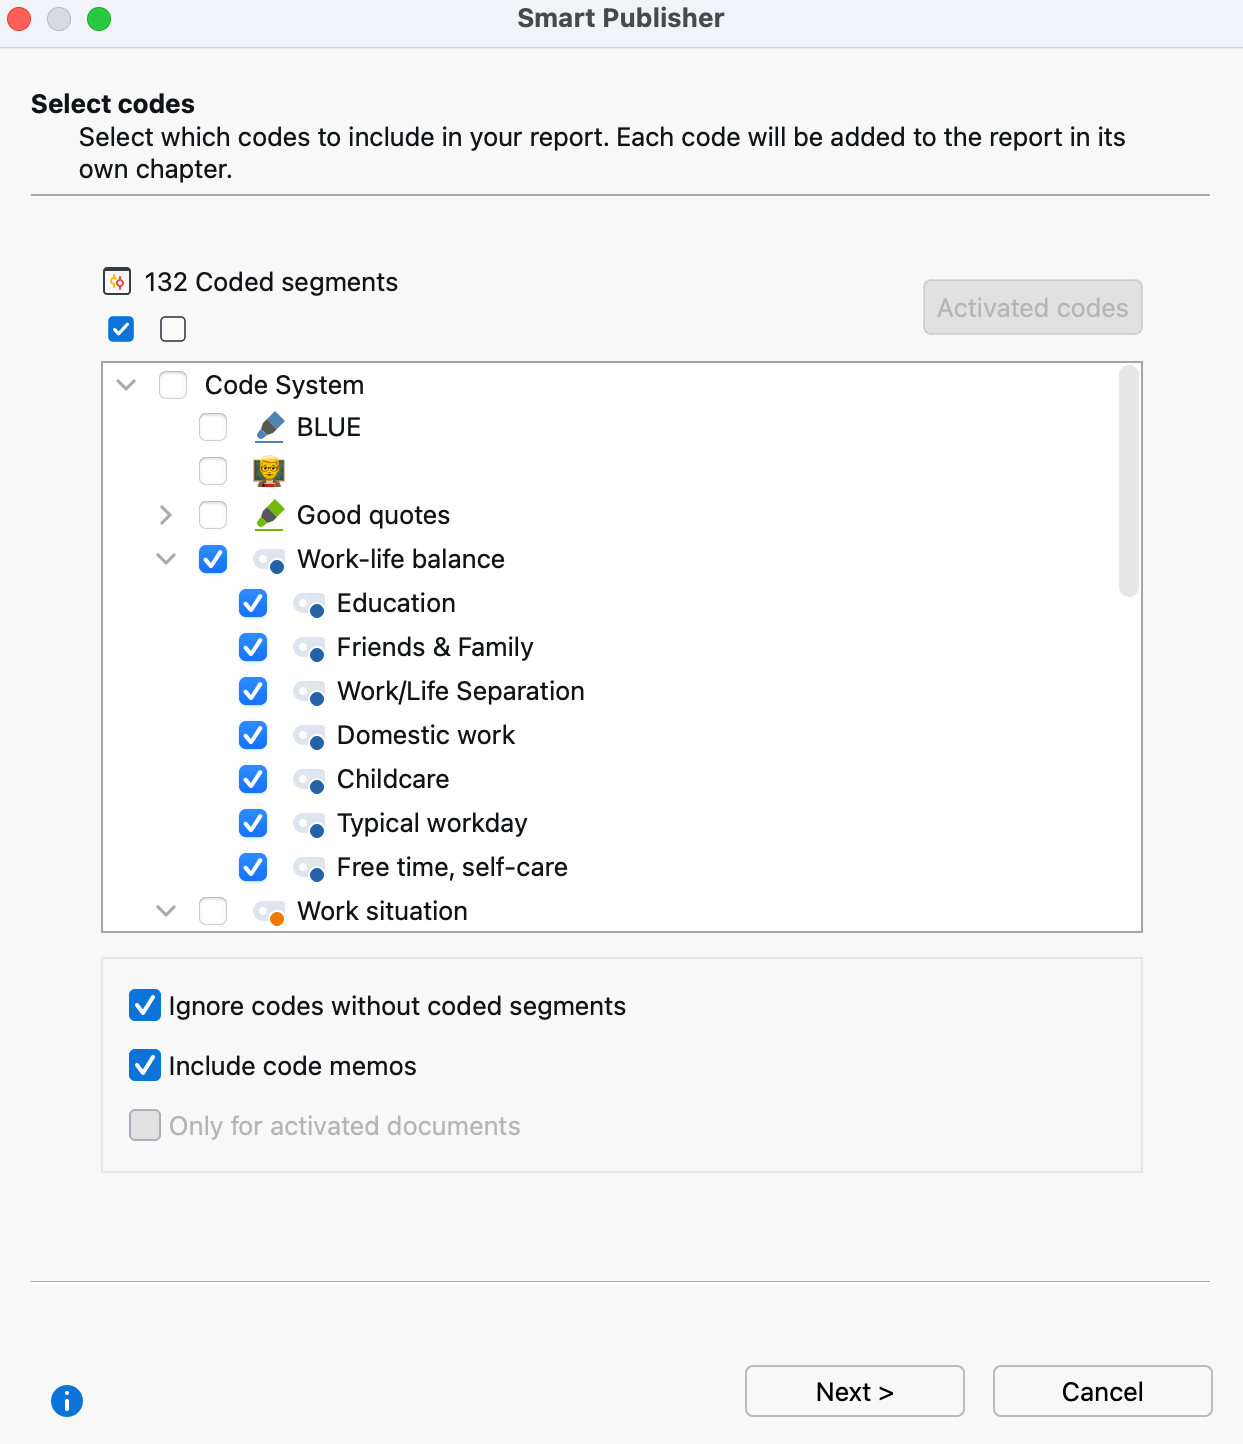
A dialog window will appear in which you can select the codes to be included in the report. You can also choose to include coded segments only from activated documents, to ignore codes without coded segments, and include code memos.
Select codes

Customize included elements an layout
In the next step, you can select various report options:
Title – The title, which will appear on the first page of the report.
Subtitle – The subtitle, which will appear on the first page of the report.
Image files 1 and 2 – Selection of up to 2 image files, which will appear on the first page of the report. If the field is left blank, no image will appear.
Header – Header text. If the field is left blank, no image will appear.
Footer – Footer text. If the field is left blank, no image will appear.
Quotation marks – Displays the segments in quotation marks.
Include list of documents – Includes a list of all considered documents at the beginning of the report.
Additional information for the coded segments
"Further Information"
In the left window, specify which supplementary information should be exported in addition to the coded segments, including memos, comments, area and coverage, other codes assigned to the segments and variabels.
"Source information"
In the section to the right, you can specify which source data should be exported with each segment.
"Coded Segments sorted by" settings
In this part you can set how the coded segments within each chapter of the report are sorted. You can sort segments by their documents position in the ”Document Sysetm” or by their assigned weight scores.
The report
The finished report is in the form of a Word document (in DOCX format), which includes a title page, table of contents, a page that lists of all the documents included in the report, and the main section including all of the exported segments. If a header/footer was included, it will appear on all pages aside from the title page.
Alias names for codes
Smart Publisher uses the code names from the “Code System” as headings for the individual subchapters of the report. However, you may wish to assign an alternate name to some or all of the subchapters in the report. This may be the case if the 127 characters per heading allowed by the system are not enough, and you wish to create a longer name, or if, in other cases, a shorter heading would be more appropriate. For this reason, MAXQDA allows you to create a code alias of up to 225 characters.
In order to assign a code alias, right-click on the code in the “Code System” and select Properties. A dialog window will appear, in which you can enter the code alias.
Adjusting the Smart Publisher layout
It is possible to customize the layout of Smart Publisher reports. To do this, you will find a settings file named as “SP_Formats.ini”, the contents of which you can customize. You can find the file in the following folder, depending on your operating system:
Windows
- Open Windows Explorer.
- In the address bar, type in the following and press Enter: %appdata%
- Navigate to folder “MAXDQA24” and open it.
Mac
- Open the Finder and press the keyboard shortcut Shift + cmd + G
- Copy the following path into the address bar and select OK: ~/Library/Preferences/MAXQDA24
The structure of “SP_Format.ini” is as follows:
[Default_Format]
StyleName = "MQ_Header1"
FontName="Calibri"
FontSize = 11
LineSpacing = 1.2
SpaceAfter = 6
Indent = 12.5
For example, to use your the font that is used in your corporate design, change the entry next to FontName from "Calibri" to the appropriate text font.
