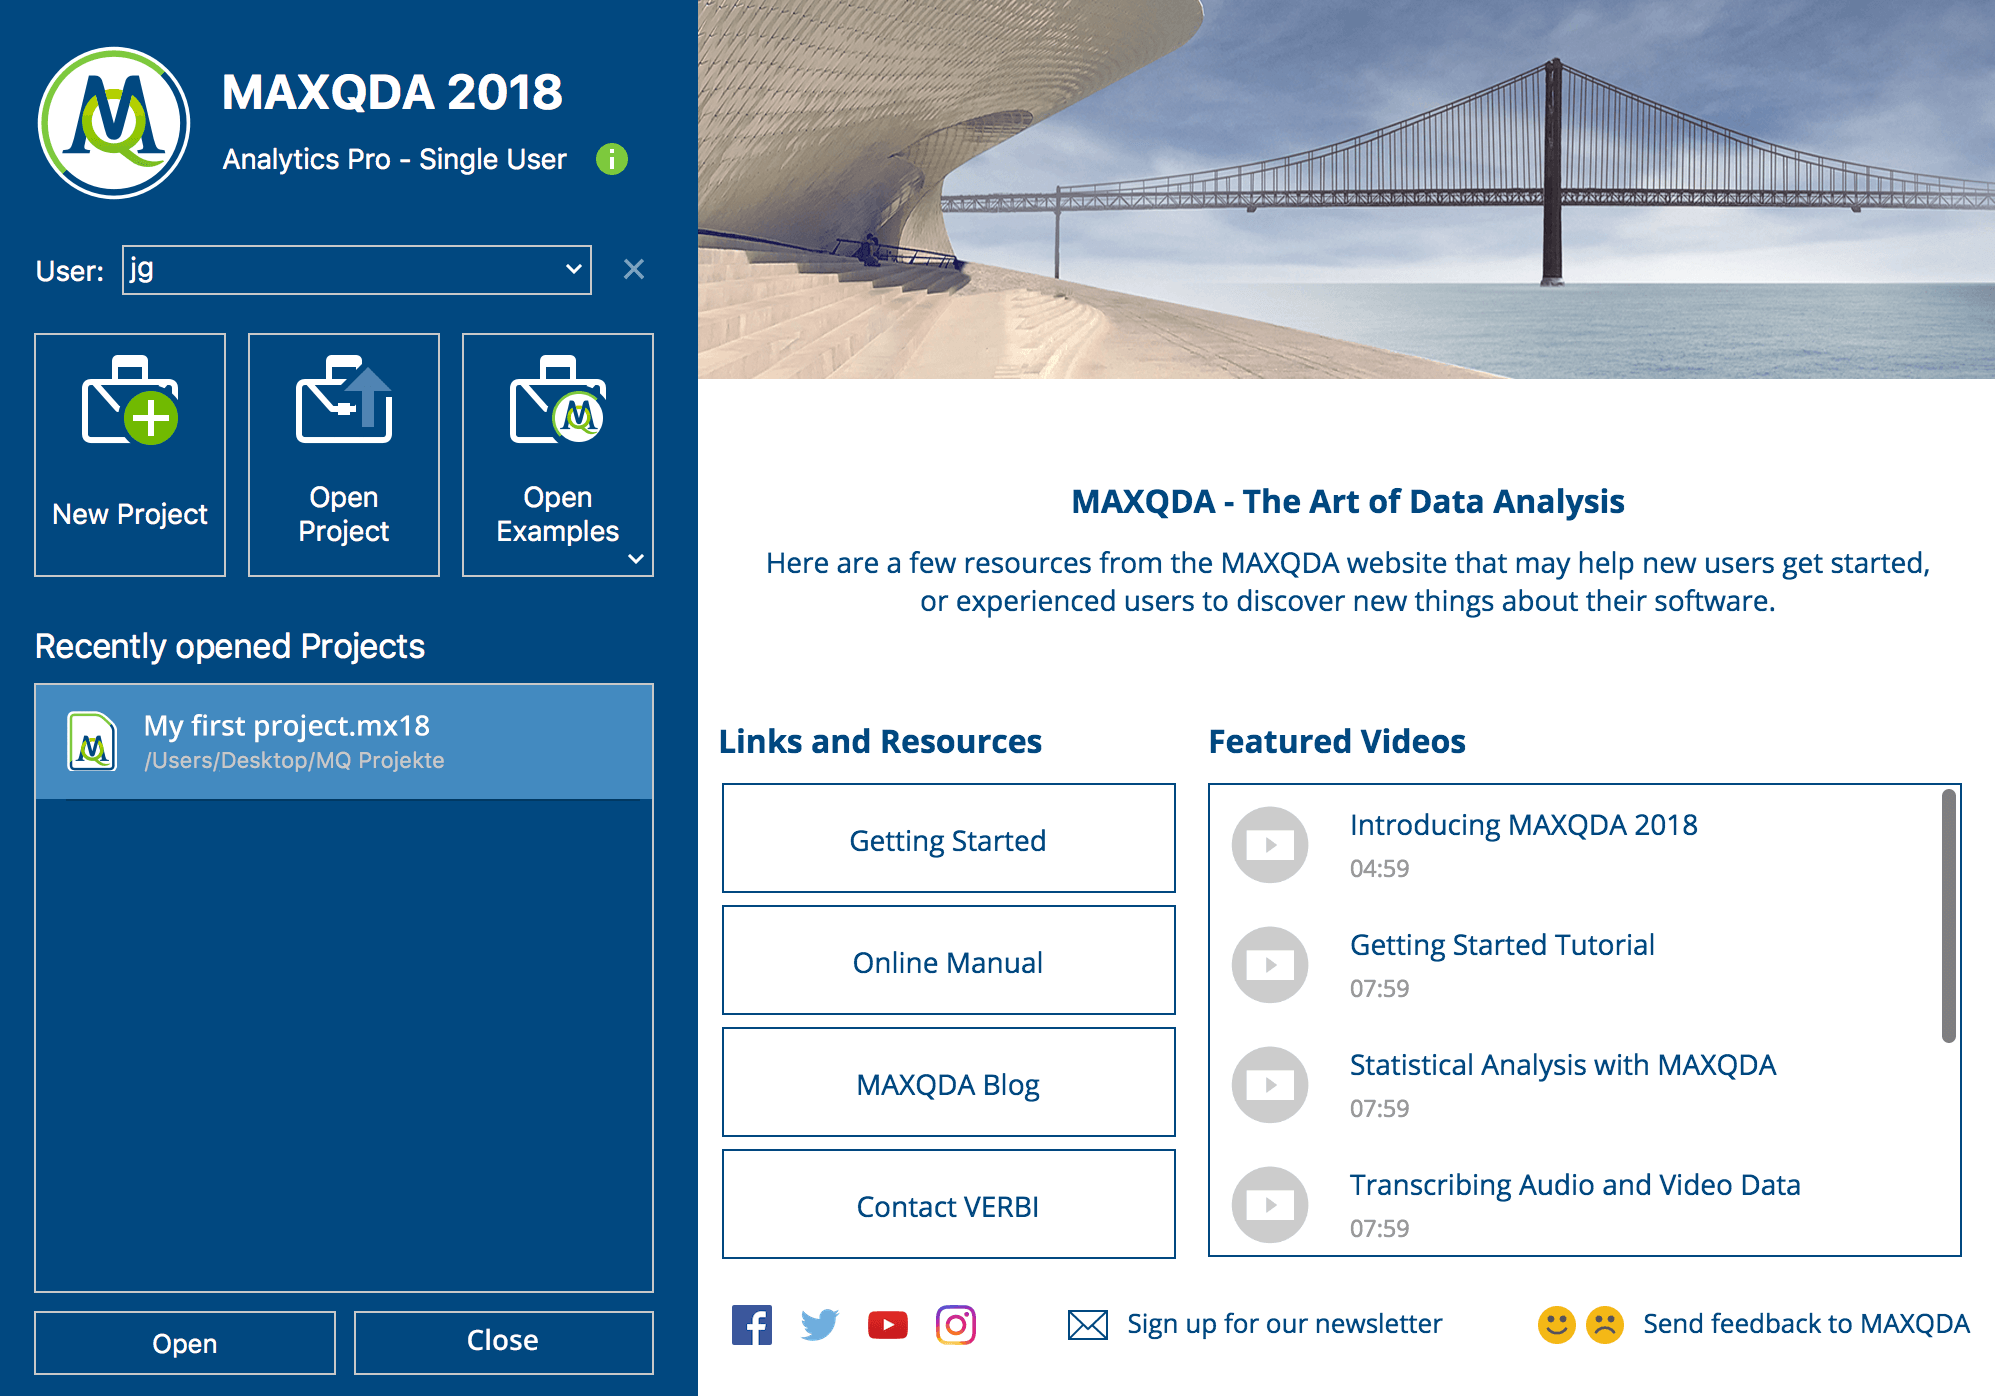
When you open MAXQDA, the following start dialog will appear in which you can:
- choose a user name,
- start a new project,
- open existing projects,
- open example projects, and
- view your license information.
The window area to the right displays all the latest MAXQDA news.

Entering your username
Enter your name in the "User" field and your signature will be added to everything you do in MAXQDA, be it importing documents, coding segments or creating memos. This becomes particularly useful when working in teams, as it’s easier to see who has done what.
Starting a new project
Before you can analyze your data with MAXQDA, you need to create a new MAXQDA project into which you can import your data. Click on New Project, enter a project name and choose a location to save your project. As soon as MAXQDA has created a new project you can start to import your data.
Opening existing projects
MAXQDA lists the recently opened projects in the lower window area, which you can open with a double-click. If you want to open a project that doesn’t appear in this list, click on Open Project and choose a file from the dialog window that appears.
Opening example projects
Click on the Open Examples button to list the featured example projects, with which you can thoroughly explore all MAXQDA’s functions. Just click on a project in the list to open it.
Changes to projects are saved automatically
MAXQDA does not include a save function which you must click when you finish working on a project.
MAXQDA operates as a database program, which means that all changes you make to a project, including the import of texts or later coding of data, are automatically saved. Exceptions are edits to texts, memos and MAXMaps. These are saved automatically every few minutes, as well as automatically when you close the window and the project.
Managing your project data
MAXQDA 2018 project files have the extension MX18. If your computer system hides file extensions, you will recognize your projects by the MAXQDA symbol or the data type “MAXQDA 2018 Project File”.
Project file backups
It is strongly recommended that you regularly create project backups and save them on external hard drives or flash drives, in order to minimize losses in case of computer problems. Backup files shouldn’t be stored in the same location as your computer.
You can transfer your MAXQDA project files to an external storage drive using Windows Explorer or Mac Finder. Alternatively, open the file in MAXQDA and choose Home > Save Project As in the top menu. Then specify a location and file name and click OK.
Automatic backups
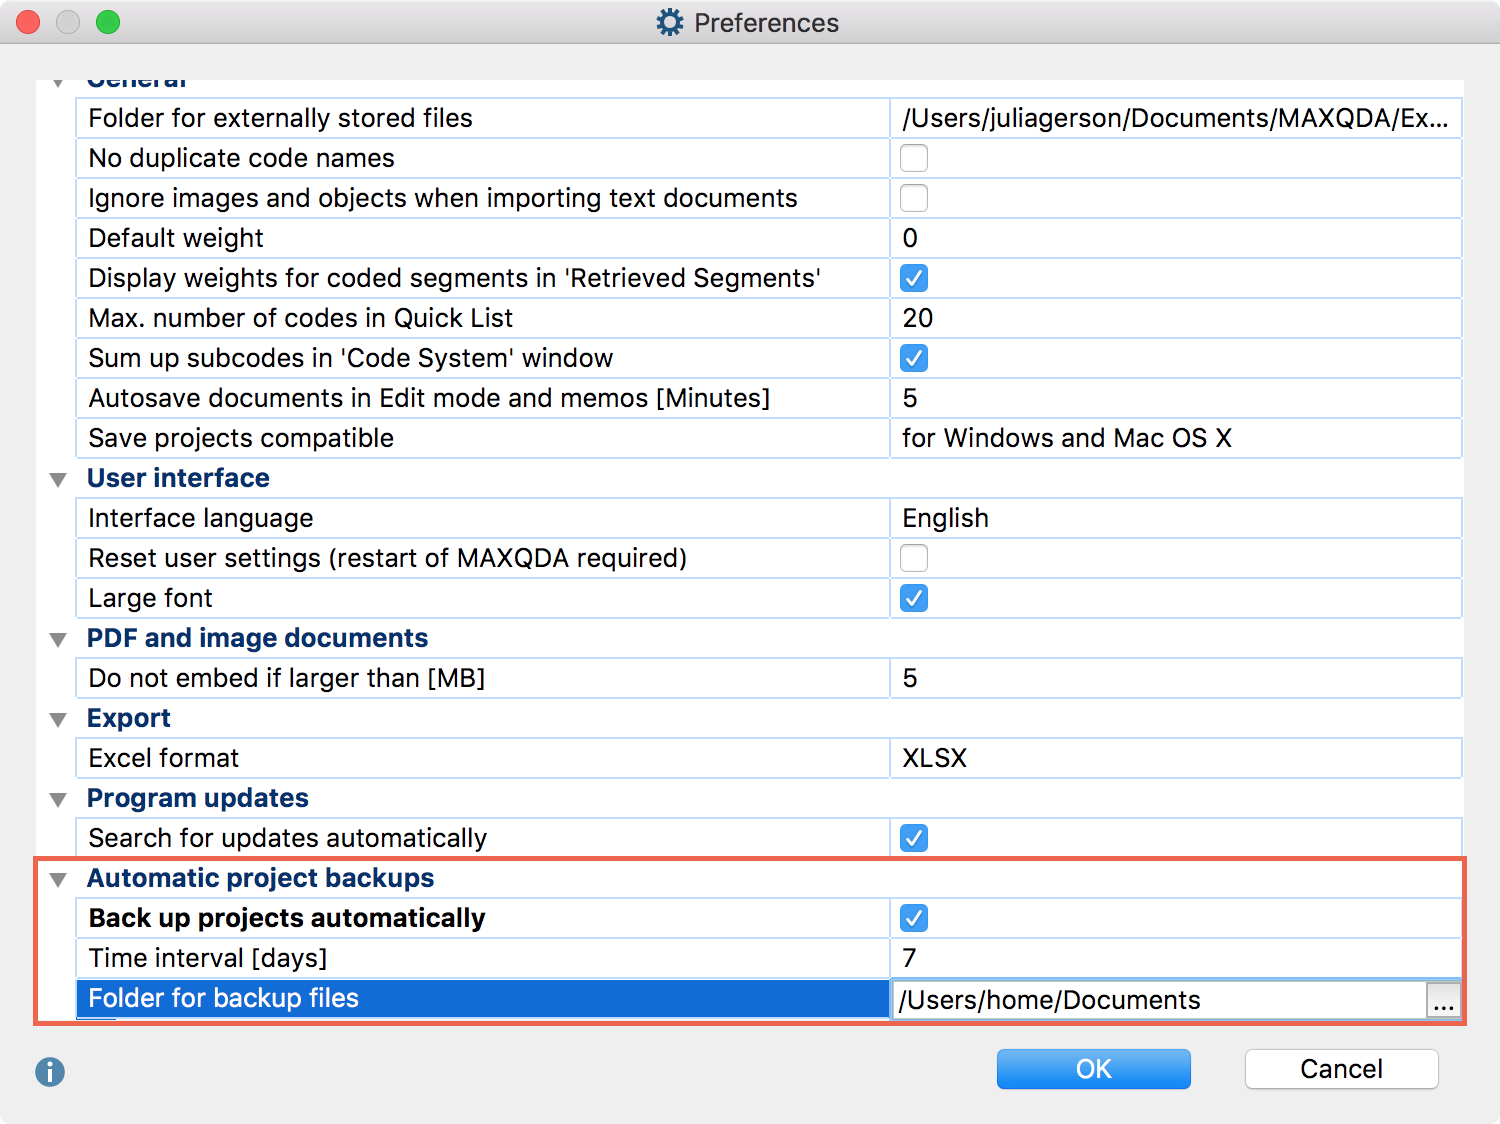
MAXQDA allows you to backup projects automatically. If you open a project that has not been backed up by MAXQDA for 7 days, a message will appear asking if you would like to save the project now. When you accept, MAXQDA will save a copy in a selected directory. MAXQDA automatically provides the backup file with a date and time stamp.
Both the time interval after which a project should be automatically saved and the directory for backup copies can be specified in the MAXQDA preferences. Open these preference by clicking on the gear symbol in the upper right corner of the MAXQDA window ![]() . There, you can also disable the function entirely.
. There, you can also disable the function entirely.

Opening projects from earlier versions (MAXQDA 12 or Older)
To open a project that was created in an earlier version of MAXQDA, follow these steps:
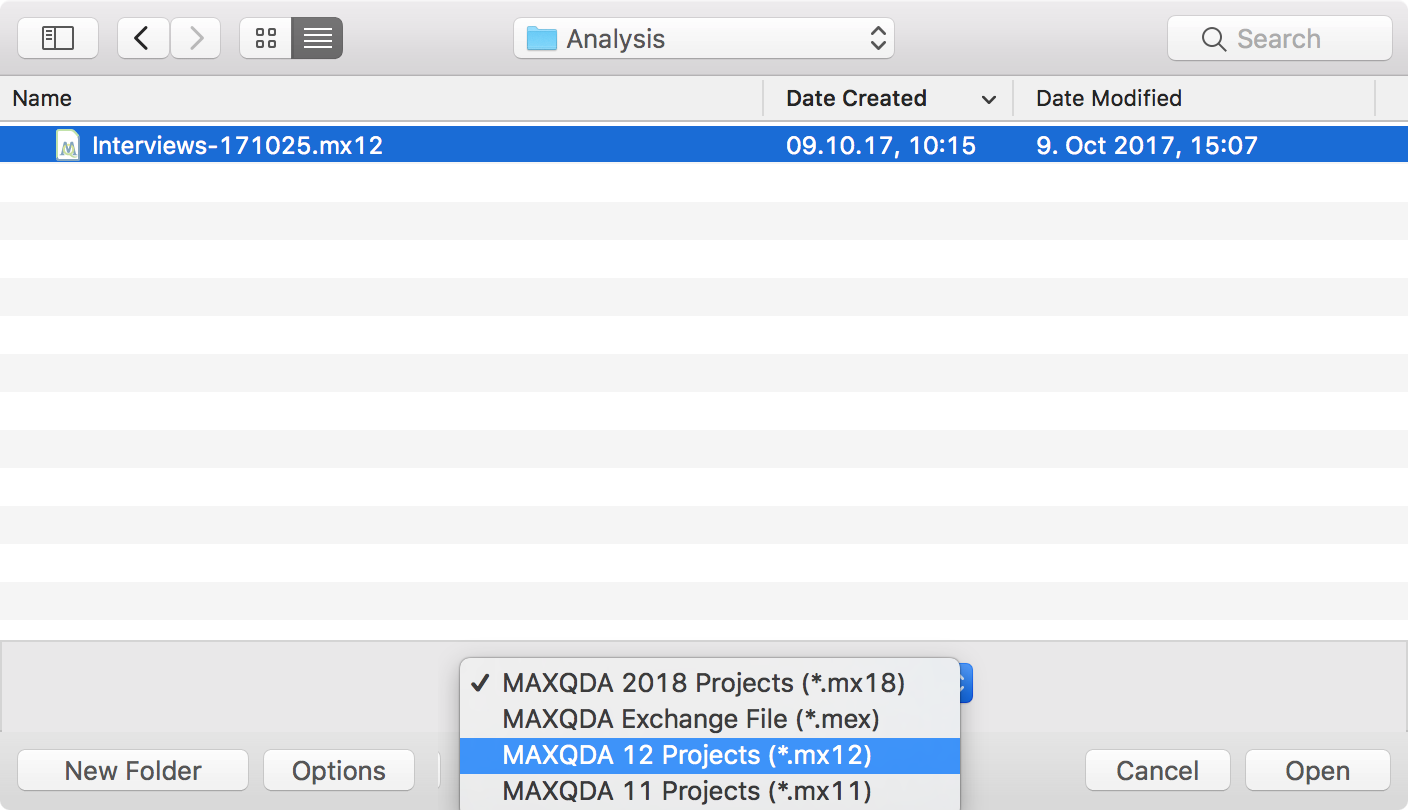
- Start MAXQDA and select Open Project in the start window.
- In the dialog window that appears select file type of the old project.

MAXQDA 2018 for Windows can read the following project file types:
- MAXQDA 12 (extension: MX12)
- MAXQDA 11 for Windows (MX5)
- MAXQDA 10 (MX4)
- MAXQDA 2007 (MX3)
- MAXQDA 2 (MX2)
- MAXQDA (M2K)
- MAXQDA Exchange files (MEX), that were created with MAXQDA for Mac versions 11.2.2 or newer
- MAXQDA Exchange files (MEX), that were created with MAXQDA for Windows.
MAXQDA 2018 for Mac can read the following project file types:
- MAXQDA 12 (extension: MX12)
- MAXQDA 11 for Mac (MX11)
- MAXQDA Exchange Files (MEX), that were created with MAXQDA for Mac version 11.2.2 or newer.
- MAXQDA Exchange Files (MEX), that were created with MAXQDA for Windows version 11.1.0 or newer.
Opening MAXQDA 2018 projects in MAXQDA 12
MAXQDA 12 (as of version 12.3.3) can open MAXQDA 2018 projects using the MAXQDA exchange file format.
To open a MAXQDA 2018 project in MAXQDA 12, proceed as follows:
- Open the project in MAXQDA 2018.
- Select Home > Export Exchange File and choose a file name and location. If the project accesses files that are stored in the remote data folder, MAXQDA will ask if these files should be bundled in a compressed ZIP file. If you select Yes, and have saved a large amount of data externally – such as large video files – this process may take a long time to complete.
- Open MAXQDA 12 and select Open existing project and click OK.
- Select MAXQDA exchange file as the file type, navigate to the saved file and click Open.
MAXQDA will search in the folder where the exchange file was saved for the compressed ZIP file, and automatically decompress the file in the folder for externally saved files.
Should MAXQDA 12 already be open with a project, you can choose to open the MAXQDA exchange file directly through the main menu Project > Open MAXQDA Exchange File.
The following modifications will be made when the project is converted:
- The default color for codes changes from blue to grey.
- All coded segment comments and paraphrases are shortened to 127 characters. Characters after the cut are deleted.
- The paraphrase code will be displayed as a standard code.
- Twitter documents created in MAXQDA 2018 are displayed as tables which cannot be edited.
- Maps created in MAXQDA 2018 are not visible.
