MAXQDA is a leading qualitative and mixed-method data analysis software. Its use cuts across all disciplines and is applicable for several qualitative and mixed-method data analysis designs. This article focuses on how the software can be maximized for editing images. This will shed light on the value of the software both for current and prospective users who may not be aware of its uses beyond data analysis.
Image Editing for Export in PNG/JPEG format
The following steps are useful for users using MAXQDA for image editing purposes.
- Import an image. The image is a screenshot from the MAXQDA website imported into the software through the “import tab” (Fig. 1).
 Fig. 1: Importing image into MAXQDA
- Click and drag your cursor on the relevant segment of the image to be edited (Fig.2) and a rectangular box will appear. The rectangular box can be adjusted to capture the needed segment of the image. The two arrows show the edges of the rectangular box that could be dragged up, down and sideways (Fig. 2).
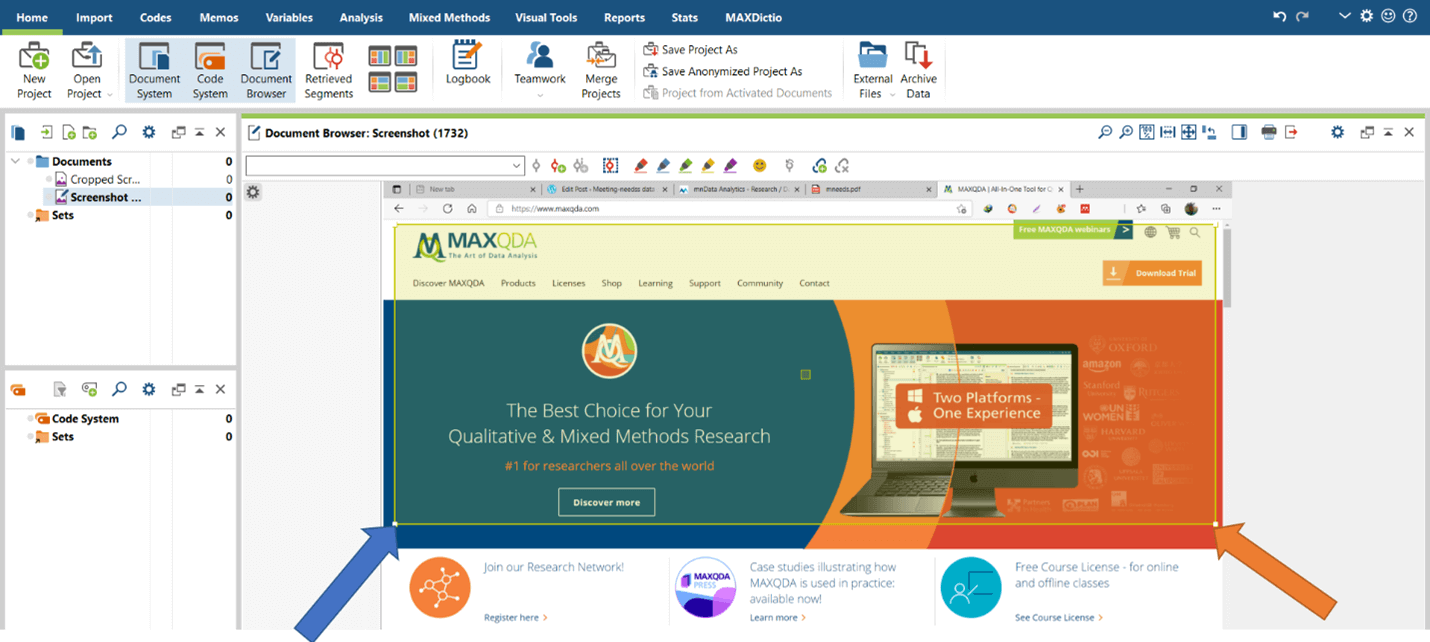 Fig. 2: Highlighting image segment for editing
- Right click on the image to edit, and select “Insert as a New Document” (Fig. 3). The highlighted segment becomes a new image document which should be renamed to reflect the editing purpose.
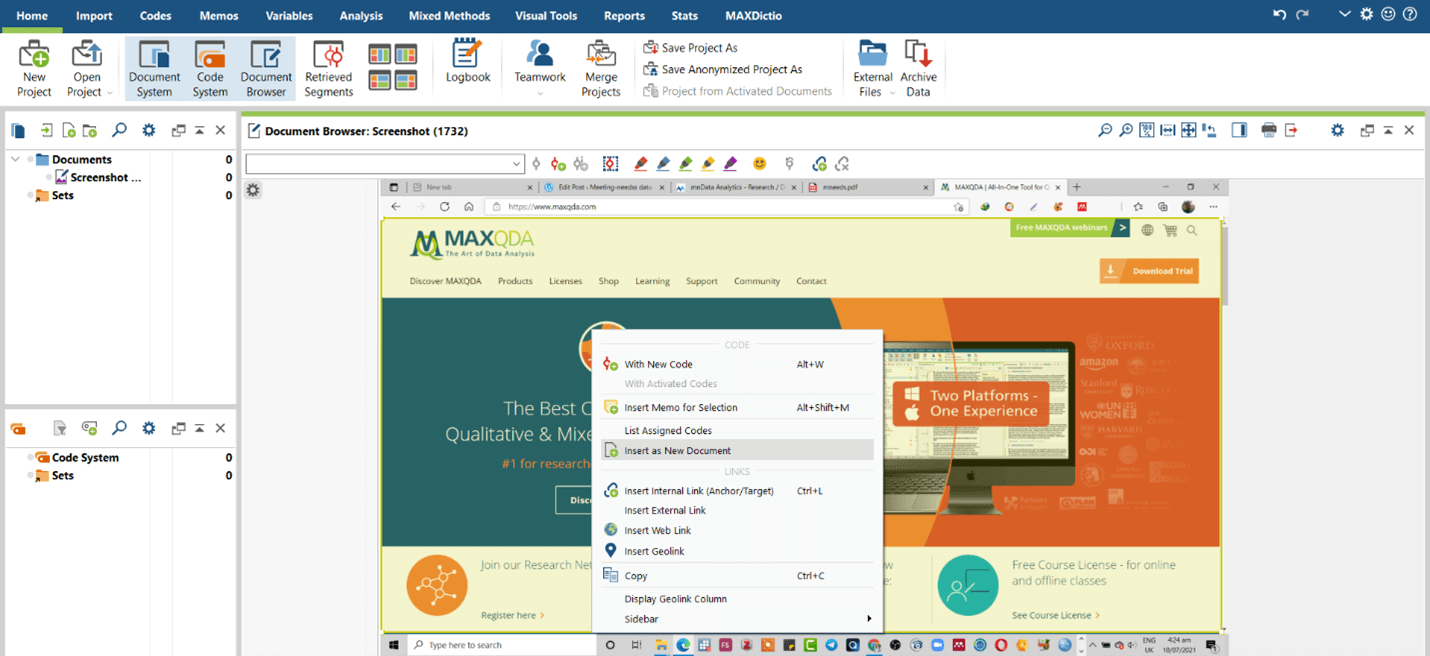 Fig. 3: Highlighting and inserting as a new document
- Right click on the new image document and select “Export Document” (Fig. 4). Another alternative is to click the export button on the right-hand side of the Document Browser toolbar. The edited image may be exported in PNG/JPEG format.
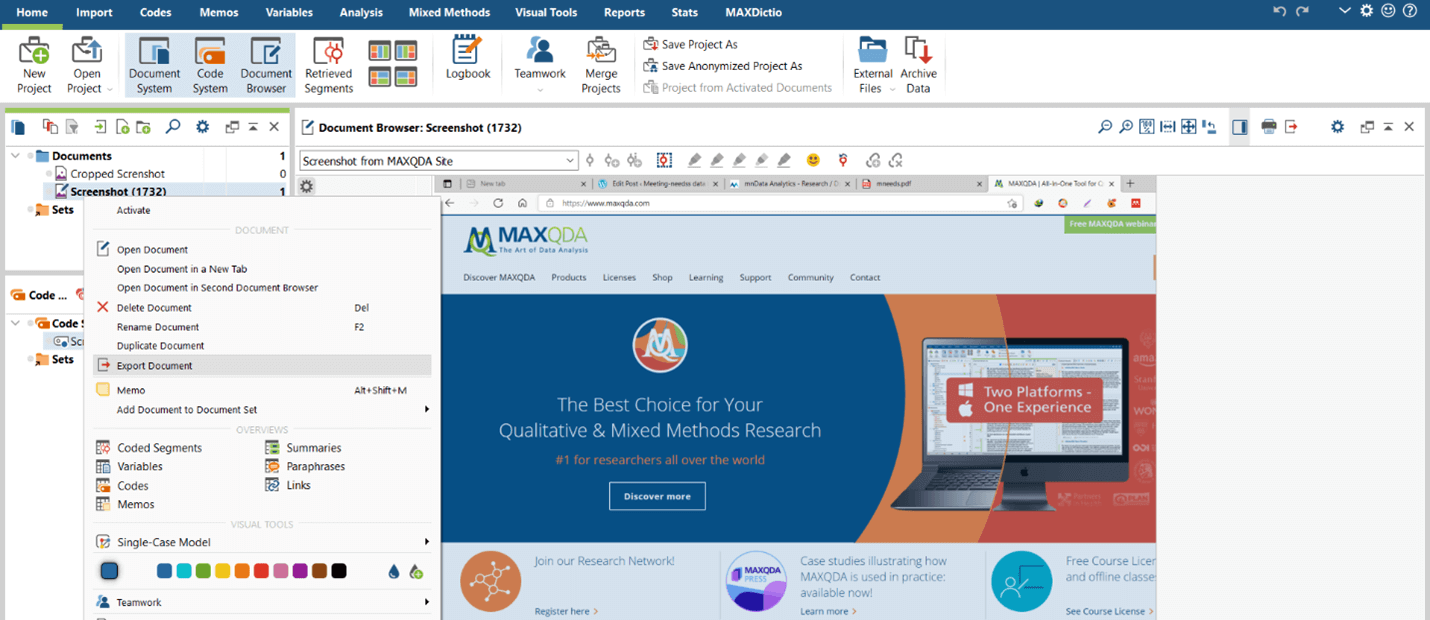 Fig. 4: Exporting image in PNG/JPEG
Exporting Edited Image as PDF
Edited images can be exported as PDFs following these steps.
- Click on the “Print Document” icon on the right-hand side of the Document Browser toolbar, or alternatively use the keyboard shortcut Ctrl-P (Windows) or cmd-P (Mac).
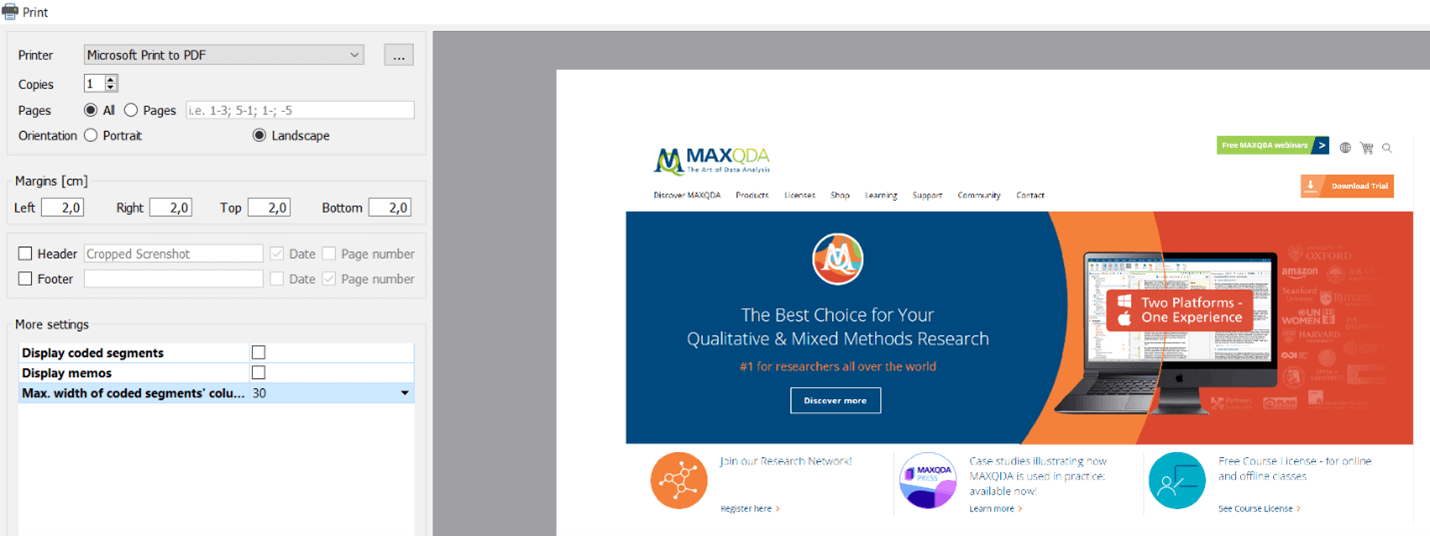
- Select your preferred settings; portrait or landscape, header or footer etc.
- Ensure the “Display coded segments” and “Display Memos” boxes are unchecked in order to create a visually appealing size; the use of landscape orientation is advisable (Fig 5).
- Click OK to export to PDF
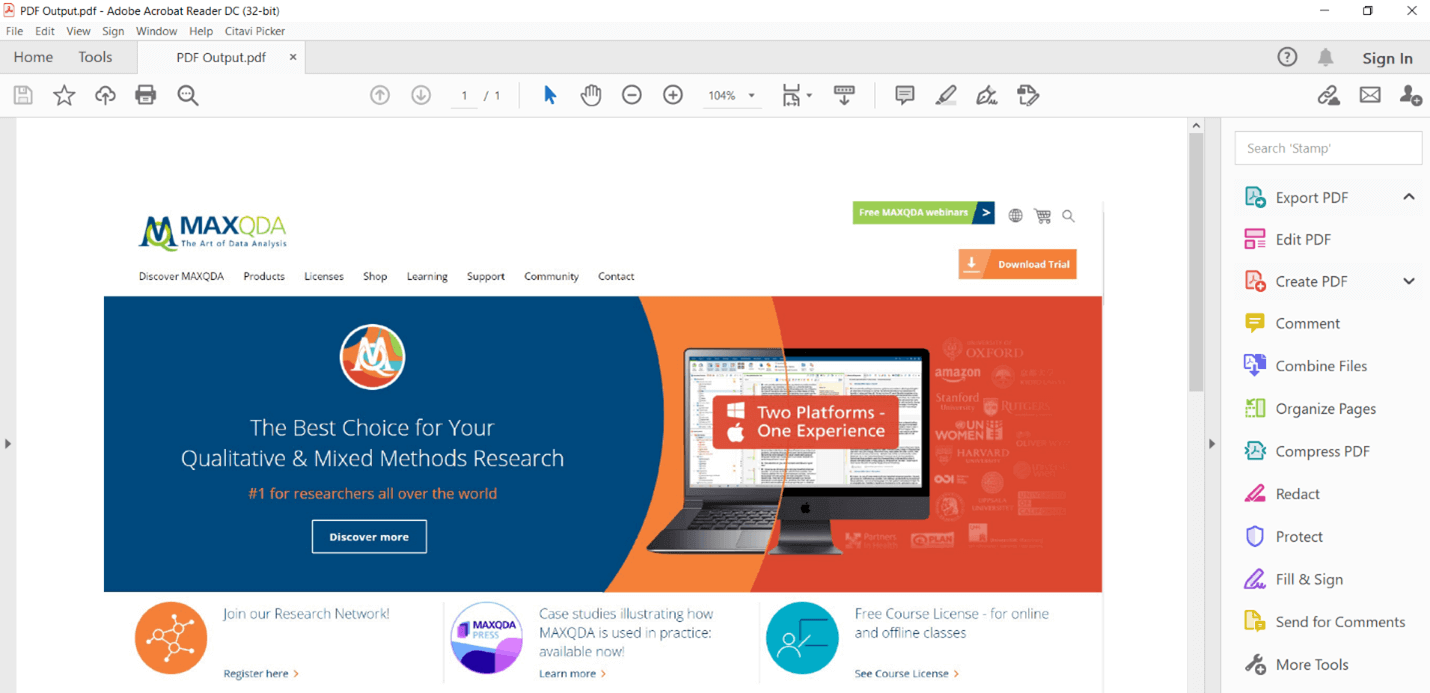
- View the exported image (Fig. 6)
Exporting Edited Image as Word Document
This process demands coding the highlighted segment of the image, unlike the first approach where the cropped image was treated as a document. The choice of this approach is premised on the need to export the cropped image as a Word/Excel document or HTML table. Users can achieve this by following these steps:
- Highlight the relevant segment of the image
- Attach a code to the cropped image (Fig. 7)
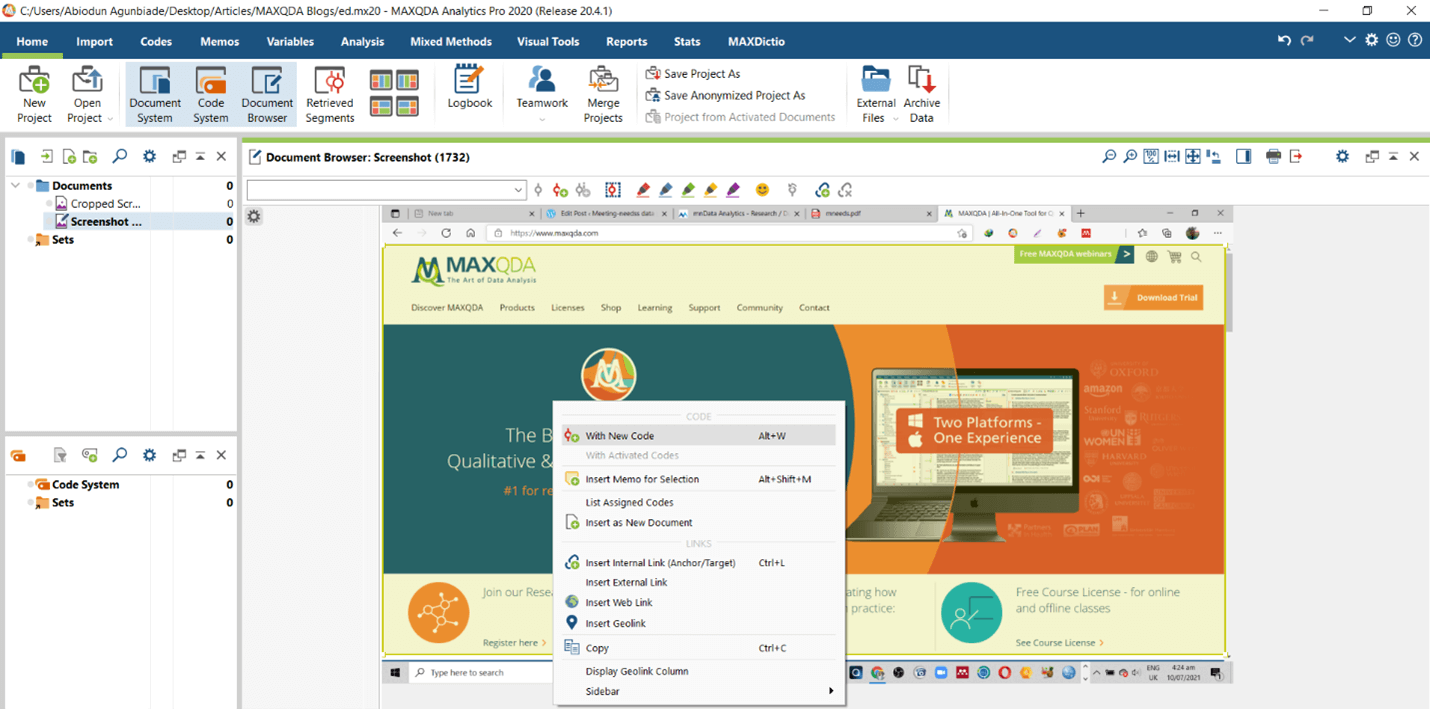 Fig 7: Attaching a code to the image
- Double click on the code to open the coded segments (this displays the cropped image)
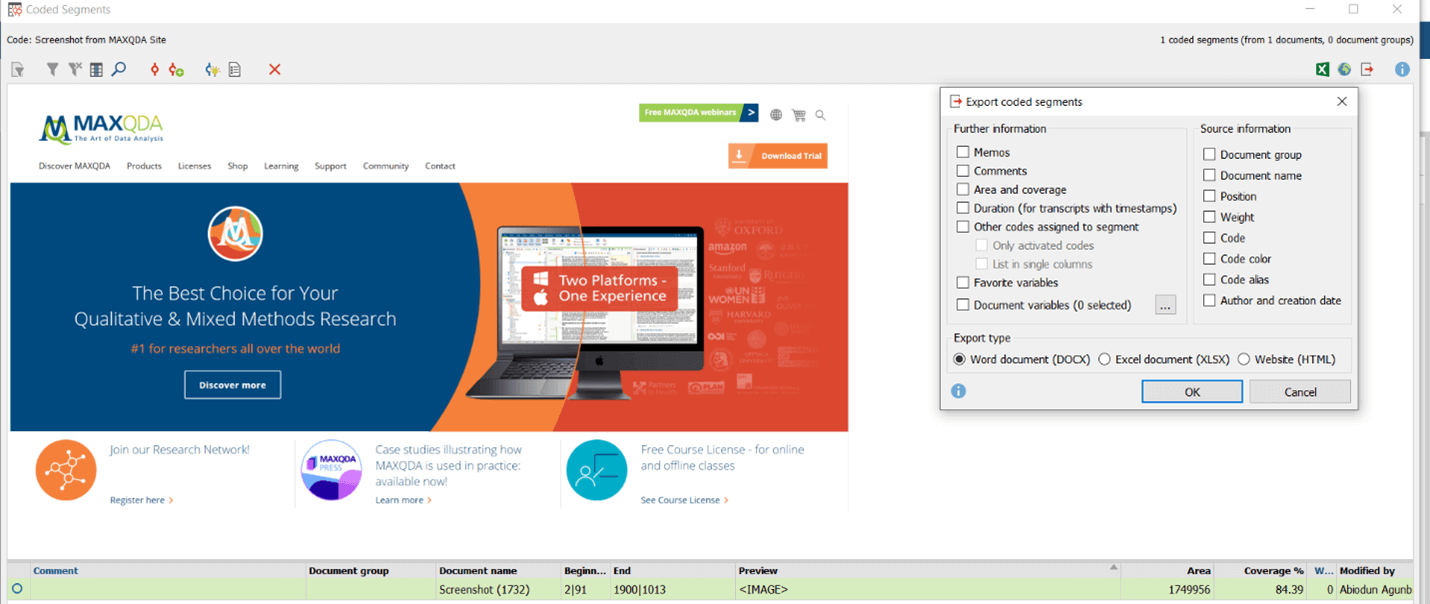
- Select the export button to export the image as a Word document (Fig. 8)
- View the output as a Word document (Fig. 9)
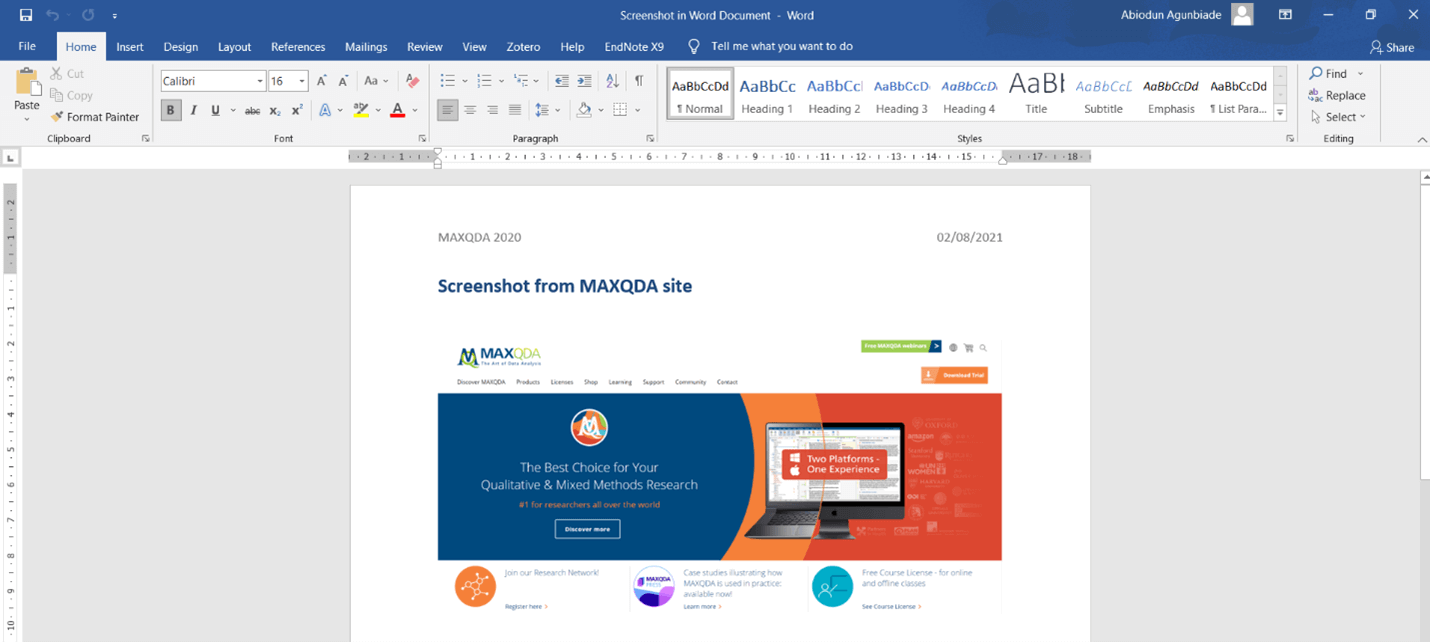 Fig 9: Output as a Word document
The same process can be followed to export to Excel or HTML table.
For more information on importing and exporting documents, have a look at the following MAXQDA Manual entries:
About the Author
Abiodun Isaac Agunbiade is a MAXQDA trainer and a Research Consultant/Data Analyst at Meetingneeds Data Analytics. He is a Ph.D. student in Educational Evaluation at the Institute of Education, University of Ibadan, Nigeria. His research interests are methodological research, educational assessment using mixed qualitative and quantitative research methods, and the use of Information and Communication Technology for teaching and learning.

