Deleting a code from the “Code System” is somewhat like cutting of a branch of a tree. By deleting that code, you are also deleting any subcodes, which are like smaller branches attached to the bigger one you cut off. At the same time, all coded segments that had been created with those codes are deleted.
You can delete codes in the “Code System” either in the classic tree structure view or in the table view:
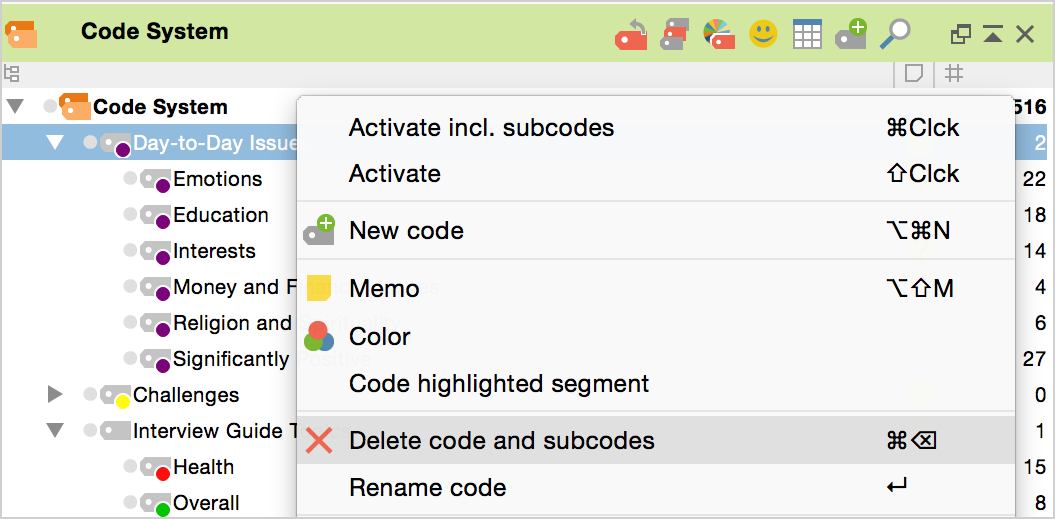
- In the tree view, right-click on the code to be deleted and select Delete code(s) from the context menu. Alternatively, you can left-click on a code and press the Del key (Windows) or cmd+Backspace (Mac).
- Alternatively, you can switch to the table view of the “Code System” (by clicking on the Change to table view icon on the toolbar), then delete the code via the context menu or by pressing the Del key (Windows) or cmd+Del (Mac).
Attention: When deleting a code, you are also deleting all coded segments that were created with this code.
If you want to delete more than one code at a time, it is necessary to switch to the table view of the “Code System.” To do so, click on the Change to table view icon in the “Code System” toolbar. You can now select as many codes as you wish by clicking on them while holding the Ctrl key (Windows) or cmd key (Mac) and then right-clicking and selecting Delete code(s) from the context menu.
Codes can also be deleted in this manner in the “Overview of Codes,” accessible via the Code menu or the content menu in the “Document System”.
Moving and Sorting Codes in the “Code System”
Moving Codes
Changing the structure of the category system is not difficult. All codes can be moved with the mouse and the drag-and-drop function.
In the following example, the “Code System” contains four codes (C, B, A, and D).
To move Code D to the top of the list, you would need to do the following:
Click on Code D and drag it in front of Code A while holding down the left mouse button, then, when a line appears, drop the code.
It is also easy to make a code a subcode of another code. If you want Code B to become a subcode of Code A, for example, you would carry out the following actions:
Click on Code B, drag it to Code A, and release as soon as Code A has a blue background. Code B is now a subcode of Code A.
Sorting Subcodes
Subcode can be sorted in ascending and descending order by name and by frequency, by right-clicking the parent code and selecting Sort subcodes from the context menu.
The word “Code System” at the top of the list represents the root of the “Code System” that you will build from this point. All codes can be created in this way.
In order to create a new code at the highest level, we can do one of three things:
- The easiest option is to click on the New code
 symbol in the “Code System” toolbar.
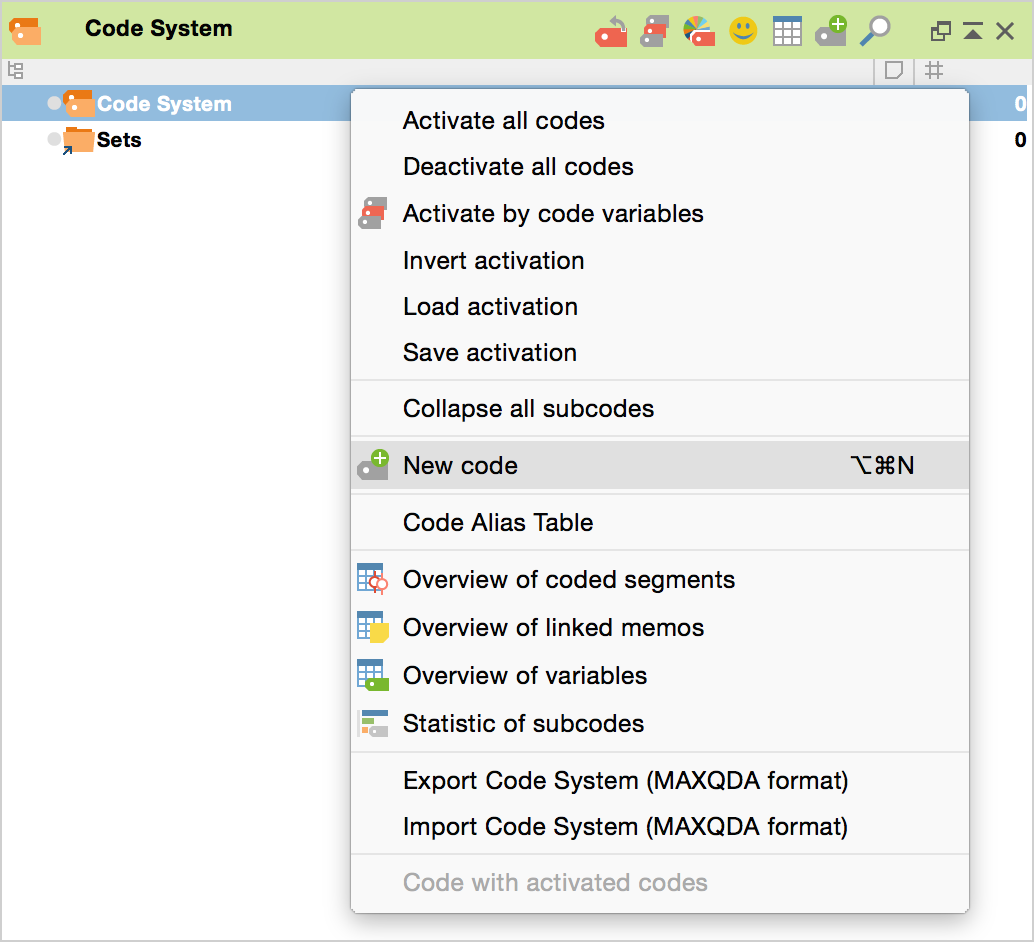
- Another option is to right-click on the Code System row and select New code from the menu that appears.
- The third option is to create a new code by using the keyboard shortcut Alt+N (Windows) or cmd+Alt+N (Mac). For this to work, however, the “Code System” window must be selected.
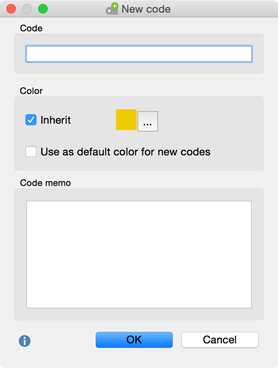
No matter which way you choose to create a new code, the following window will appear:
Type the name of the new code in the upper dialog field of the window. You can select a color attribute for the new code below. There is an almost unlimited number of colors that you can pick from or design on your own. The dialog field in the lower part of the window enables you to write a code memo, for instance a definition of the characteristics of the new code.
If you select the option Use as default color for new codes, all newly created codes in the project will use the chosen color, e.g. In-vivo codes. Of course you can change this default color each time you create a new code using this dialog.
Creating Subcodes
If you would like to define subcodes, just right-click the parent code and choose the option New code. Again the same dialog window as mentioned above will pop up. If you want the subcode to have the same color attribute as the main code, just click the checkbox “Inherit.”
Creating subcodes can also be completed using the Alt+N (Windows) or cmd+alt+N (Mac) keyboard shortcut or the New code  icon from the toolbar. It should however be noted that the code for which you wish to create a subcode should be highlighted in blue.
If you have entered text into the memo field of the dialog box, a memo icon is displayed beside the new code in the “Code System” as soon as you close the dialog window.
Note: Newly-created codes are always added at the top of the “Code System” unless created as a subcode, in which case it will appear as the top subcode.


