To create and edit summaries,
•From the main menu, select Analysis > Summary Grid,
•Or
click the corresponding button ![]() in the “MAXQDA
standard” toolbar.
in the “MAXQDA
standard” toolbar.
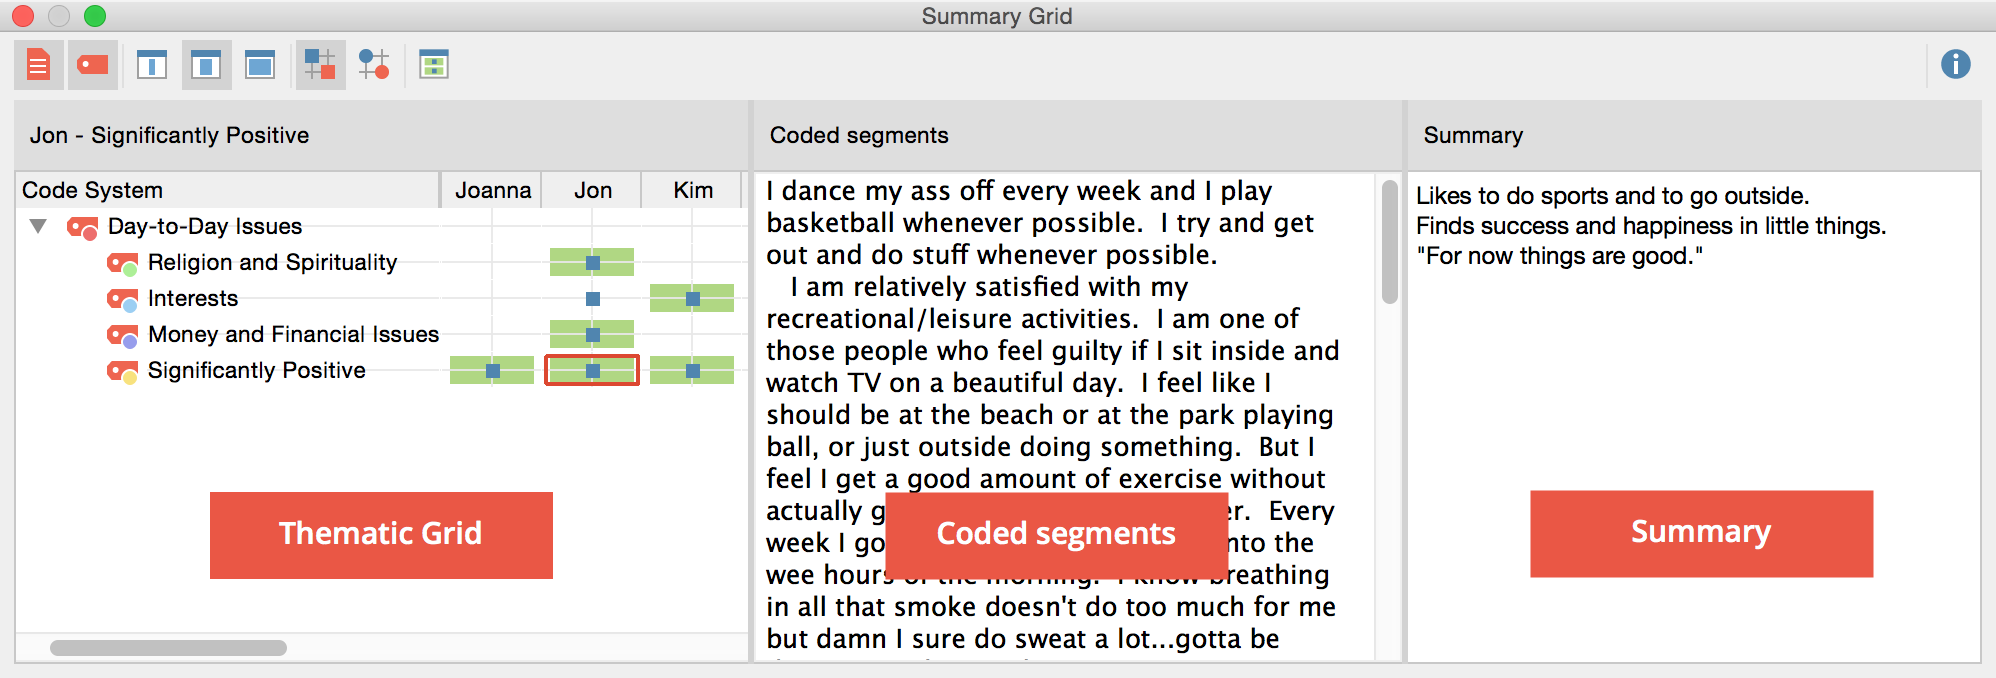
MAXQDA then opens a new window called “Summary Grid.” The window itself is divided into three areas:
•Left window: the thematic grid, the Code Matrix Browser display.
•Middle window: the coded segments, so exactly what is normally listed in the “Retrieved Segments” window after double-clicking a node in the Code Matrix Browser.
•Right window: the summary, this is where the summary is displayed, created and edited.
Window “Summary Grid”
You can adjust the content of the columns and rows of the grid on the left with two buttons:
![]() Only
activated documents –
only documents that have been activated in the “Document System” will
appear as columns.
Only
activated documents –
only documents that have been activated in the “Document System” will
appear as columns.
![]() Only activated Codes – only Codes that have been
activated in the “Code System” will appear as rows.
Only activated Codes – only Codes that have been
activated in the “Code System” will appear as rows.
Additional buttons offer the following functions:
![]() Names, columns: none – in the left window, the document
names will not be displayed in the column header.
Names, columns: none – in the left window, the document
names will not be displayed in the column header.
![]() Names, columns: short – in the left window, the document
names will be appear in the column header in short form.
Names, columns: short – in the left window, the document
names will be appear in the column header in short form.
![]() Names, columns: full – in the left window, complete
document names will be displayed in the column header.
Names, columns: full – in the left window, complete
document names will be displayed in the column header.
![]() Display nodes as squares – existing codes will be
symbolized as squares in the left pane.
Display nodes as squares – existing codes will be
symbolized as squares in the left pane.
![]() Display nodes as circles – existing codes will be
symbolized as circles in the left pane.
Display nodes as circles – existing codes will be
symbolized as circles in the left pane.
![]() Summary tables – opens the “Summary Tables” window, described
below.
Summary tables – opens the “Summary Tables” window, described
below.
In the right window, you can write and edit a summary for the node you have selected in the left window. You can select a node by clicking on it. The summary will automatically be saved after selecting a different node or closing the window.
Tip: You can move text segments from the middle window “Coded segments” to the right window with the mouse. This way you can easily insert citations in the summary.