
After opening or creating a new project, you will see the MAXQDA interface:
•At the very top of the screen, you will see the project document name including the location where it is saved.
•Underneath the file name, you will see the drop-down menus and various toolbars with buttons that offer quick access to frequently-used functions.
•A status bar is found at the bottom of the screen.
MAXQDA's four main windows occupy the main part of the workspace:
The four main MAXQDA windows
The four windows have the following functions:
• The “Document System” provides an overview of all the texts, PDF files, tables, pictures and media files of your project. You also have the option of organizing these documents in document groups, which act as folders.
• The “Code System” displays all the codes, subcodes and code memos along with the number of associated coded segments.
• The “Document Browser” displays one of the documents from the “Document System,” where it can then be worked on. You can highlight, edit, code, create links, or attach memos in this window. Geo-Links are also displayed in the Document Browser.
• The “Retrieved Segments” window is a results window. Here you can display a selection of coded segments (Retrieval).
Each window has a toolbar, which gives you quick access to frequently-used functions. By hovering over each symbol, you can see what each symbol does. Symbols that are found in more than one toolbar always have the same function, such as:
![]() prints out the
content of the window
prints out the
content of the window
![]() exports the content
of the window
exports the content
of the window
![]() allows for search in
associated window
allows for search in
associated window
![]() undocks the
window
undocks the
window
![]() maximizes the window
to the largest possible size
maximizes the window
to the largest possible size
![]() closes the window
closes the window
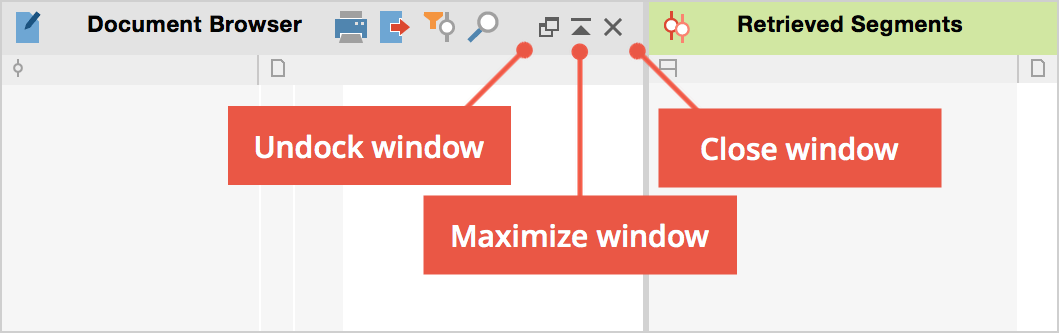
Small toolbar within a window
All four windows can be shown or hidden in various ways so that you can control the arrangement of windows on your screen and optimize your work space.
1. You can hide or show the windows by selecting View > Windows in the main menu.
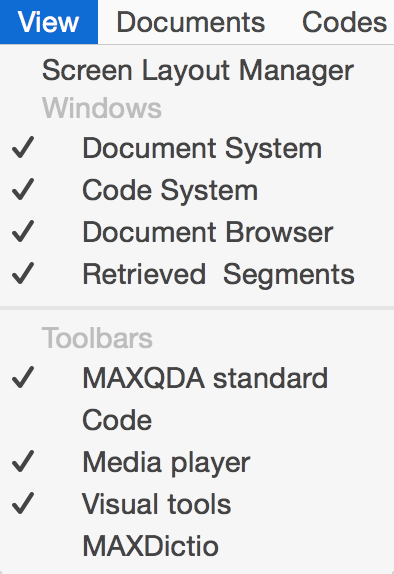
Hide and show four main windows in the menu
2. You can hide or show the windows by
clicking on the appropriate icons in the “MAXQDA standard” toolbar: ![]() .
.
3. You can close the windows by clicking on
the appropriate icon ![]() in the upper-right
hand corner of each window. Next to the close icon, you also have the option of
clicking to maximize the window to its largest possible size.
in the upper-right
hand corner of each window. Next to the close icon, you also have the option of
clicking to maximize the window to its largest possible size.
Note: You can hide or show all windows, but at least one window must be shown at all times, which means it isn’t possible to close all four windows.
The optimal setup of your windows in MAXQDA depends largely on the size of your monitor and the set resolution. It is not recommended that you use a resolution smaller than 1024 x 768.
The size of each window in comparison to the others can be adjusted as you wish by clicking with the left mouse button on a border and dragging it in the appropriate direction.
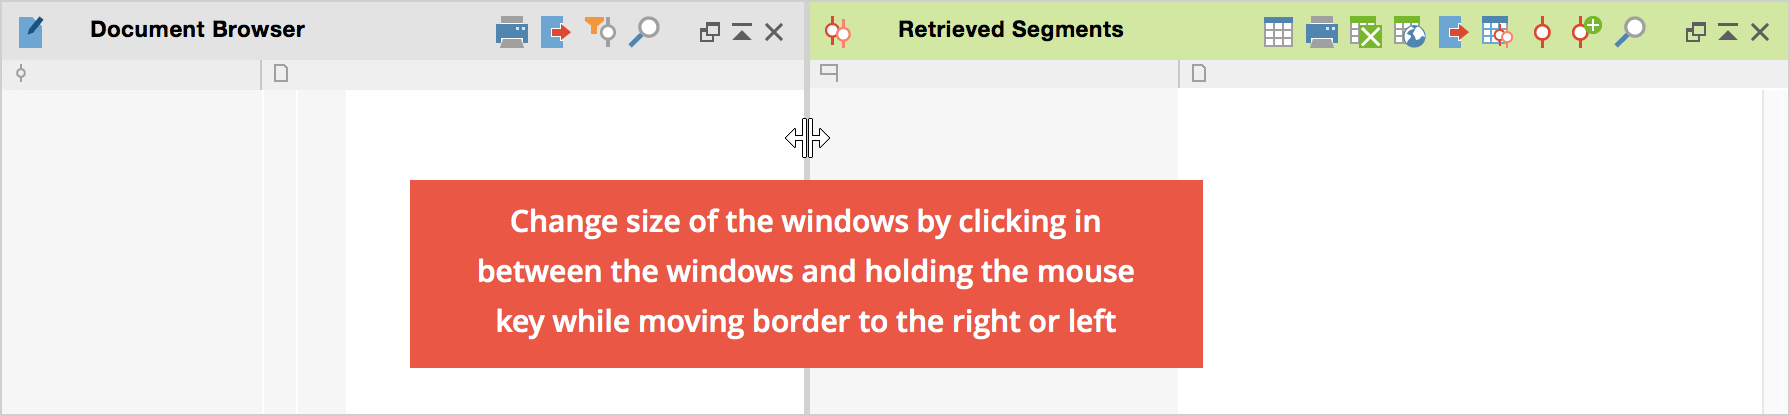
Window height and width can be adjusted by clicking and dragging borders with the mouse
The “Document Browser” window includes the coding column, a gray area left (or right) of the text document in which codes are displayed. To adjust the width of the coding column, move the mouse pointer to the top of the line separating it from the document, press the left mouse button, and drag the column to the left (or right) side of the text.
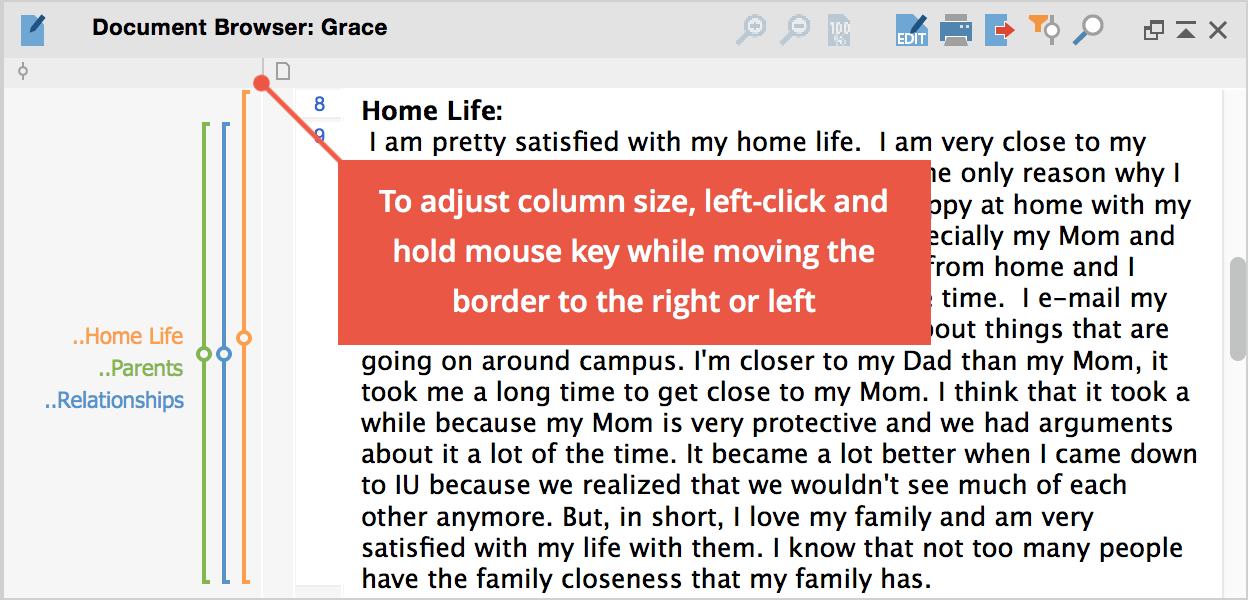
Adjusting the width of the coding column
You can choose whether or not to display the names of each code by clicking on an empty spot in the coding column and right-clicking. A window will then appear that allows you to change this setting.
With a screen width of over 1,440 pixels, MAXQDA 12 uses a three-column layout by default. This takes advantage of the widescreen format of modern monitors better than the traditional four-window layout, which has long been a characteristic of MAXQDA. You can easily change back to the traditional four-window view with the help of the “Screen Layout Manager.” This is appropriate for screens with normal formats.
To call up the Screen-Layout-Manager, select:
1. In the opening window View > Screen Layout Manager; or
2. The ![]() icon in the
main toolbar.
icon in the
main toolbar.
The Screen-Layout-Manager allows you to select from among four options:
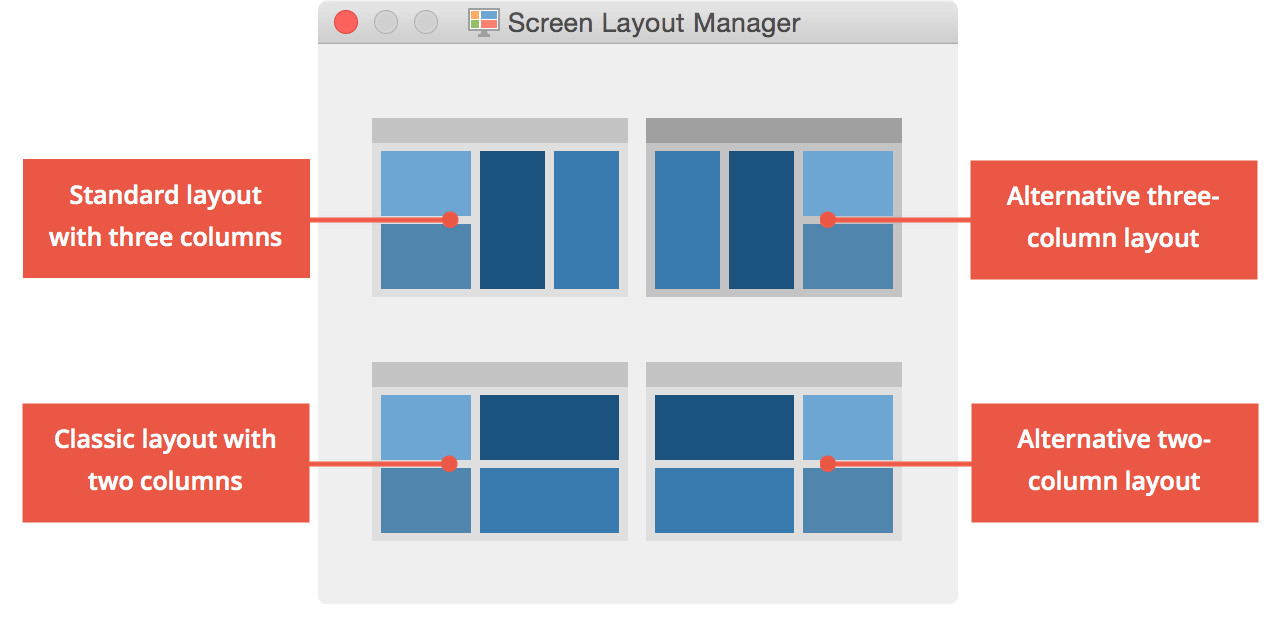
The Screen-Layout-Manager
Top left: The new default layout in three columns for wide screens. The “Document Browser” is found in the middle and “Retrieved Segments” in the third column on the far right.
Top right: Alternative three-column layout with the “Document System” and the “Code System” on the right side.
Bottom left: The classic two-column layout with the “Document System” and the “Code System” on the left side.
Bottom right: Alternate two-column layout with the “Document System” and the “Code System” on the right side
When coding a document, it is sometimes helpful to close the “Document System” and “Retrieved Segments” window, so the “Code System” and “Document Browser” are larger. The “Document Browser” can then be made even bigger by dragging the border in the direction of the “Code System.”
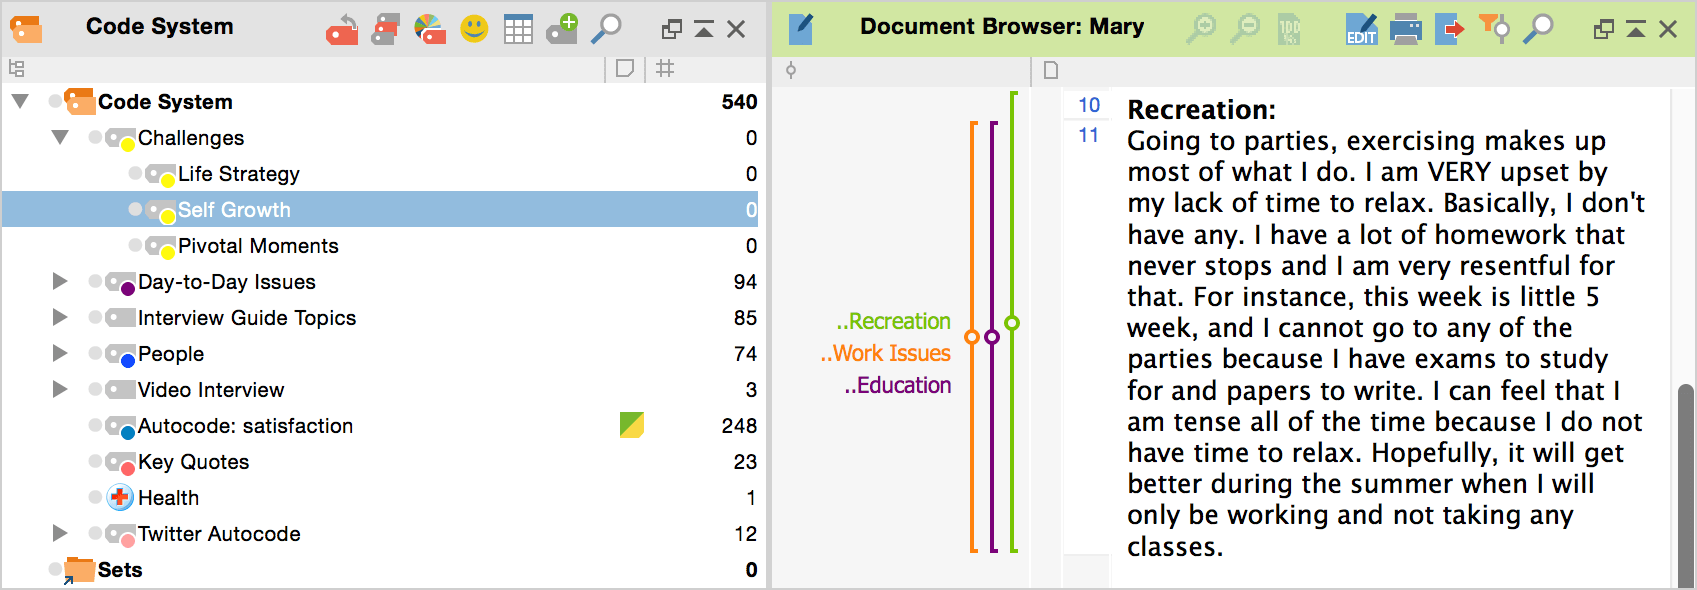
Optimal window setup when coding
It is similarly helpful to close the “Document Browser” when you are doing retrievals (Coding Query), so you have access to the three necessary screens while maximizing the size of your “Retrieved Segments” window. Whenever you now click on the text information box in the “Retrieved Segments” window, the corresponding text will be open in the “Document Browser” window.