Different than with classic quantitative content analysis, the categorization of data in qualitative analysis is not the end of the document analysis; instead it is simply a step toward further interpretative analysis. The categories create a structure within the documents, but they don’t replace them. MAXQDA’s analysis functions are tools to help you navigate and further develop this structure.
MAXQDA allows you to analyze the combination of activated codes in different ways, by taking into account the different groupings and positions of coded segments. In this section, we will discuss the complex combinations modes, of which MAXQDA has many to offer.
To perform a complex retrieval you can call up the Complex Coding Query:
- Select Complex Coding Query from the Analysis drop-down menu,
- Click on the icon
 in the status bar at the bottom of the MAXQDA screen, or
 - Right-click on the gray area in the “Retrieved Segments” window where the info boxes appear and choose Complex Coding Query from the context menu.

The following dialog window will open:

The dialog window has the following aspects:
- The Function field allows you to choose the analysis function.
- Below that, there are three windows, labeled A, B, and C.
- Window A is important for almost every retrieval option and holds the selection of codes to be included in the selection function. To add codes, activate them in the “Code System” and then click the button to add All activated codes.
- Window B is also for selecting codes, but you can do so from the quick list. Simply click on the
 symbol to view the list.
- Window C allows you to set certain parameters (e.g. the maximum distance between two coded segments).
The “Result” window at the bottom shows how many segments would be pulled up if the retrieval were carried out with the current settings in Windows A, B, and C. Under this window is a description of the retrieval function that is currently selected, and on the right side, there is a visualization of what that function does.
The retrieval begins when you click on the Start button.
The following table gives you an overview of the various functions:
Name | Description |
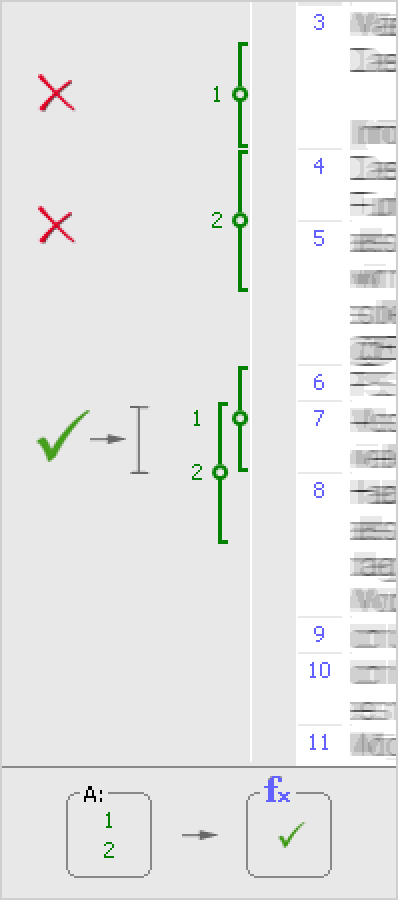
Intersection | Retrieve only the part segments that have all of the codes listed in "A" assigned to them. |
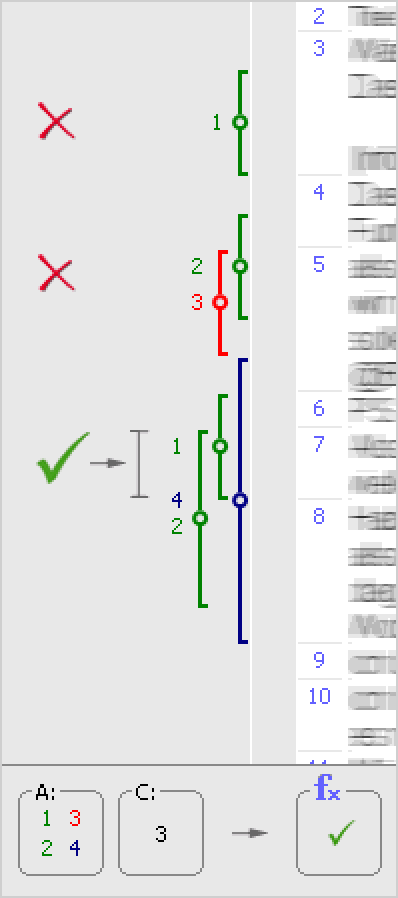
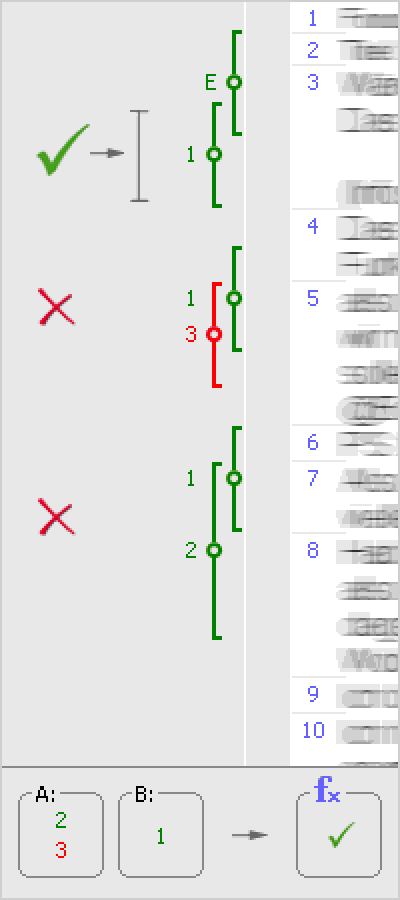
Intersection (Set) | Retrieve only the part segments that have at least X of the codes listed in "A" assigned to them (the number X is specified in "C"). |
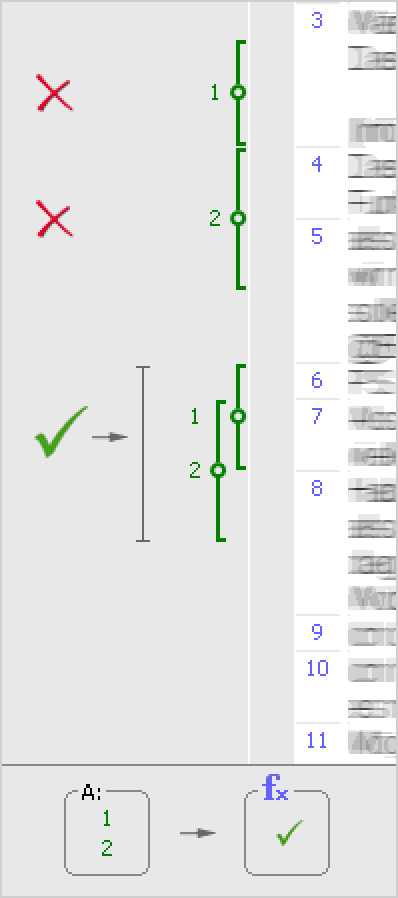
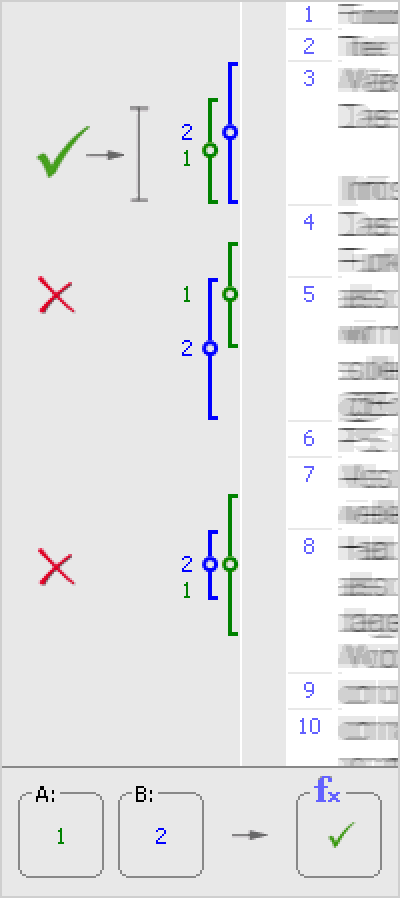
Overlapping | Retrieve the full segments where at least one part has all the codes listed in "A" assigned to it. |
Only one code | Search for segments where only one of the codes listed in "A" is assigned (and none of the other codes listed in "A"). |
Only this code | Search for segments where the code selected in "B" is assigned, but none of the codes listed in "A" are assigned. |
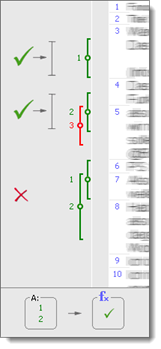
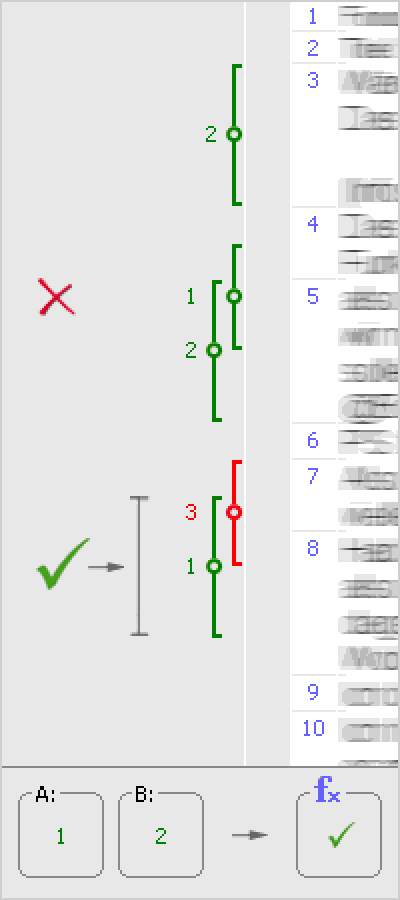
If inside | Search for segments assigned to any one of the codes listed in "A" that are also completely surrounded by a segment assigned to the code selected in "B". |
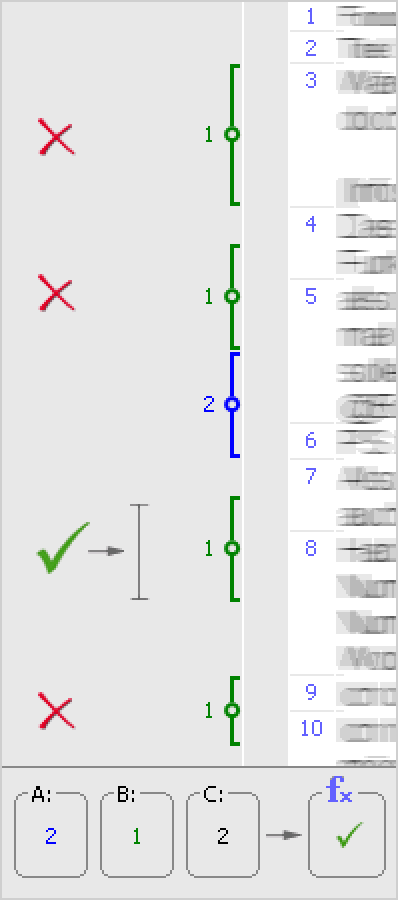
If outside | Search for segments assigned to any one of the codes listed in "A" that has no overlap or intersection with a segment assigned to the code selected in "B". |
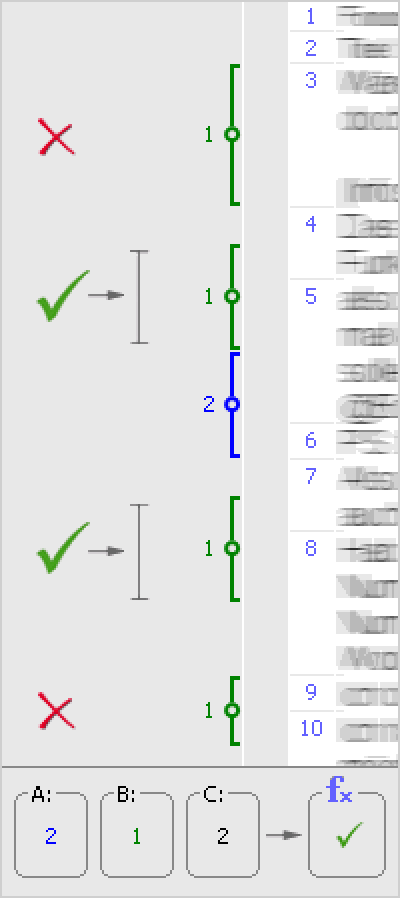
Followed by | Search for segments assigned to any one of the codes listed in "A" that is followed by a segment assigned to the code selected in "B" within no more than X paragraphs. The number X is specified in "C". (Does not work in image or PDF documents.) |
Near | Search for segments assigned to any one of the codes listed in "A" that is preceded or followed by a segment assigned to the code selected in "B" within no more than X paragraphs. The number X is specified in "C". (Does not work in image or PDF documents.) |
You can see which retrieval function is currently active in the status bar at the bottom of MAXQDA, in this case it is the “Near” function: